LinkedIn Sales Navigator is a great tool to use for prospecting. Whether you’re just starting to get an idea of your audience or if you’re just calling down the list, it makes finding your target that much easier.
That being the case, LinkedIn’s lead searches aren’t always the most accurate. People and companies each have industries that don’t always match up, so when using the Lead industry selector, you may be getting the wrong companies. Account lists help because they make sure you’re selecting the right companies and then the right people.
If you’re new to the Sales Nav. platform, here’s a step-by-step guide of how to use account lists to better target your audience.
What Are Account Lists in linkedin sales navigator company account and Why Use Them?
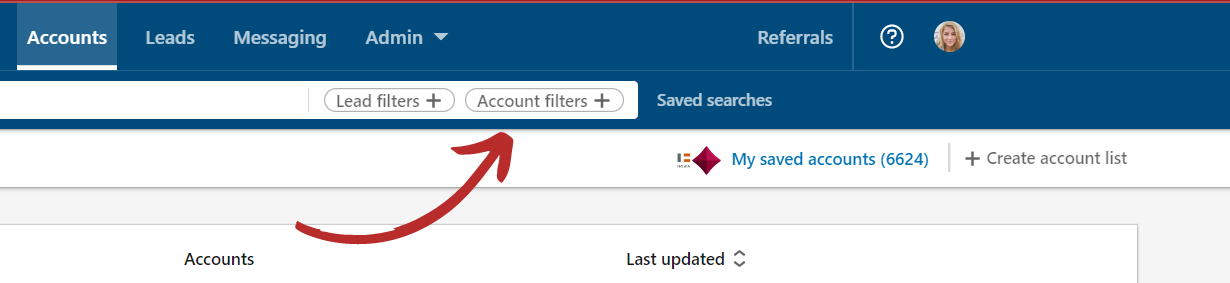
The account list feature is found under the account tab under LinkedIn Sales nav. When someone creates a new account list, what they are doing is compiling a list of companies – often using a set of filters to determine which ones have potential viability in a marketing campaign.
Salespeople and marketing teams use this feature to achieve greater specificity when targeting an audience. Because the lead filters can pull from any company, this adds an additional layer of filters that can more-accurately help them hit their target.
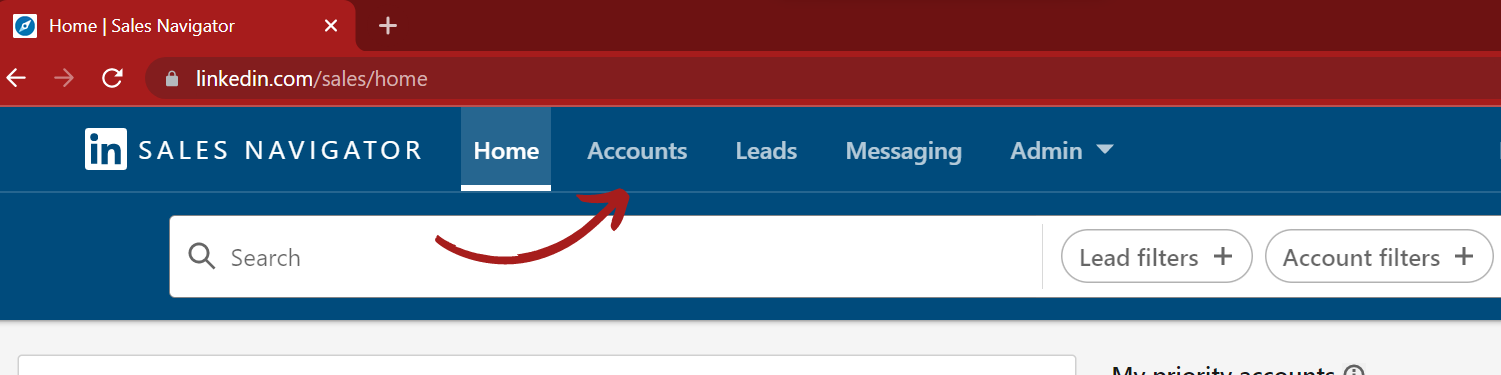
To access this feature:
- Open LinkedIn Sales navigator and click “Account Lists.”
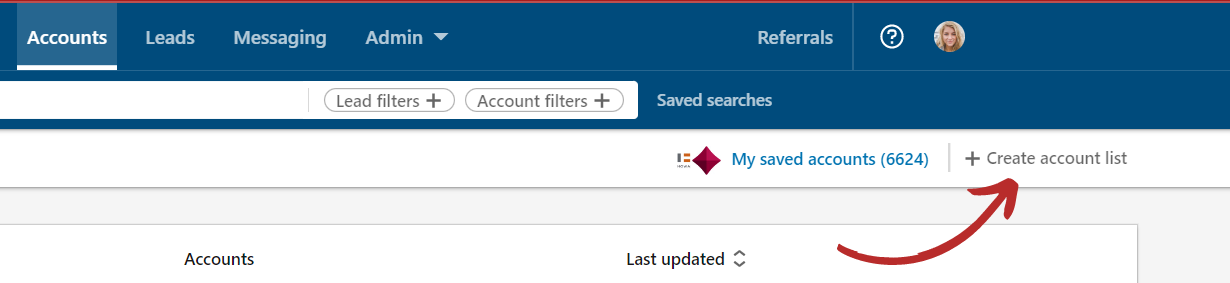
- From there, select “Create a new account list.” You will see a pop-up on your screen that asks you to name your new list and provide an optional description. After you complete this, you will see it populate below.
- After, navigate back to the “Account Filters” to begin filling this list.
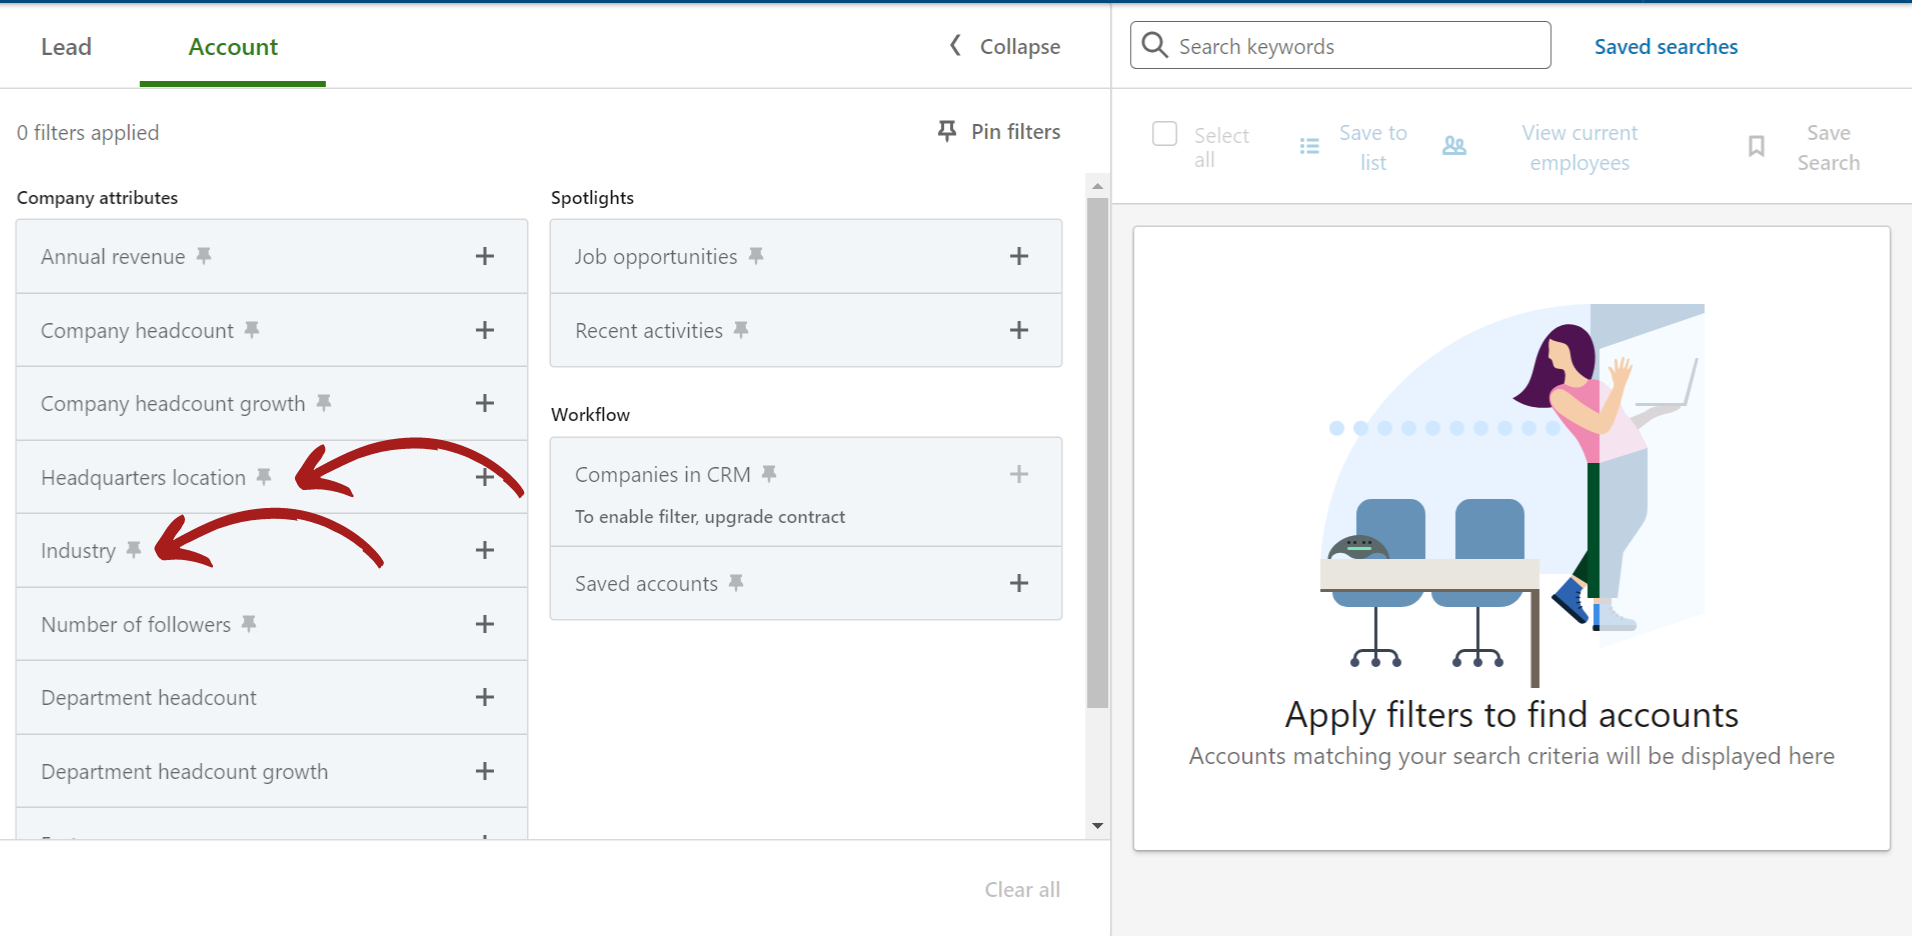
Step One: Company Headquarters and Industry
These two filters are a good place to start. Most B2B companies have a range of company locations they’re able to work with, and this is usually well-defined. Whether you’re only able to reach out to prospects in Texas or if you can work with anyone in the United States, this filter helps you refine based on location.
One important note is that it only refines the company headquarters. Your prospects are likely to be close, but sometimes that’s not the case. With the rise of remote work, you’re likely to see a number of your prospects outside this location; however, they are working for a company in your target region.
The next filter you want to consider is “industry.”
If you have any sales experience, this will look familiar; however, it’s important to note that – while there is some crossover with NAICS – LinkedIn operates under its own, unique industry codes. These codes were also recently updated in early 2022 to the current V2 Codes. This update broke up larger industries and added more specific titles. Many companies on LinkedIn automatically updated to LinkedIn’s best guess for their specific industry.
On a final note under the account list, these two filters are the most important at this stage. The other filters can help, depending on your target audience, but are not necessary for most.
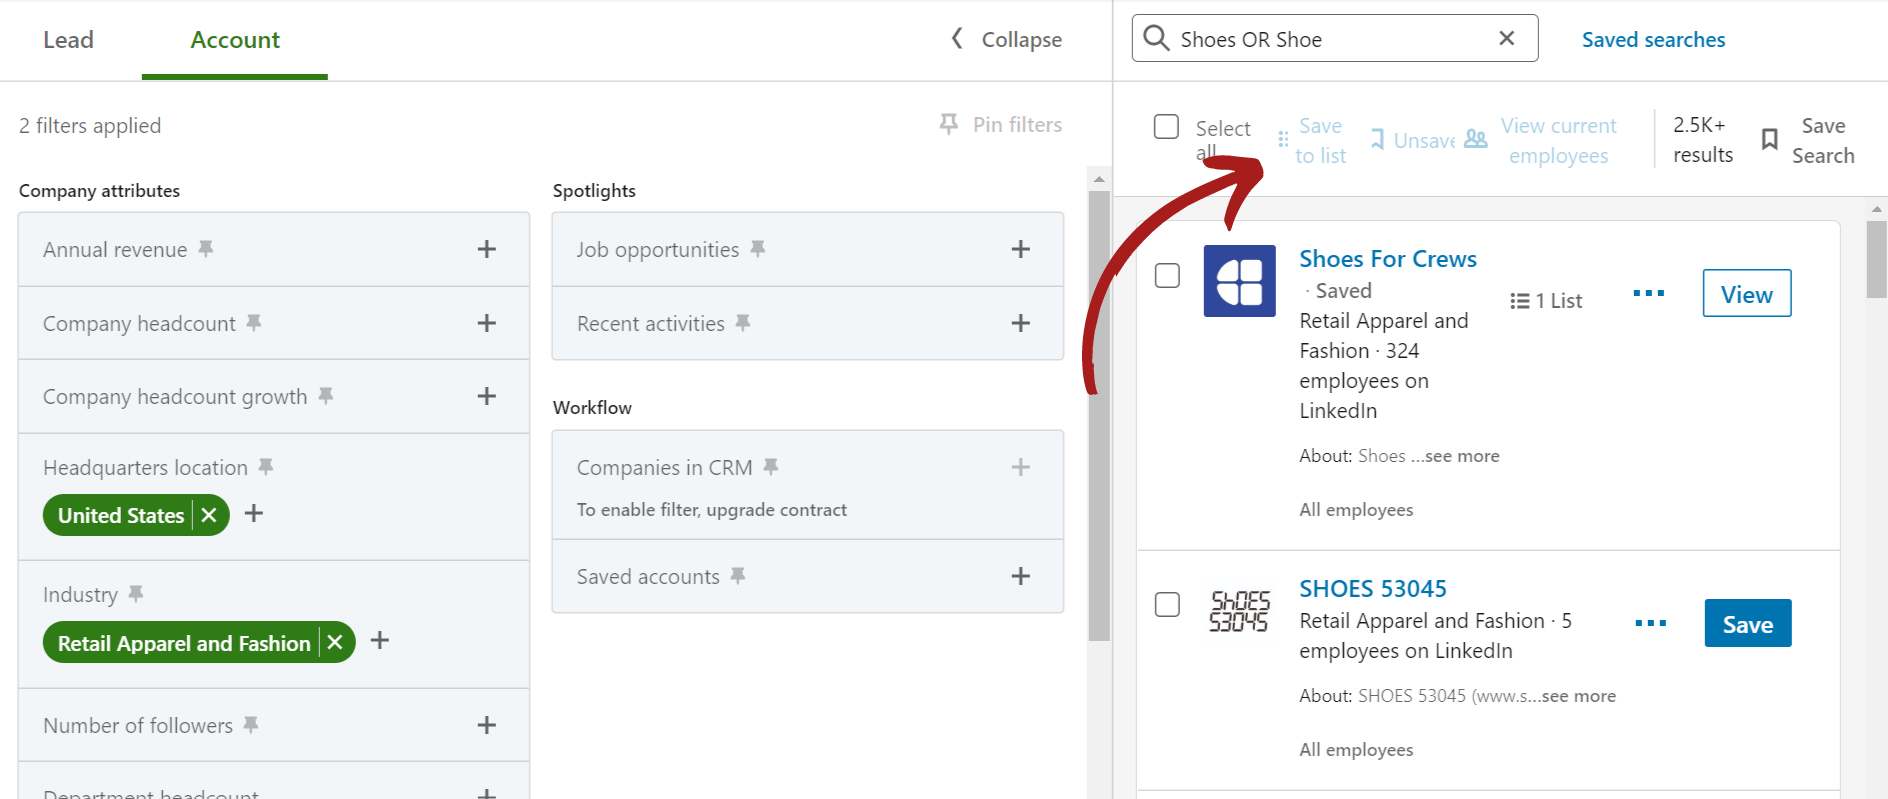
Step Two: Start Saving Your Companies to a List
Once you have the keywords put in, you’re going to need to start saving the companies you like to the list you just created. Using the account list feature means that you will only reach out to prospects from the companies on your list; therefore, we recommend adding between 250-999 companies. Naturally, the longer the list is, the longer it will take to reach out to everyone on it. The lists won’t let you save more than this, but you can be generous at this stage. It is also possible to add multiple lists if you want more than 999 companies included in your search.
An added benefit is that you can use keywords in the search bar to add companies based on different searches. It helps you diversify your outreach, while still operating off of one list.
To save time, you can also bulk save prospects by hitting the arrow at the top.
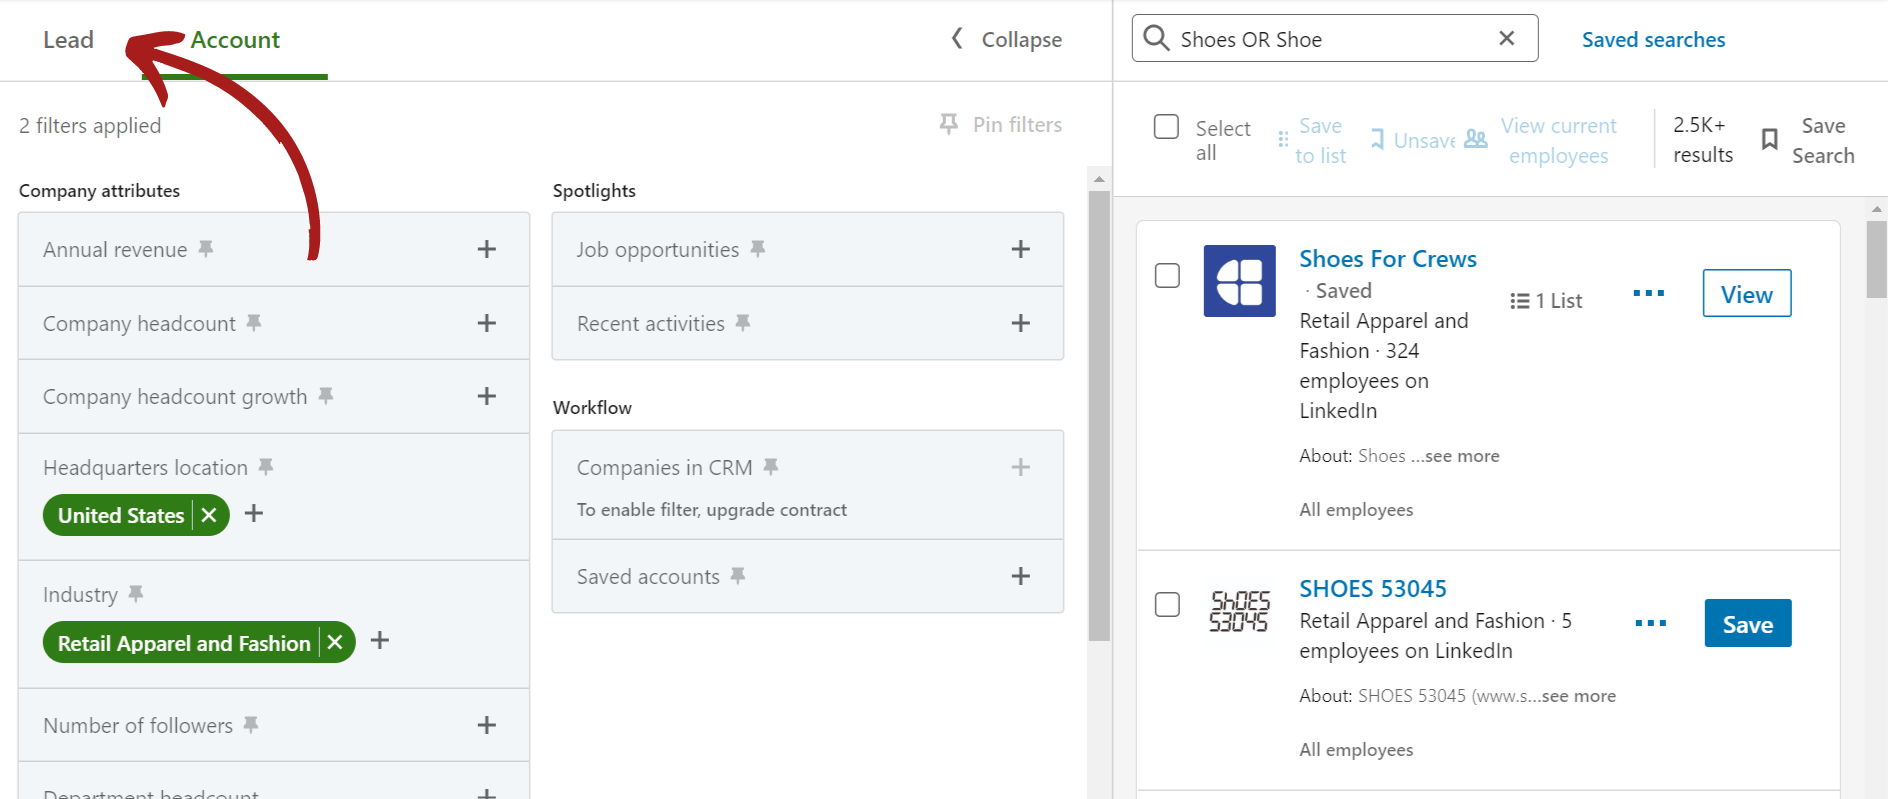
Step Three: Go Back to the “Lead” Tab
Once you feel as though you’ve saved enough companies to your list, move back to the “lead Tab.” You can always come back and add more later if you need to.
In the following steps, it’s necessary to determine which types of prospects you want to reach out to. That means, we need to take the list of companies and start filtering it down more.
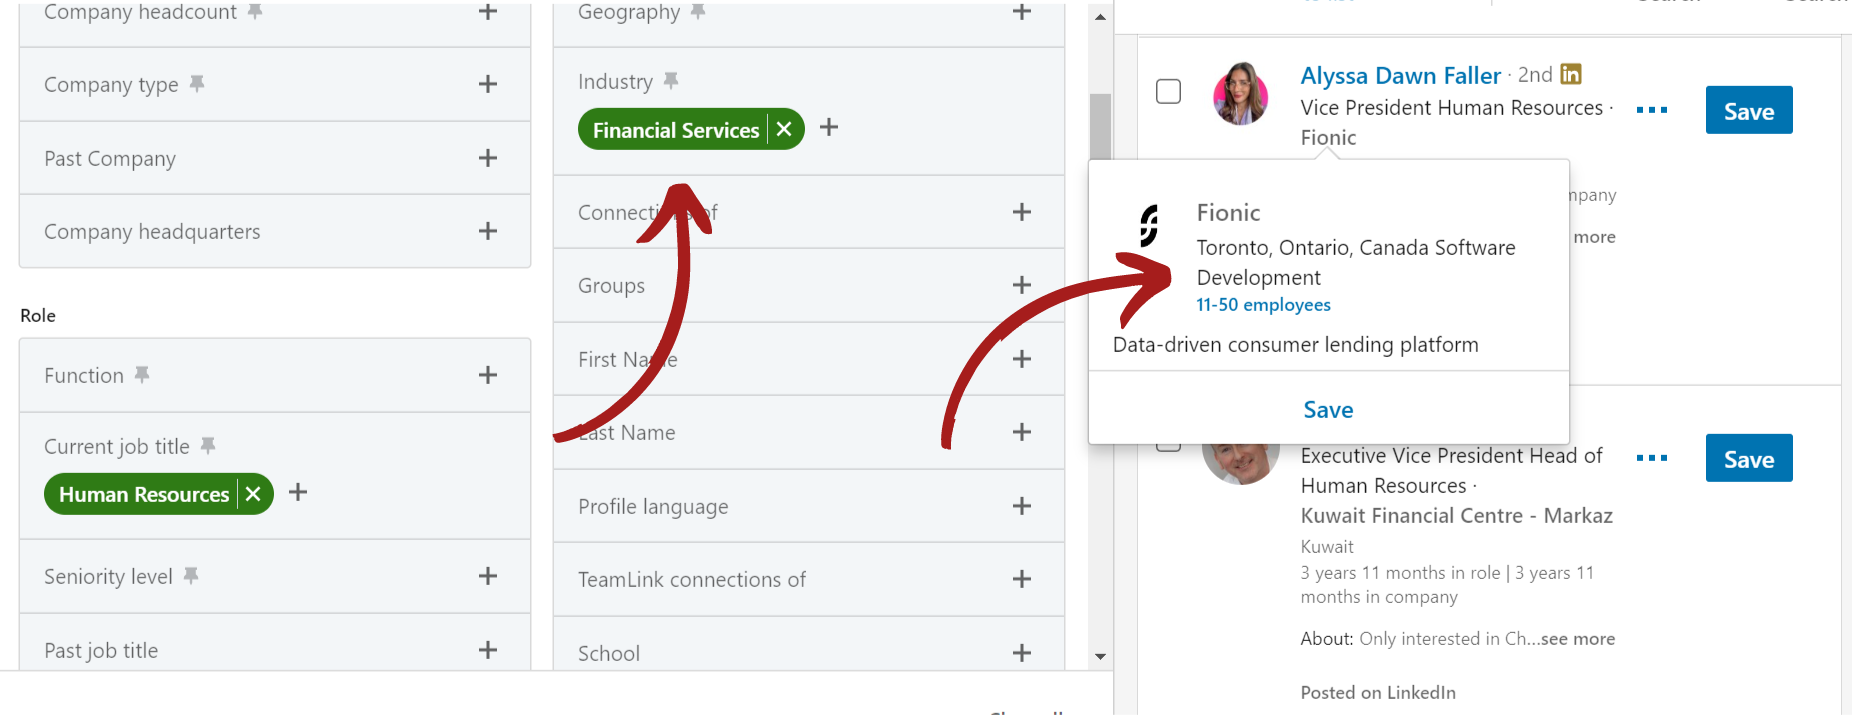
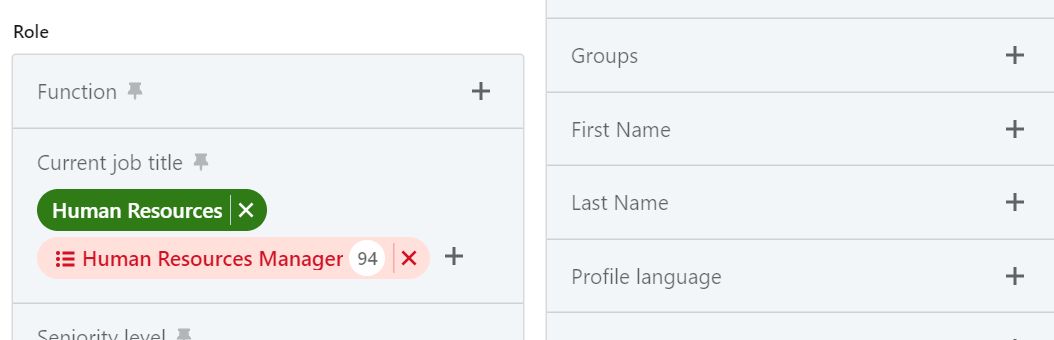
Step Four: Job titles
Under “Current job title,” you can add as many titles as you would like. This search reads the prospects’ profile and includes it if your keyword is located. For example, using “Human Resources” will include most “Human Resources” titles if that keyword is on the prospect’s profile.
Sometimes, this is a good thing, and sometimes it isn’t.
Using general keywords is great for reaching a wide audience; however, it may include some job titles that you don’t want. Let’s say you want “HR” senior titles, but you can’t sell to “HR Managers.” You would need to get rid of that title by adding it in another search and hitting “exclude.”
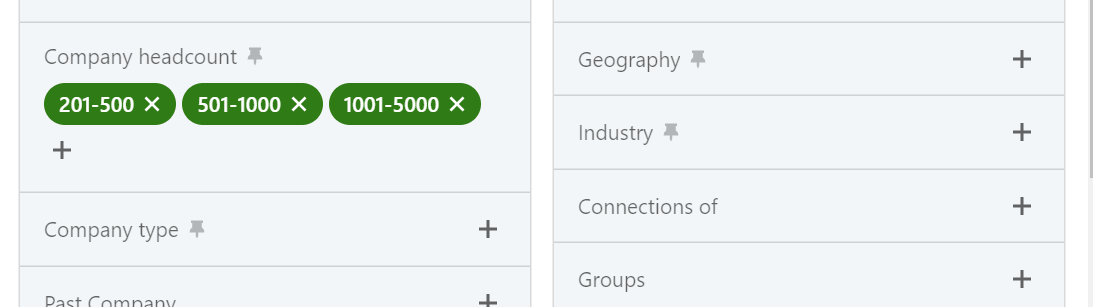
Step Five: Company size
Company size on Sales Navigator is preset, meaning that there is no sliding scale. To adjust these, simply go under “Company Headcount” and select the ranges that you want to include on your list. Depending on your product/service, you may not need to use this filter.
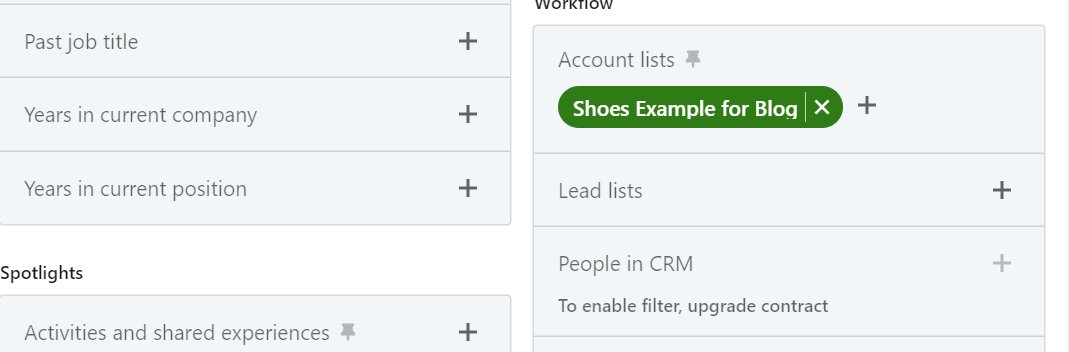
Step Six: Select your Account List
This is the most important part!
You may have noticed that this search is pulling from every company on LinkedIn – not just the ones you saved. To apply your list, click on “Account list” under “Workflow.” You will find every account list you’ve created on your profile in this dropdown, so you just need to pick the one you want!
Note: You may need to open up some of your other filters in order to get a large enough list.
There you go! You’ve successfully created a search using Account lists on Sales Navigator. Don’t forget to copy that link and save it somewhere! Also, note that it will only appear on your account. Others will not be able to use your search link on their own accounts because they don’t have access to your account list.
Happy searching!
FAQ’s
[sp_easyaccordion id=”2291″]