Learn How to Use Google Tag Manager & JavaScript Event Listeners to Track Booked Meeting Conversions – with Google, LinkedIn, and Facebook Ads Examples.
Are you using HubSpot Meetings and frustrated by not being able to track conversions when a prospect books a call with you?! 🤬
After working with dozens of HubSpot run companies… we’ve seen first hand that most people have conversion tracking set up on every other call-to-action, such as Form Submissions and Purchases…
…but are almost always missing conversion tracking on HubSpot Meetings. 🙄
For marketing teams that are pushing lead generation – this is a key conversion to keep track of. If you’re running Facebook Ads, Google Ads, Google Analytics, or LinkedIn Campaigns, this is an important conversion to log – and each has their own conversion pixels to integrate – so that you can train the algorithm and improve your conversion rate and results.
The issue is in the way the HubSpot Meetings module works – it’s usually embedded in a page on your website…
But the scheduler doesn’t operate like a normal form submission. It’s a multi-step calendar where you first select the day and time, and then enter your contact details, such as name, email address, phone number, company name, and website on the following page.
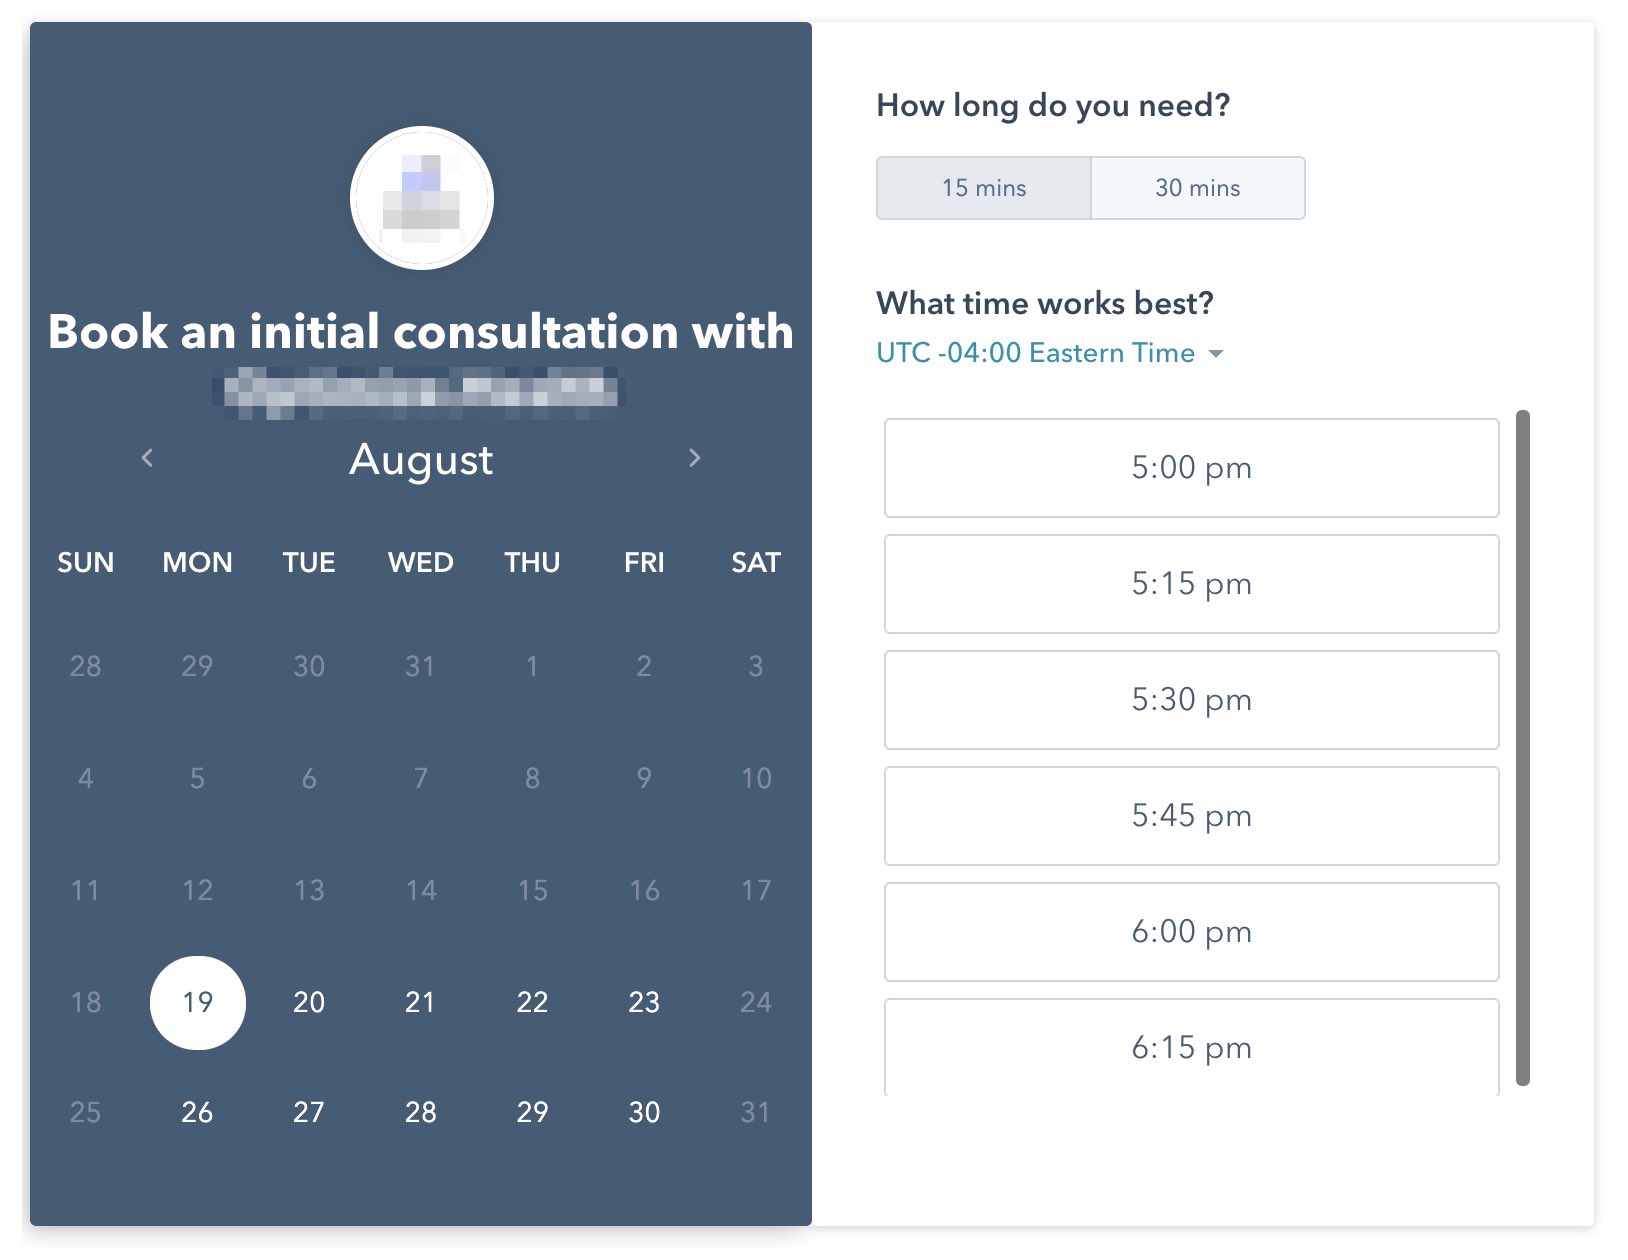
We all have a love/hate relationship with this widget…
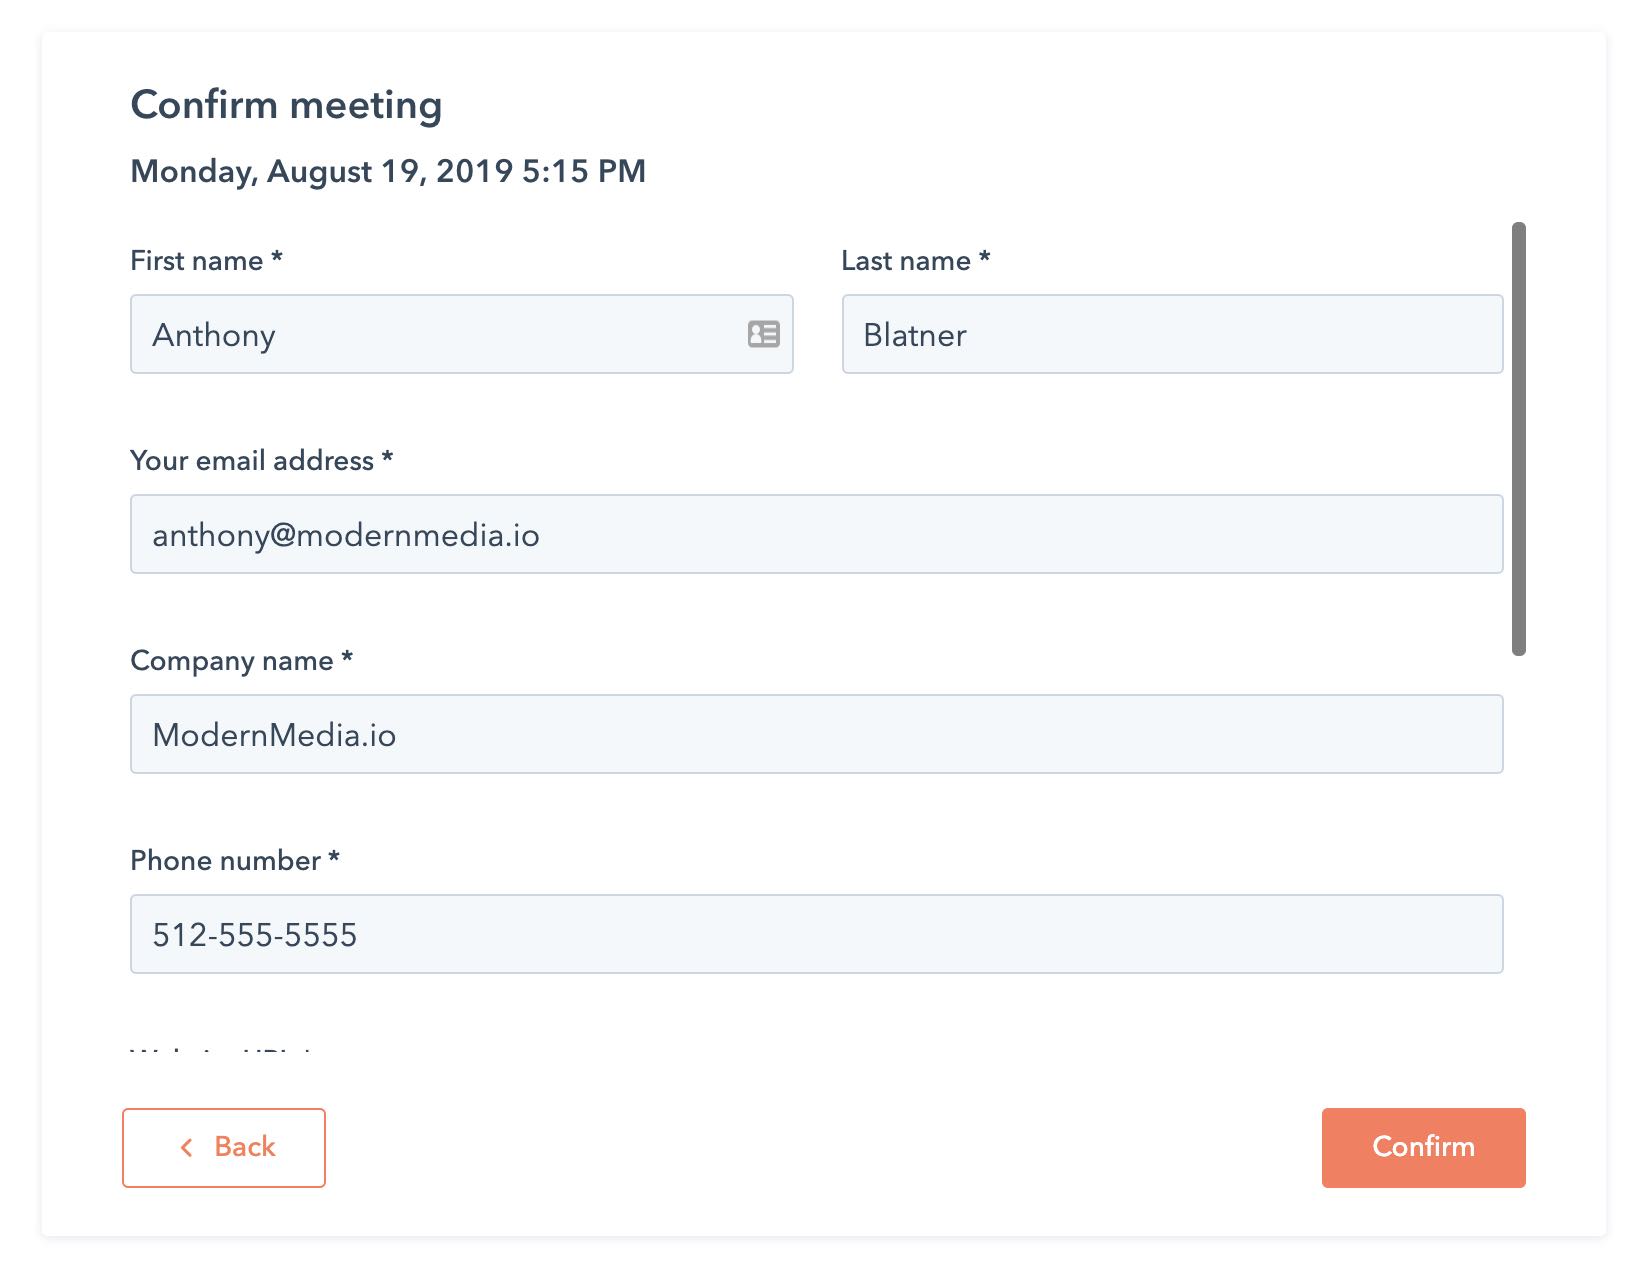
Two pages, data validation… and all I want is one little conversion, plz.
The widget does validate your data entries, so like any form, triggering on button clicks is NOT a reliable method ⚠️. If someone enters invalid data, like a broken email address or incorrect phone number, then the scheduling won’t complete.
If you triggered on button clicks, you may likely end up logging duplicate conversions for one real meeting schedule.
Instead… we have found that there are JavaScript events broadcast in the background by these page elements, and we must listen for these events to then trigger our tracking codes.
I’ll even show you how to best use Google Tag Manager to insert this listener code, and then how to trigger other GTM tags – and log your conversions – on a successfully scheduled meeting.
Here are the steps required:
- Add Google Tag Manager to your HubSpot Page
- Add a Hubspot Meetings Event Listener
- Create a Custom Event trigger in GTM
- Trigger your conversion tags on our new Meeting Booked Event
- Test!
1. Add Google Tag Manager to your HubSpot Page
Go to https://tagmanager.google.com to create or find your GTM container.
Click on your blue code in the top middle “GTM-XXXXXXX” to open up the installation instructions with code snippets.
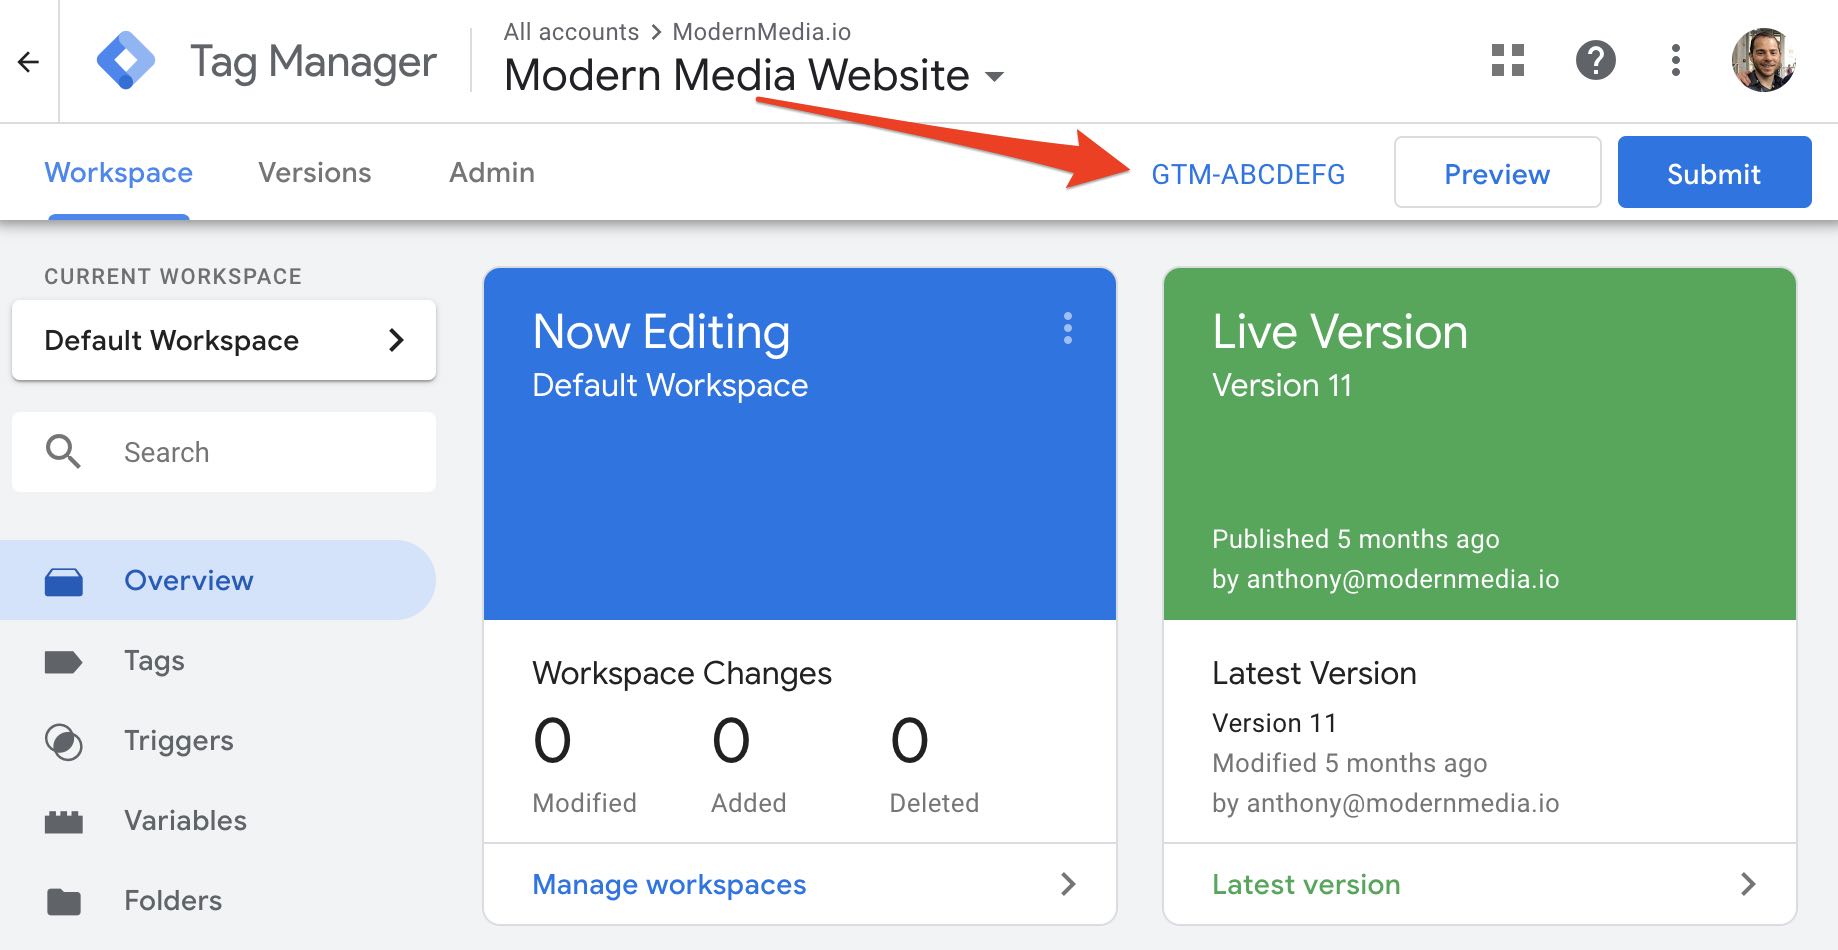
“Click here to learn more!”
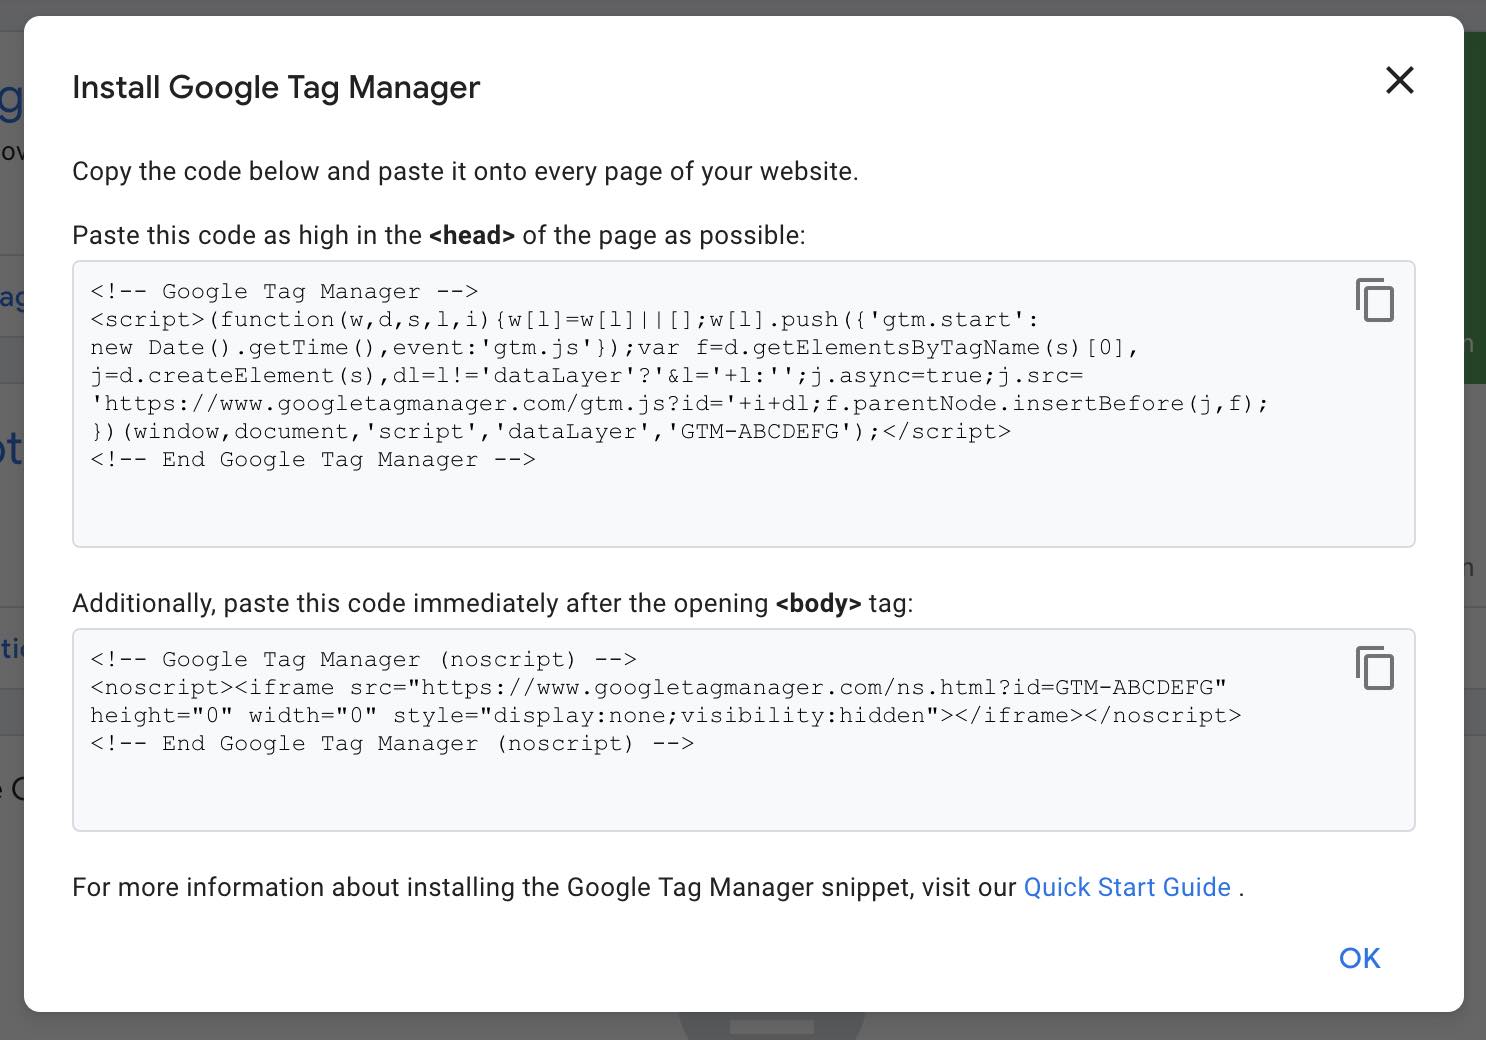
Sounds easy… right…
Grab these HTML code blocks (above) and jump over to your HubSpot Page.
I recommend embedding Google Tag Manager globally across your entire site so that you don’t need to add this code every time you create a new page. 🙏
To do so, go to HubSpot > Settings (gear icon in nav bar) > Website > Pages
Add GTM’s <head> code to the HubSpot’s Site header HTML and add GTM’s <body> code to HubSpot’s Site footer HTML.
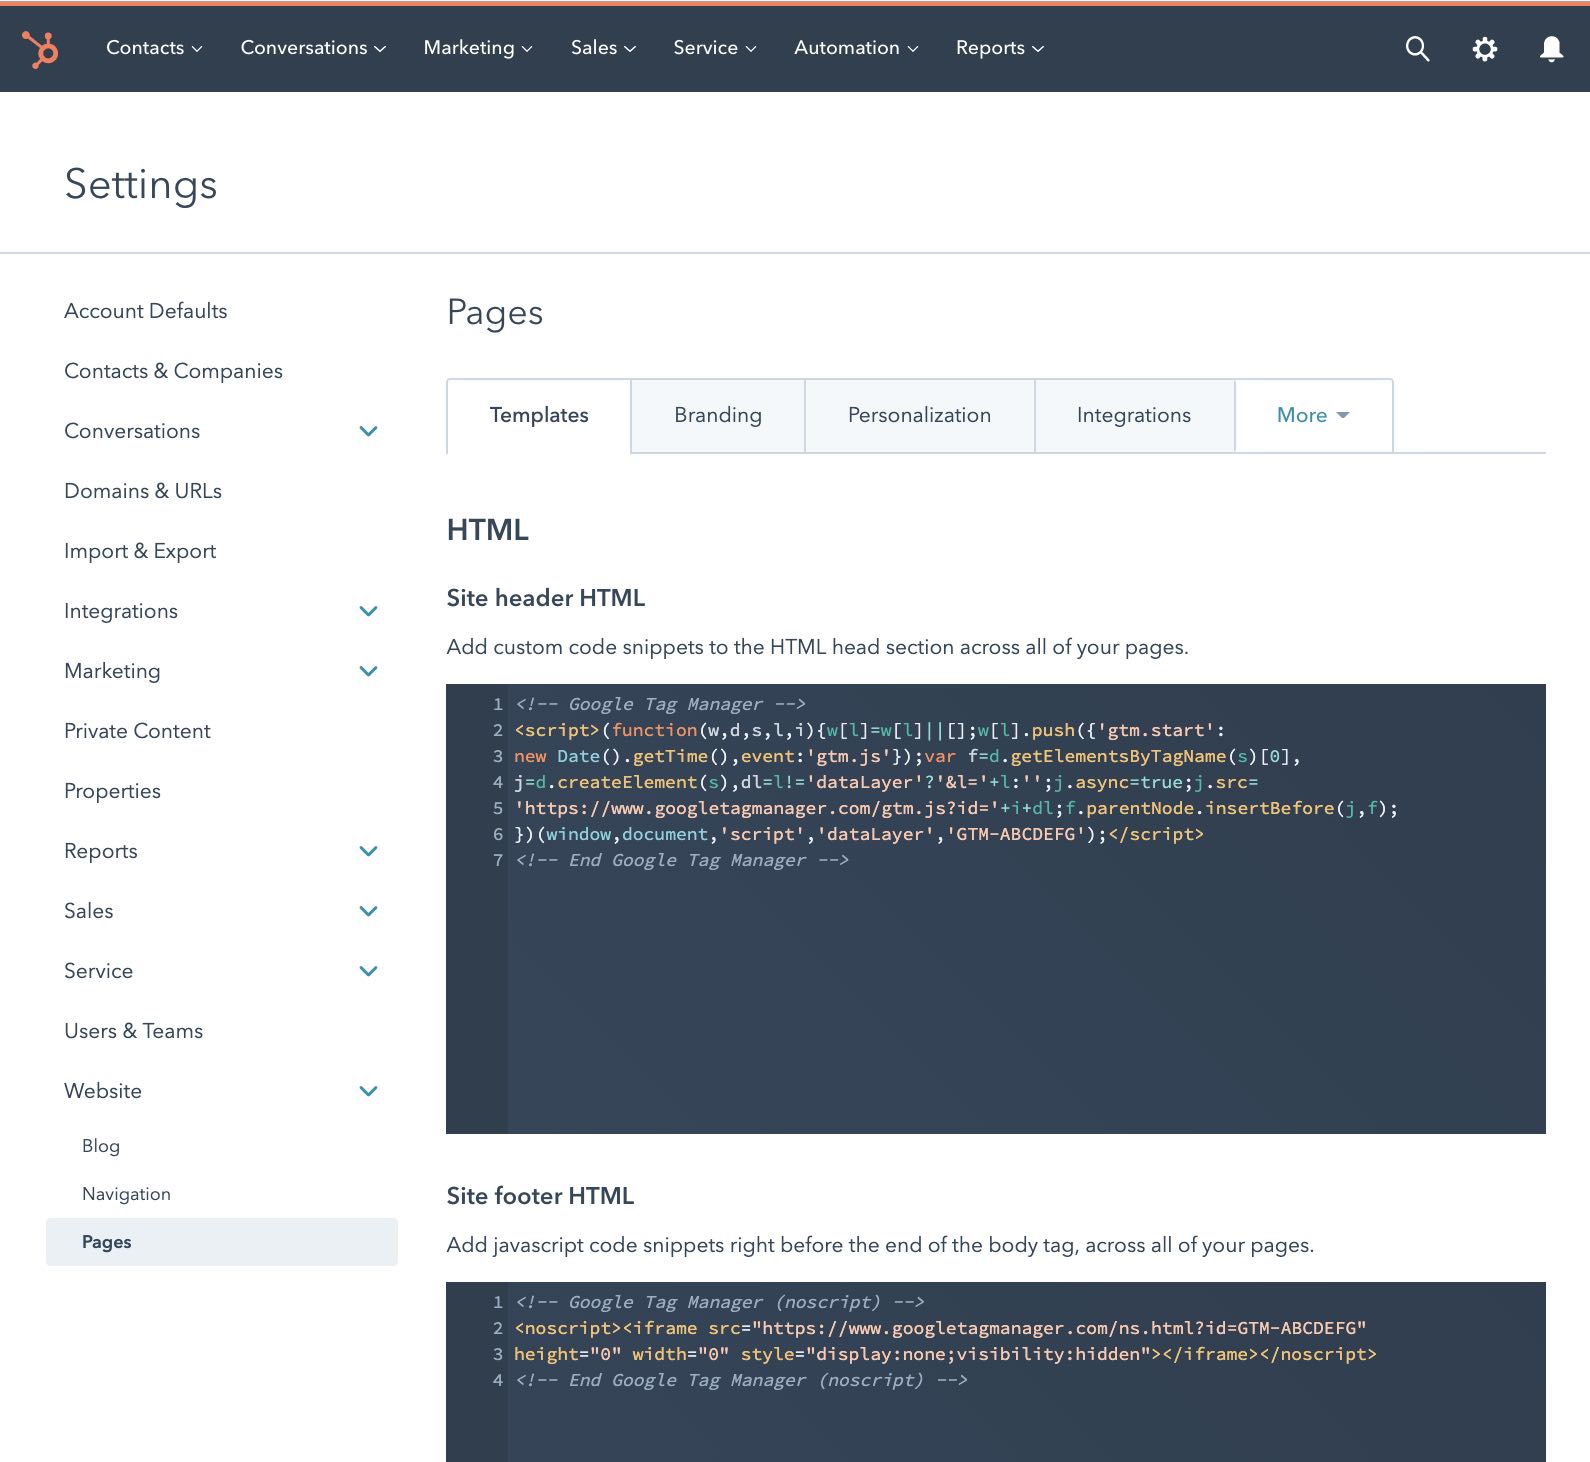
Copy/paste, copy/paste, …
Alternatively, if you do want to only add this to a single page, open up the HubSpot Page Editor and go to Settings > Advanced Settings and add the Google Tag Manager code to the Head HTML and Footer HTML.
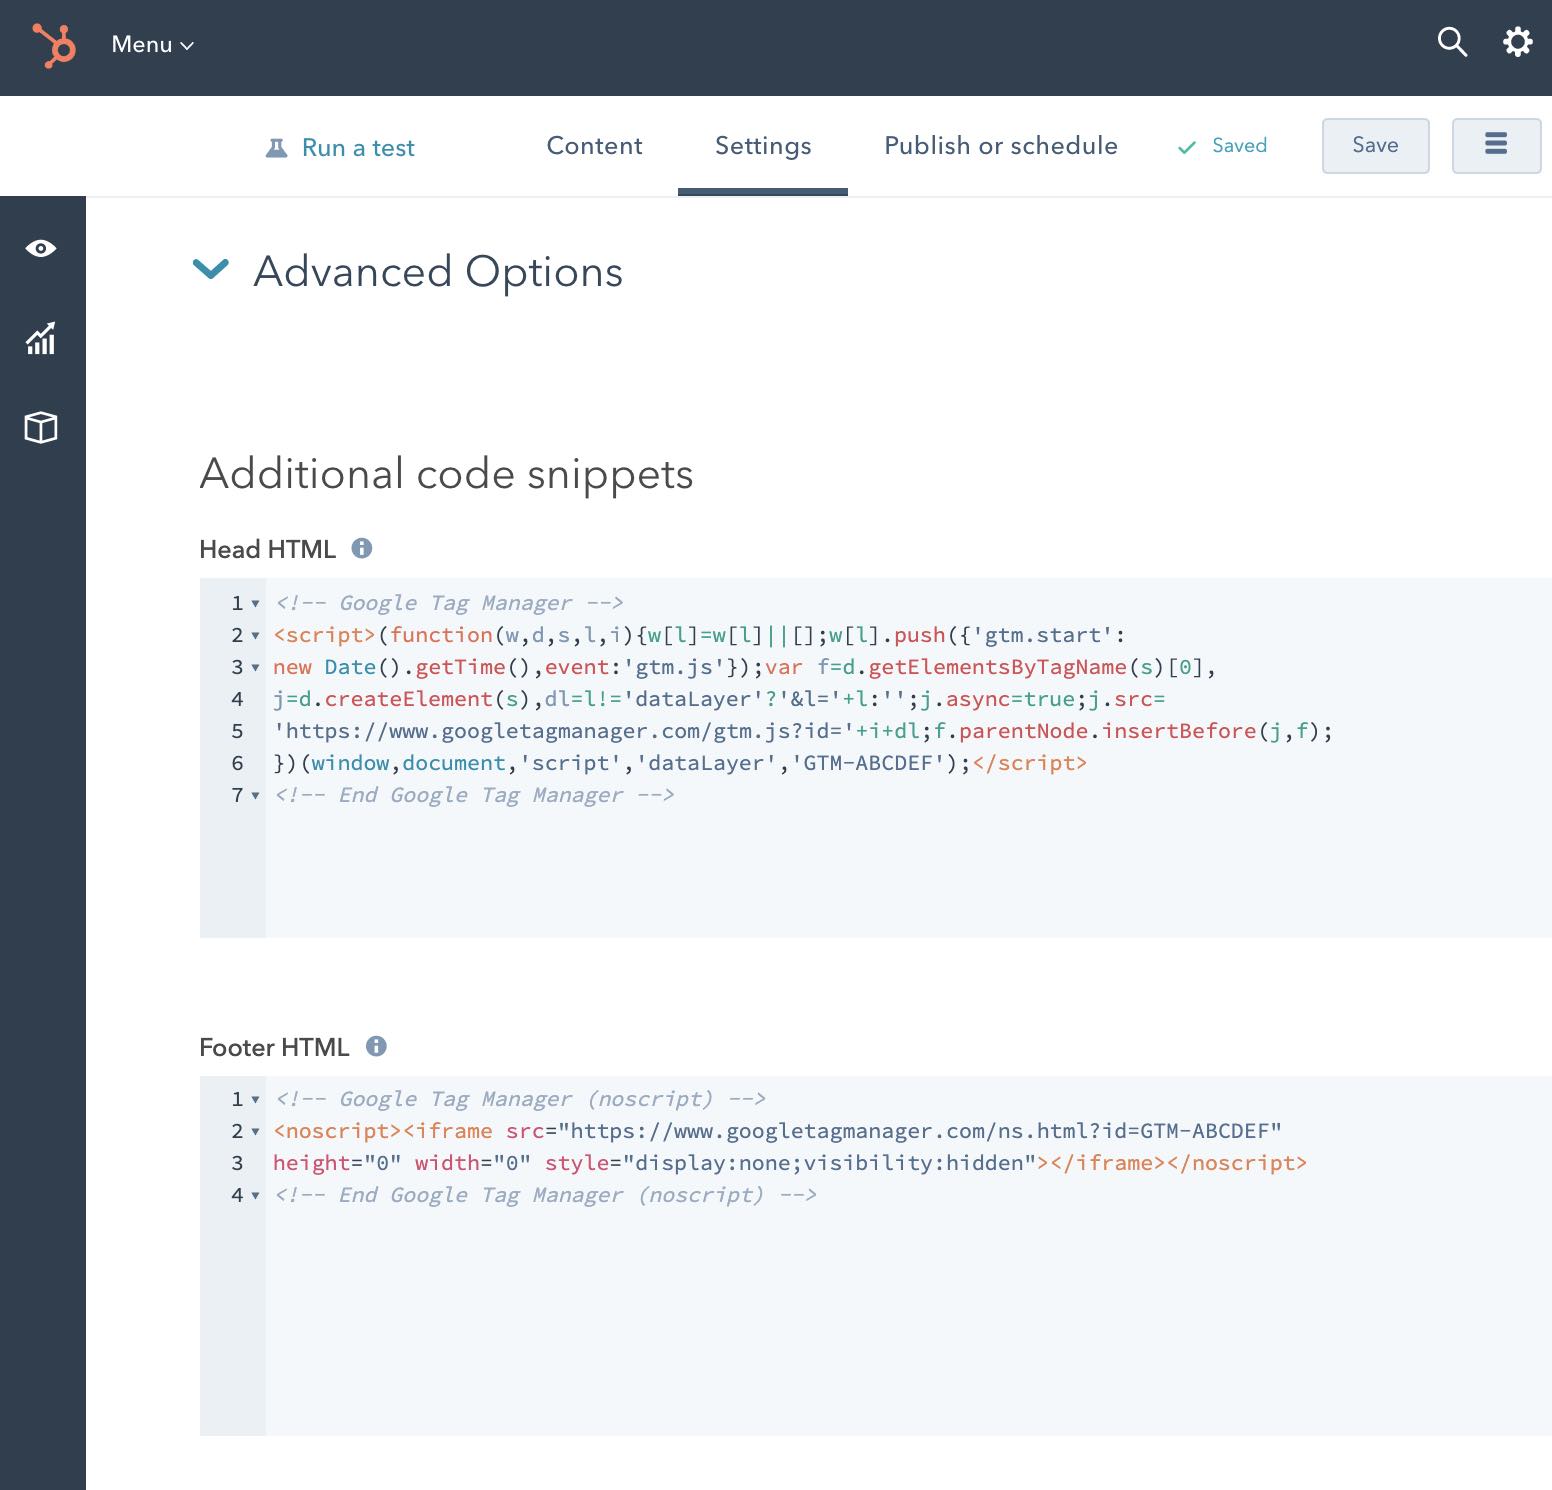
You’re Ninja-level when you get into the Advanced section…
TEST!
To ensure your GTM container is properly appearing on the page, use the Google Tag Assistant extension in the Chrome browser.
If it’s configured correctly, you should see Google Tag Manager listed with the proper GTM-XXXXXXX ID with a green icon next to it. If the icon is yellow or red, click to find out what your issue may be.
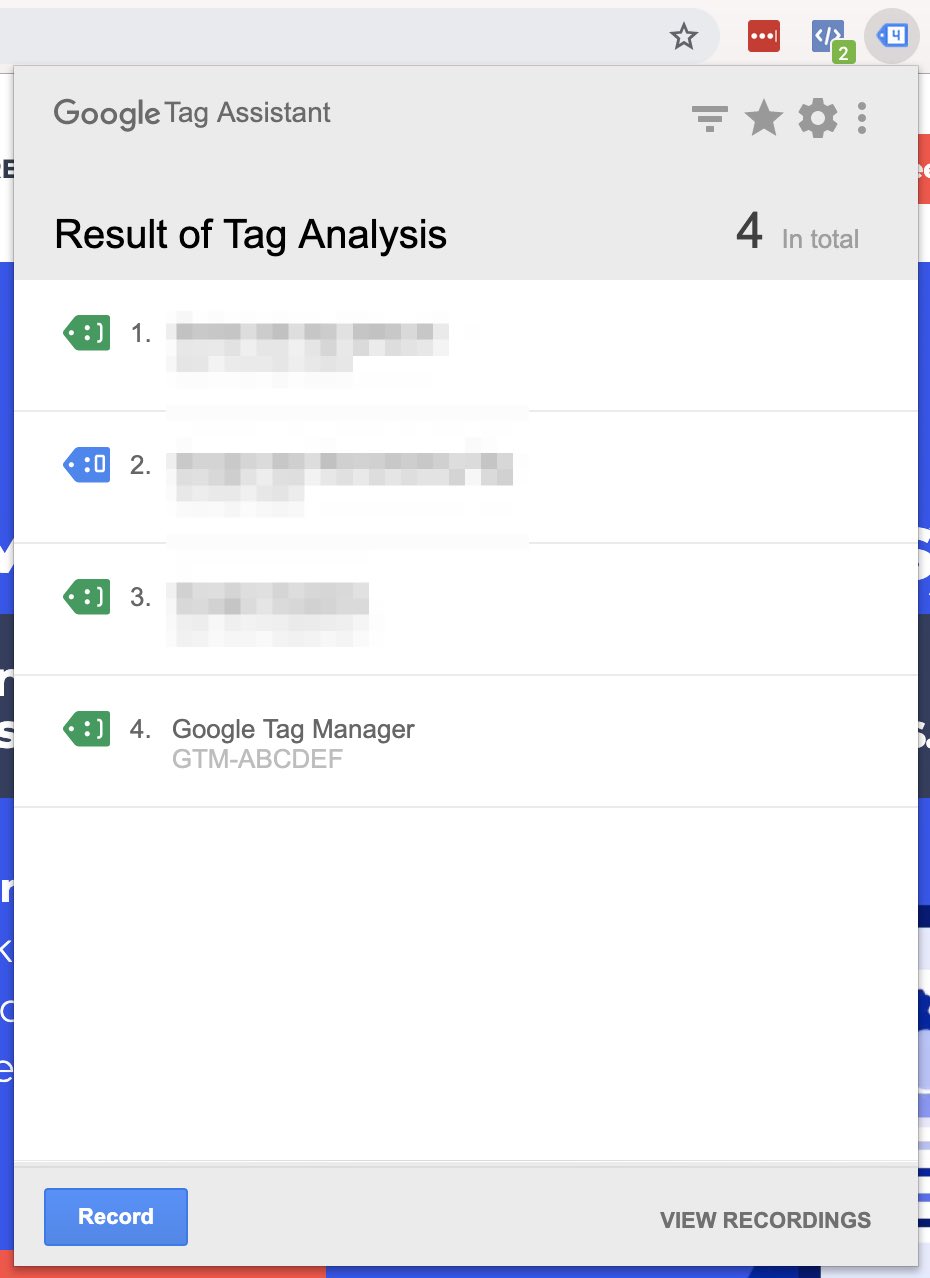
We want smiles! We want GREEN smiles!
2. Add a Hubspot Meetings Event Listener
Now that we have Google Tag Manager on the website. We can have GTM add code that will watch for HubSpot Meeting bookings. 👀
There are background JavaScript events that fire when a booking is confirmed.
The specific event that we want to watch for from HubSpot contains a data property, and that data property has a meetingBookSucceeded boolean set that will be true.
So, what we do is add an Event Listener that looks for these specific properties.
Events without these properties will not pass through our code and nothing will happen (that’s good).
When our JavaScript listener detects that event, we then push a new Custom Event into window.dataLayer so that it can be used as a trigger inside of Google Tag Manager (and then trigger other conversion codes).
To do this, go to Tags > New. Set the Tag Type to Custom HTML.
I name it “SCRIPT – HubSpot Meeting Booked Listener”, and set it to trigger on All Pages (because we want to make sure that we’re listening on all pages that have the Meetings module, including new pages created in the future).

You get a tag… you get a tag… you get a tag!
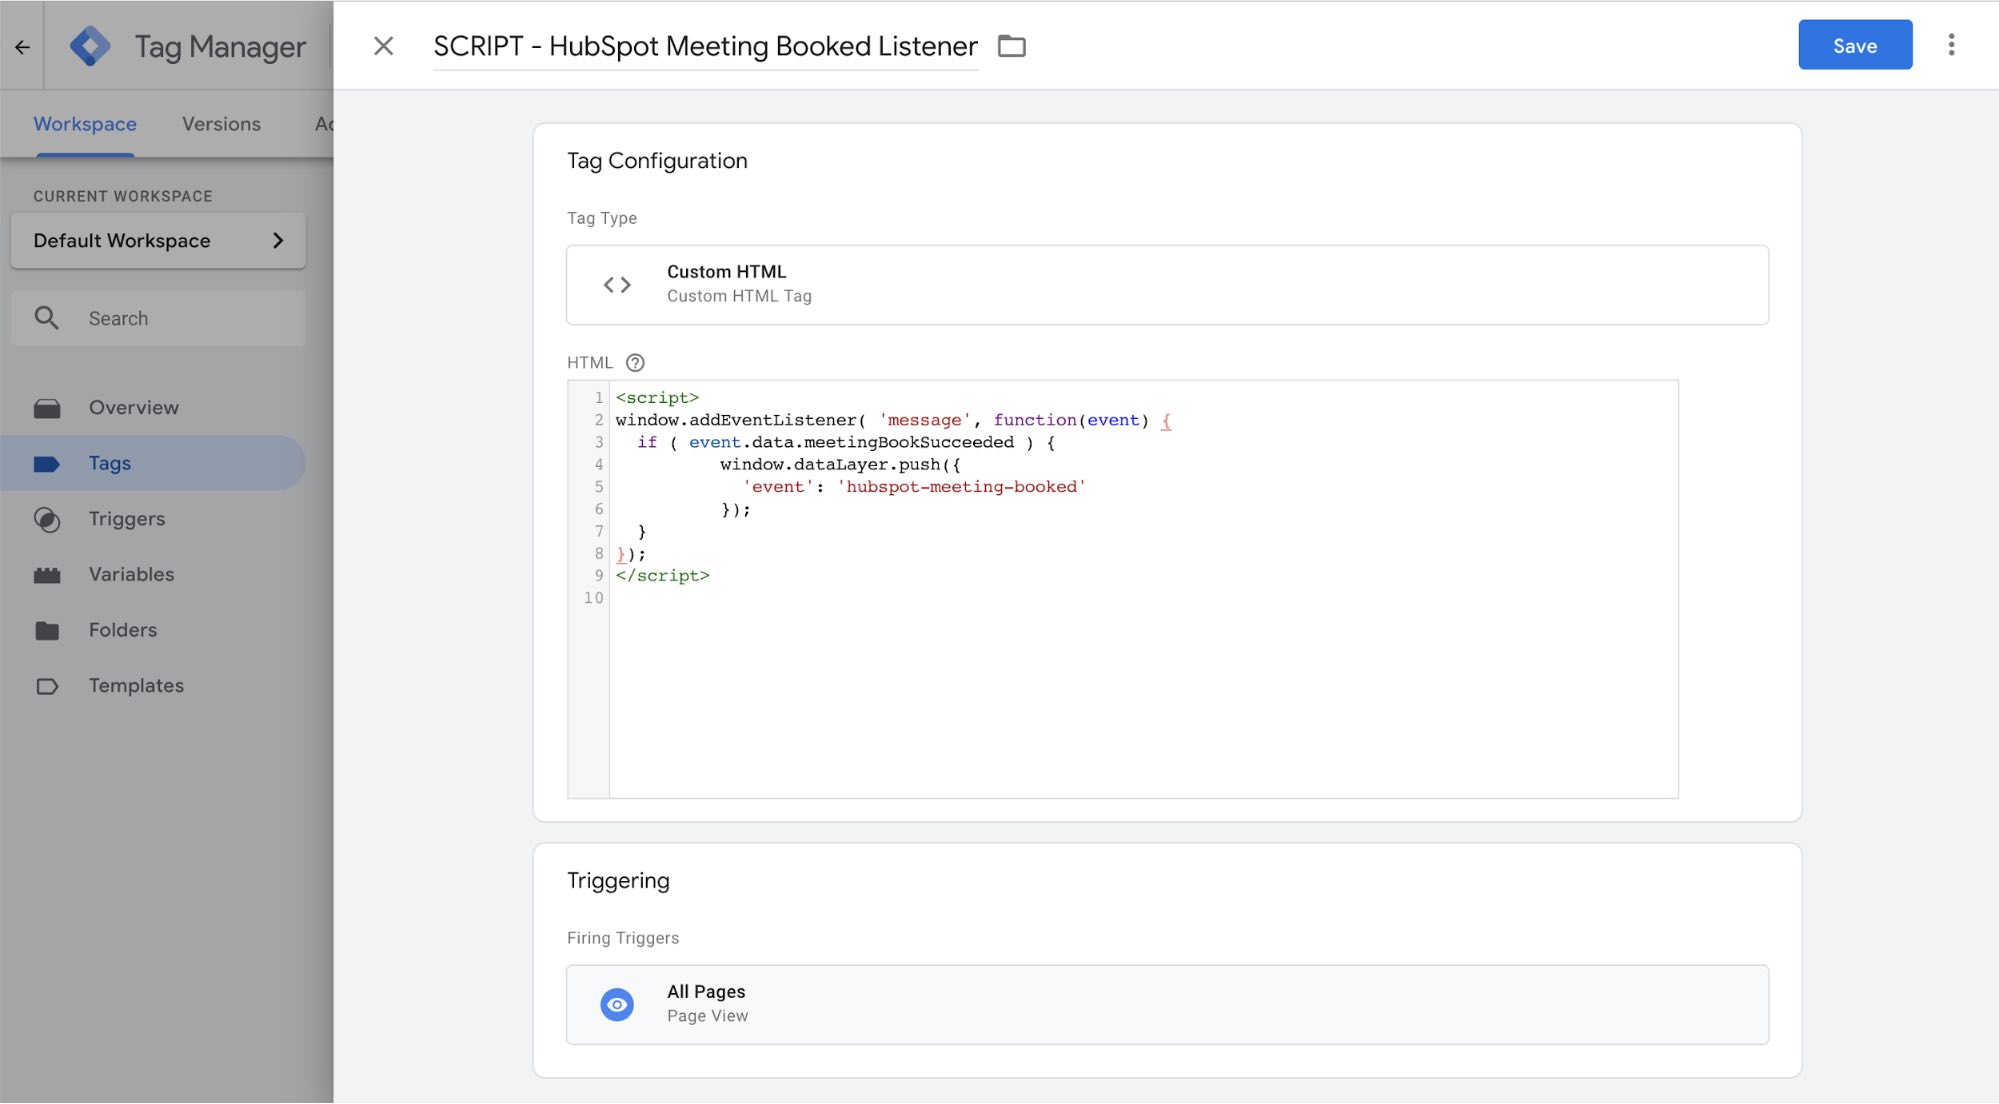
THIS IS THE IMPORTANT PART
⬆⬆ THIS IS THE IMPORTANT PART ⬆⬆
3. Create a Custom Event trigger in GTM
Now that we’re listening for the JavaScript message and pushing a new event into the data layer, we can create a Custom Event trigger that will execute when our new event is detected.
To do this, go to Triggers > New. For Trigger Type, select Custom Event.
For event name, input hubspot-meeting-booked
Set it to trigger on All Custom Events (this is saying, check all custom events to see if they match the event name I define here).
This Event name input MUST match the event name in your window.dataLayer.push call exactly.
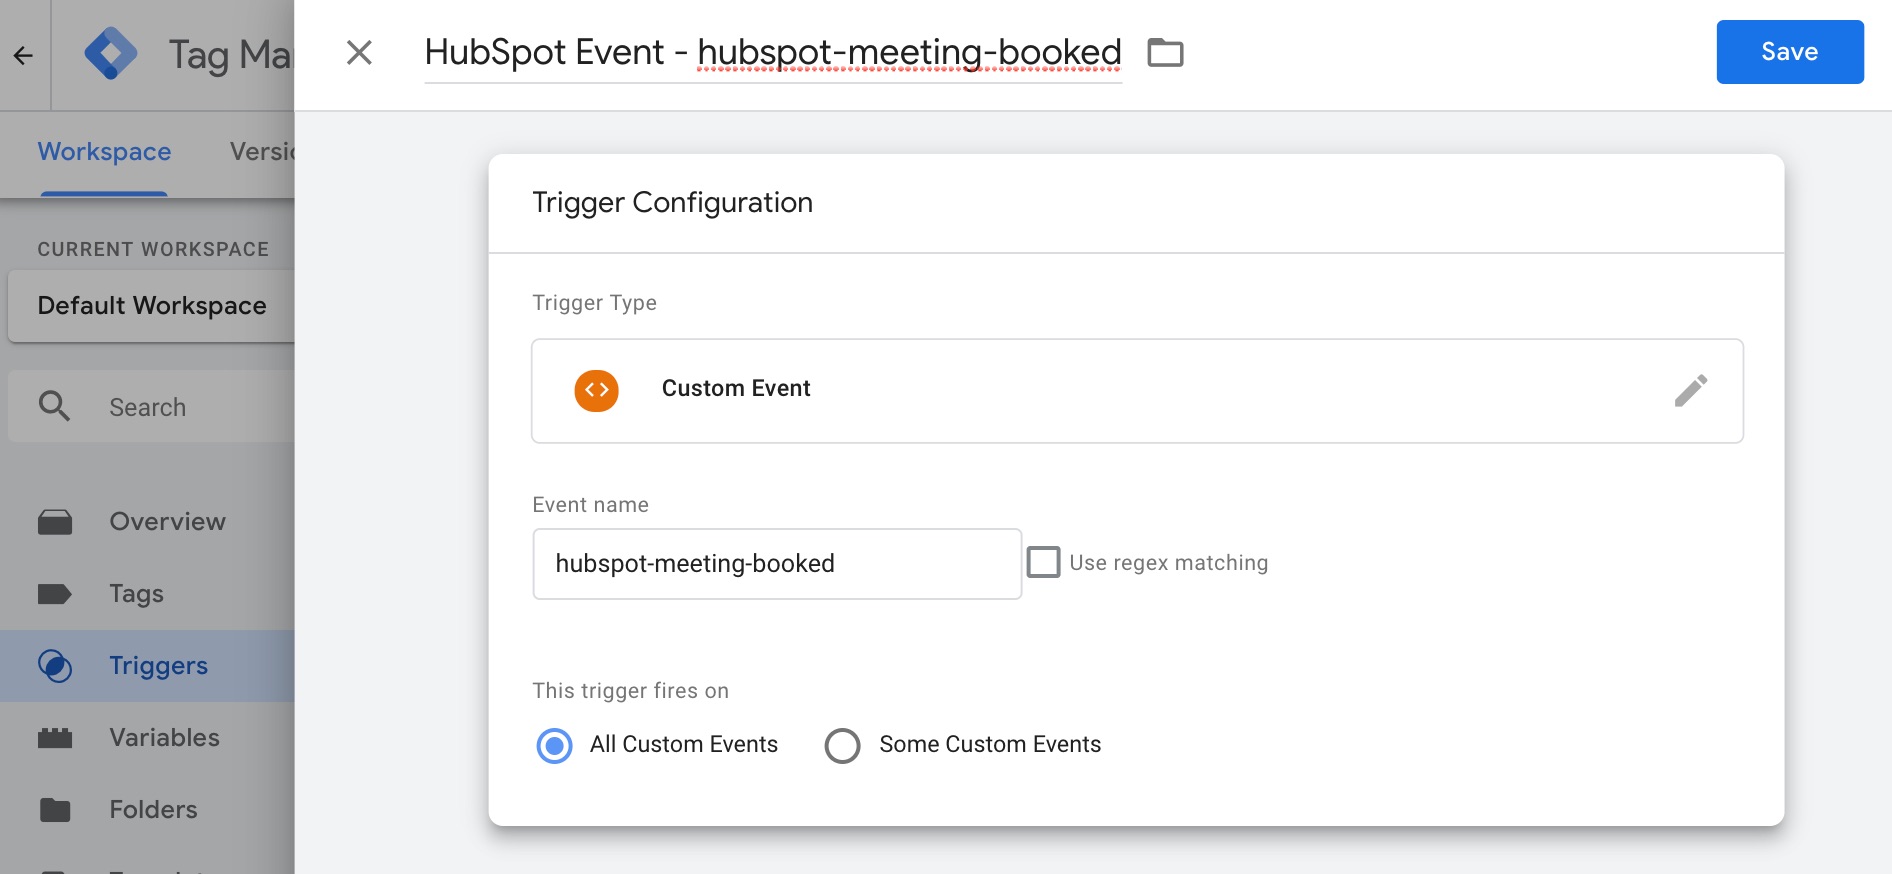
Sooo much easier – you can thank me later 🙂
4. Trigger your conversion tags on our new Meeting Booked Event
Now we have a GTM trigger that will execute when a Meeting is confirmed.
This is great because now we can configure other GTM Tags as normal – and reduces the amount of custom code you’ll need 🙌
For example, if you are using Google Ads, then you can create a new tag for Google Ads Conversion Tracking and set the trigger to your HubSpot Event – hubspot-meeting-booked.
The same works for LinkedIn Ads, Facebook Pixel events, and Google Analytics Goals. See below!
Google Ads Conversion Tracking
Inside of Google Ads, go to Tools and Settings > Measurement > Conversions.
Find or create your conversion action. When you get to the Tag setup section, select Use Google Tag Manager… and grab the Conversion ID and Conversion label. You’ll need to pop these codes into GTM.
Also, when setting up either Google Ads or Google Analytics tracking, be sure to create an add a Conversion Linker as well. This helps track the user across different pages and domains (if your funnel or user experience is cross-domain).
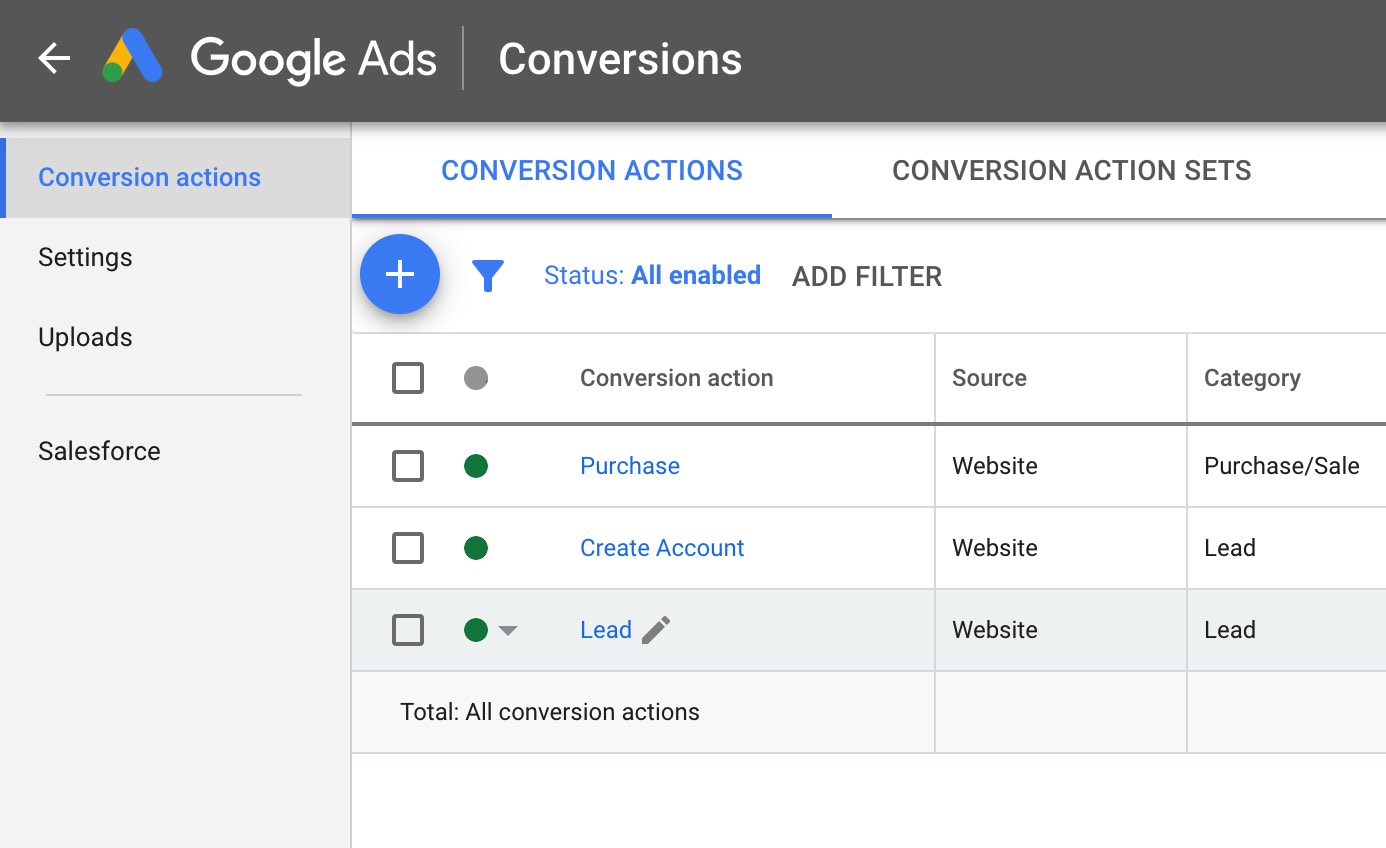
I wish Google Ads had Standard Events
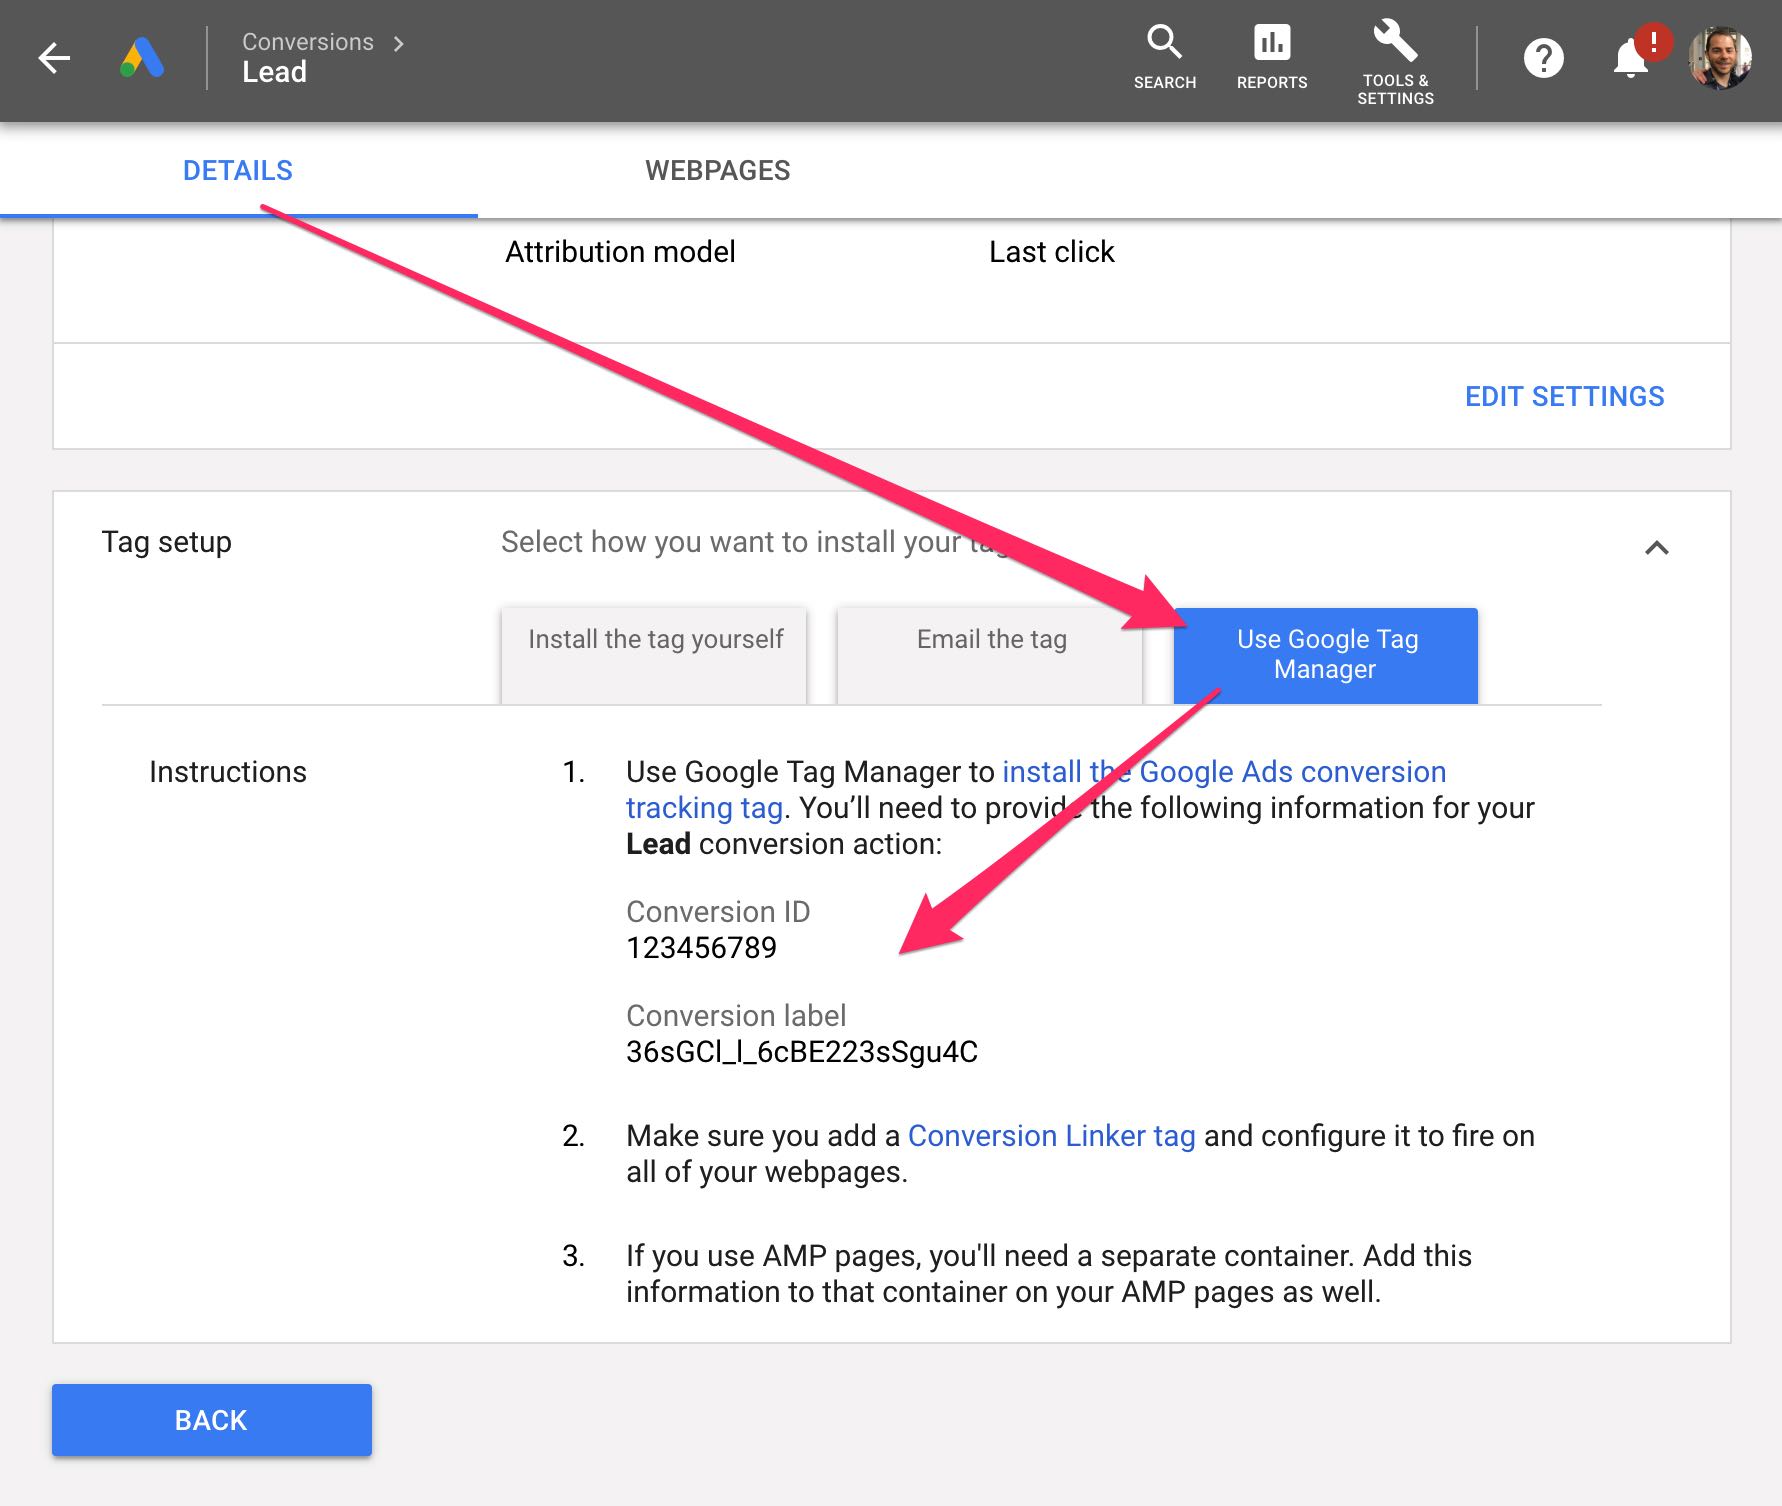
Copy/paste… copy/paste!
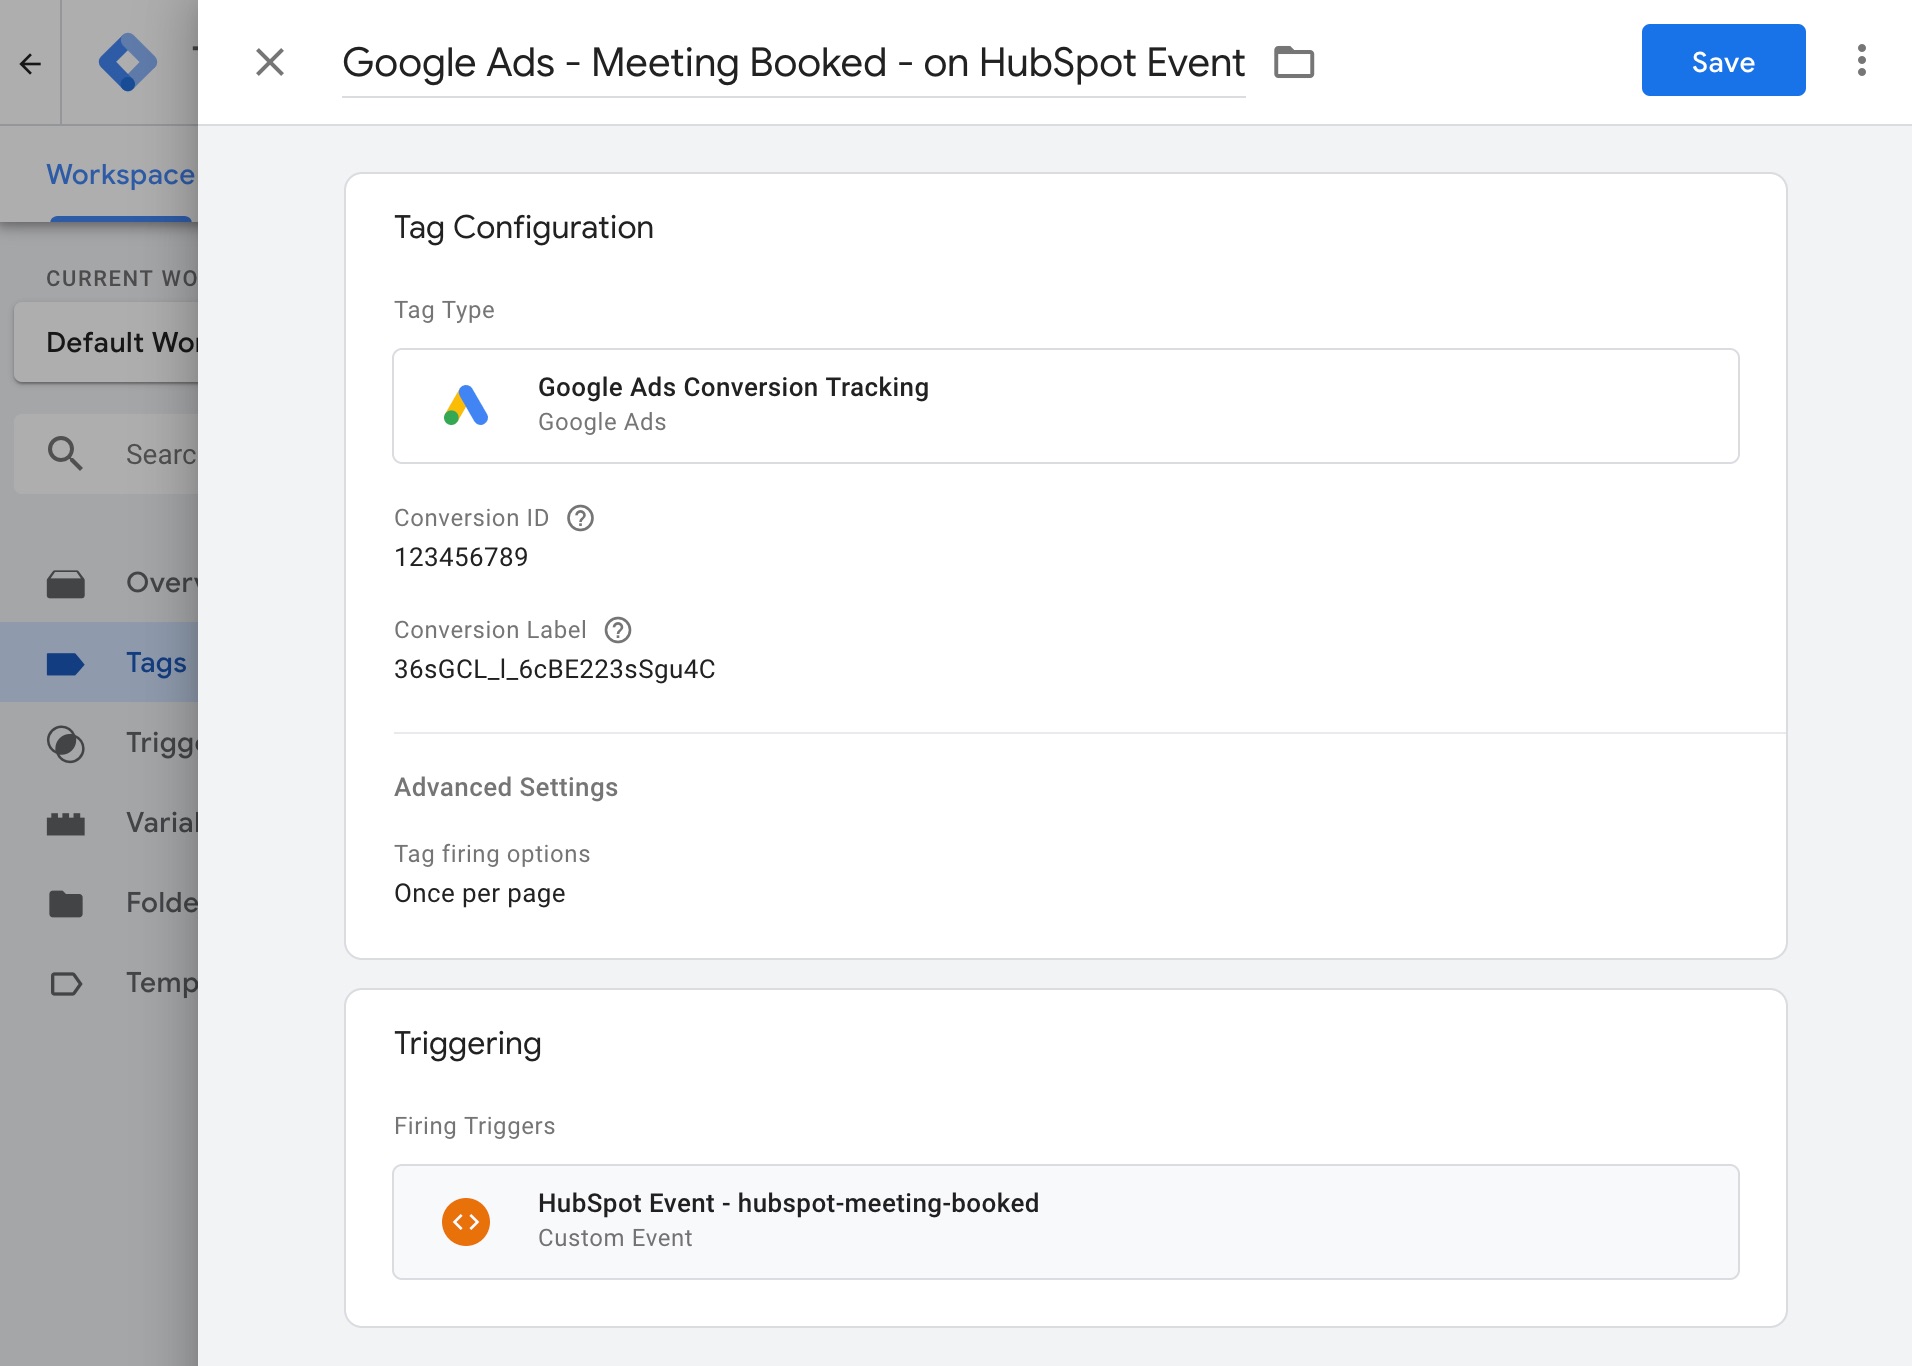
Don’t try to steal my conversion IDs… these are fake =P
Google Analytics Goals
For Google Analytics goals, create or find the goal you want to log and take note of the Event conditions that are configured in the Goal details section. In my screenshots here for this Meeting Booked goal, it is configured to look for a matching GA event of Category: meeting and Action: booked.
Take that info over to GTM to create a new tag type Google Analytics: Universal Analytics and use the same Category and Action inputs. I often send the Page URL variable as well.
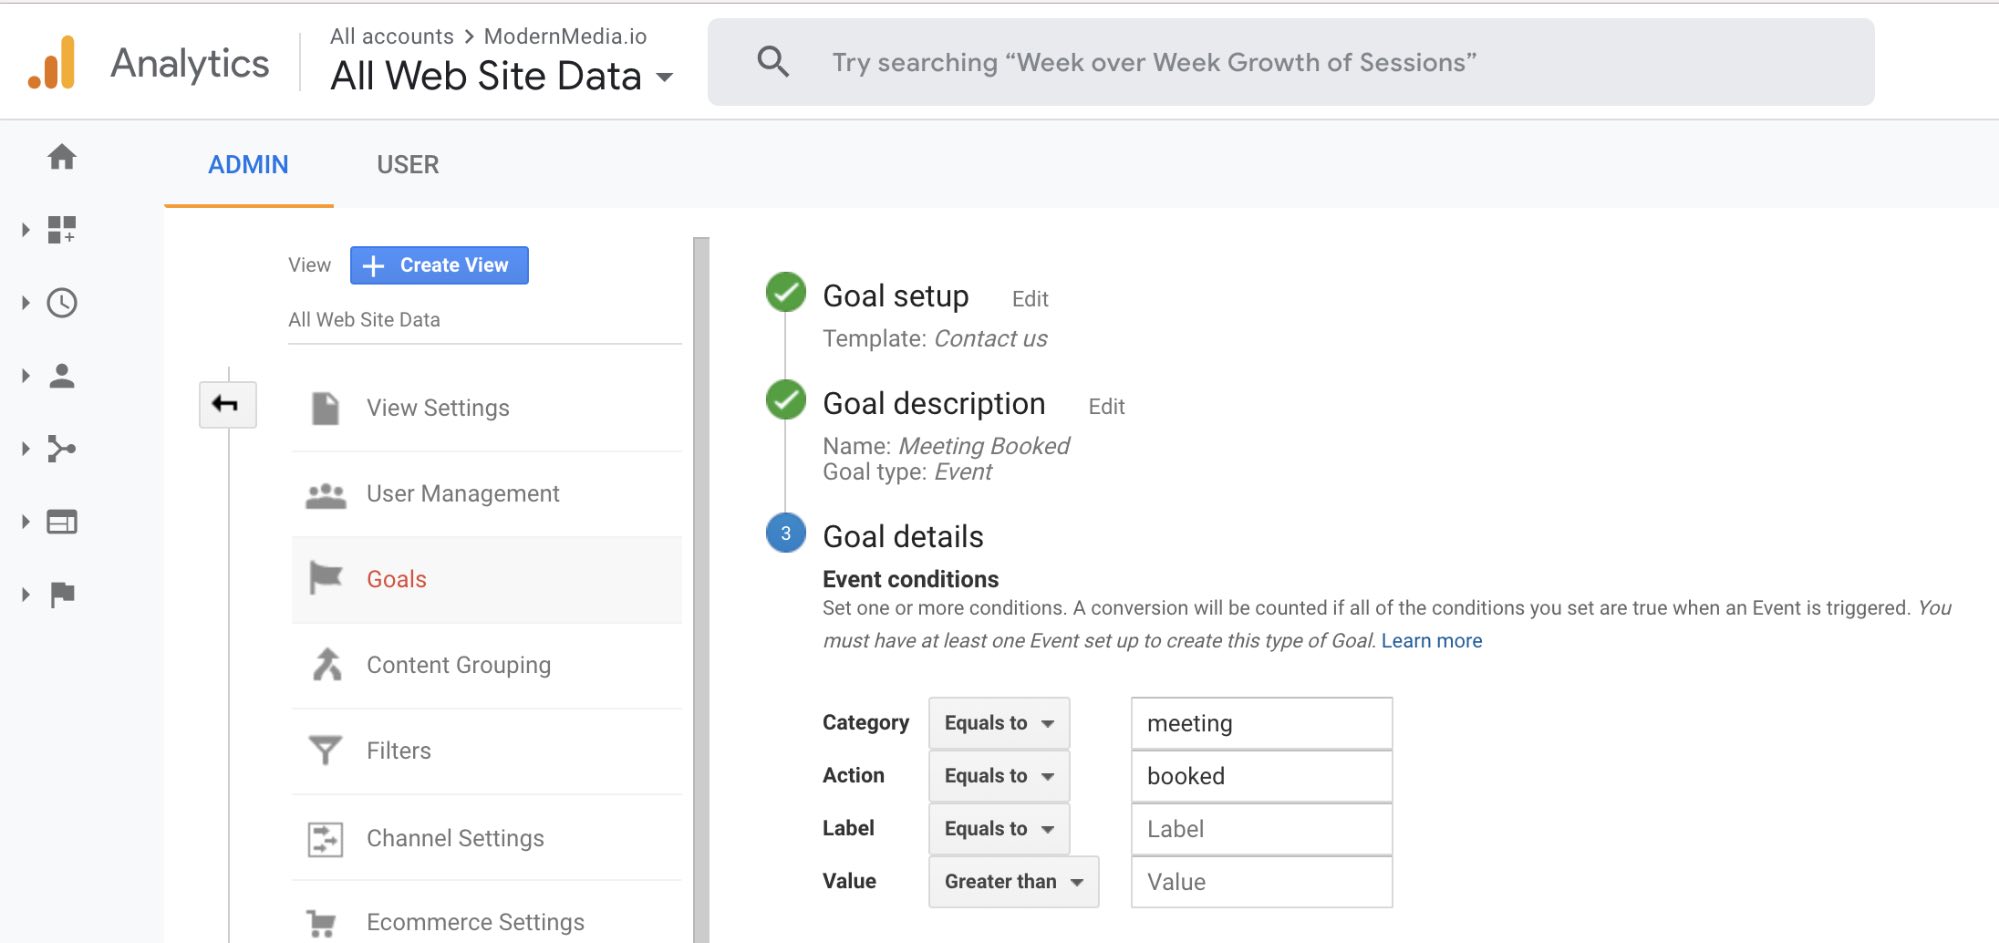
Life Goals… Google Goals…
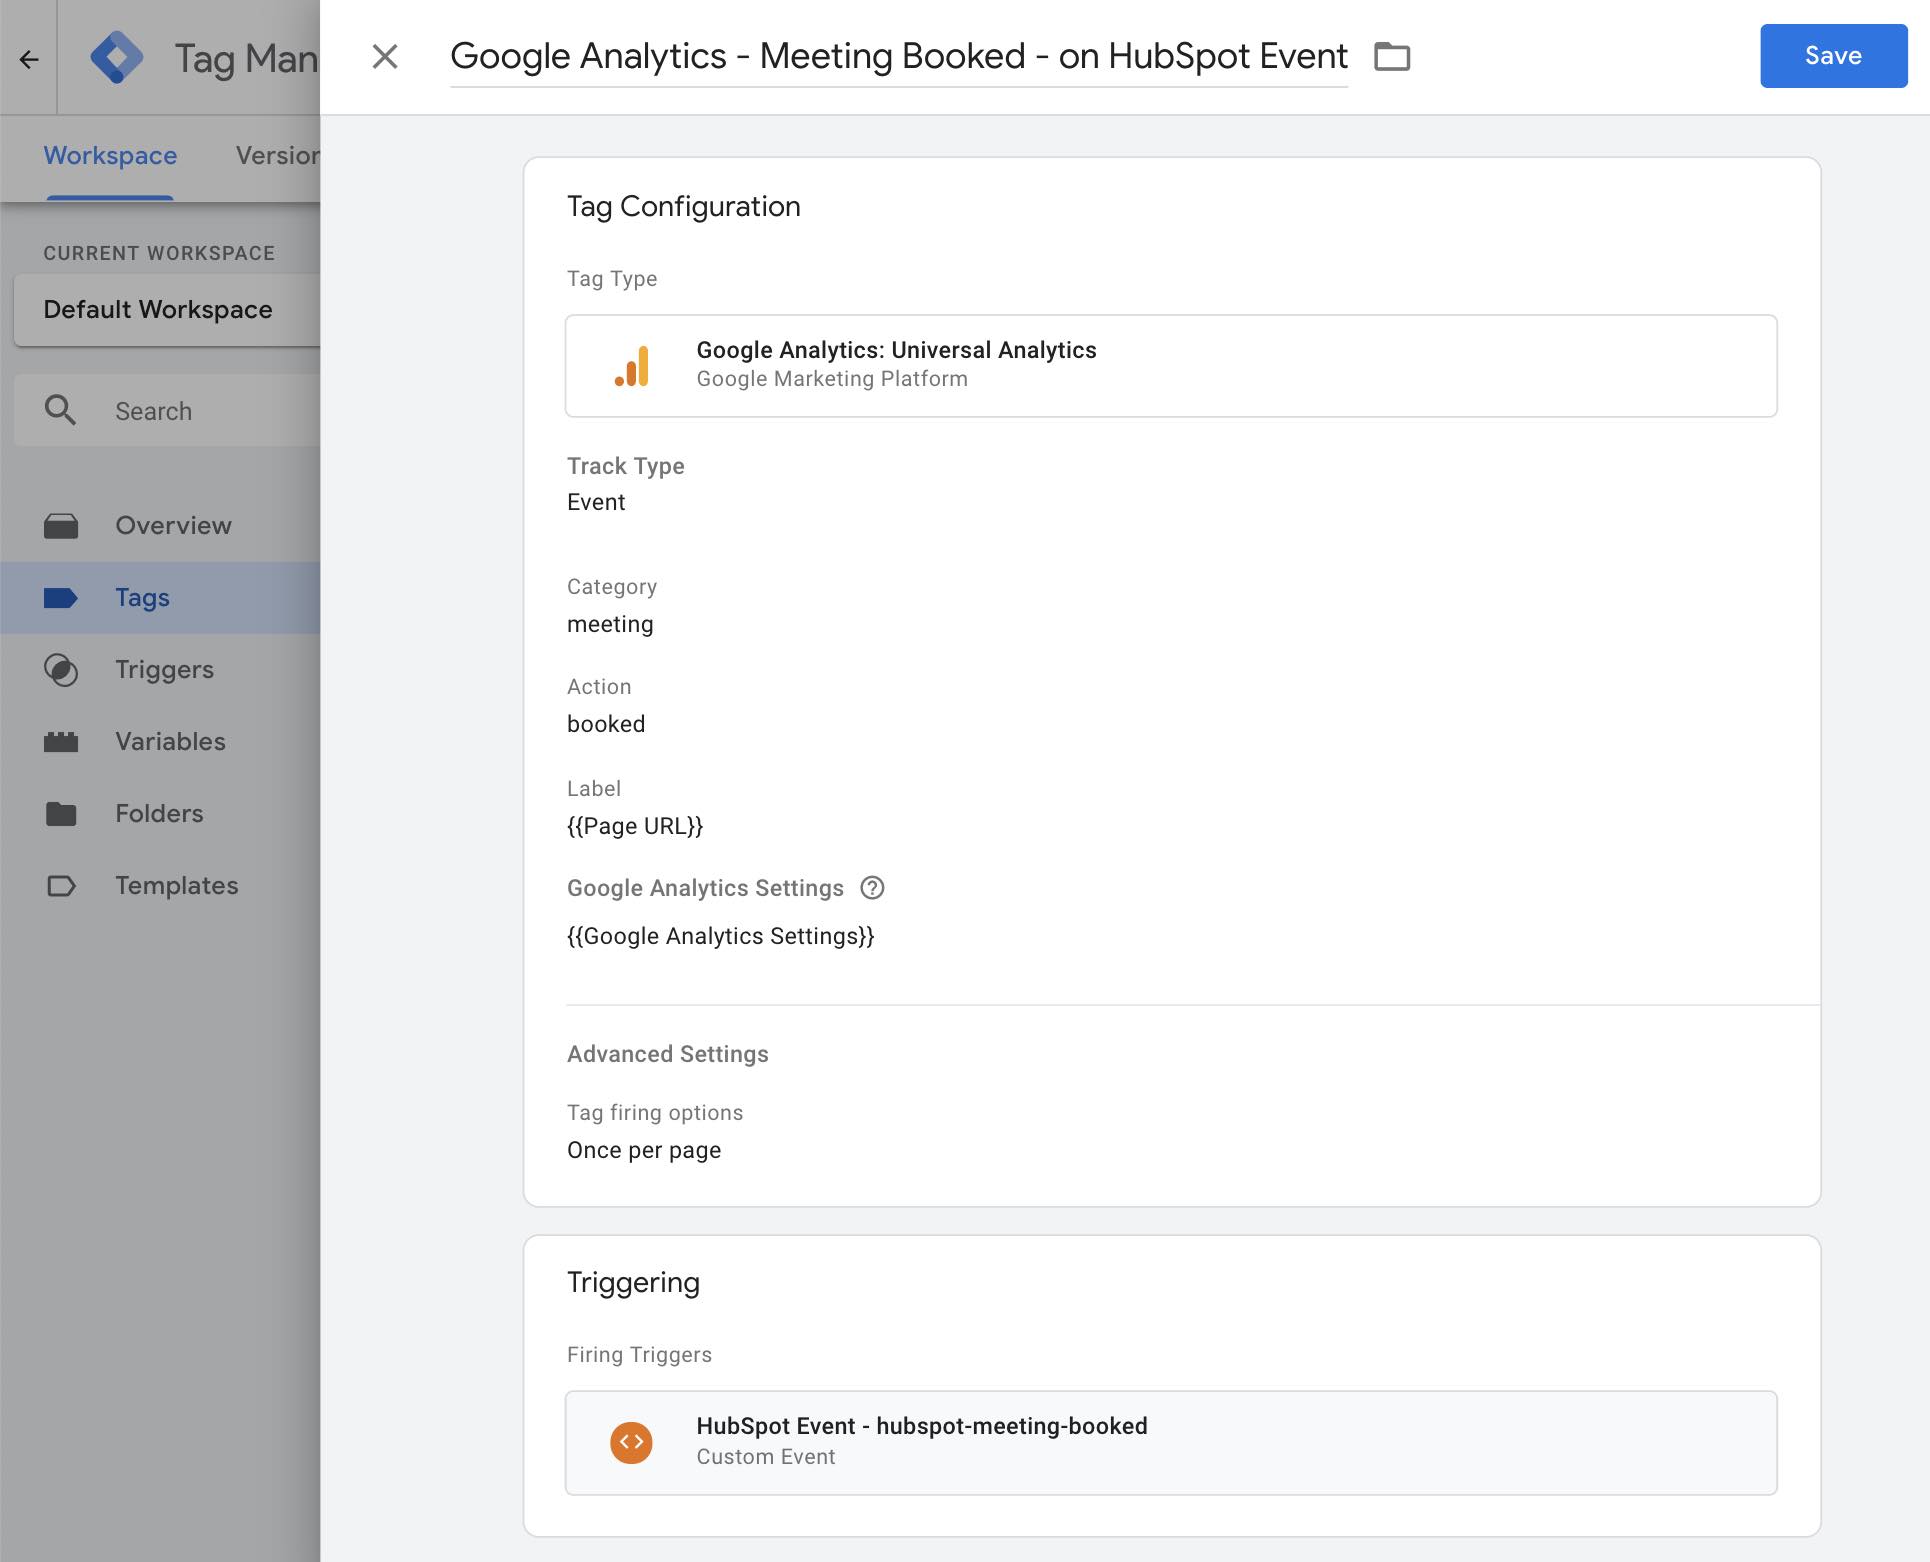
{{I got a meeting, I got a meeting, I got a meeting, hey hey hey hey}}
LinkedIn Ads Conversions
Create a new conversion in LinkedIn Campaign Manager or find the existing one you want to track.
Make sure it’s set to “Use an event-specific pixel to track” and then copy the code snippet provided. It’ll start with the <img … /> tag.
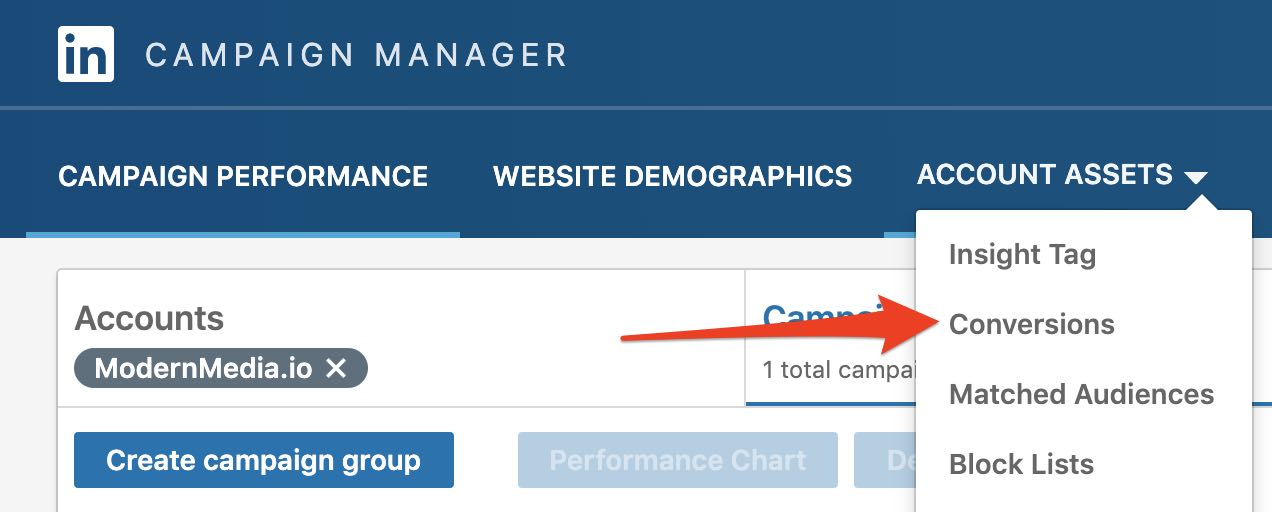
Right here, dawg
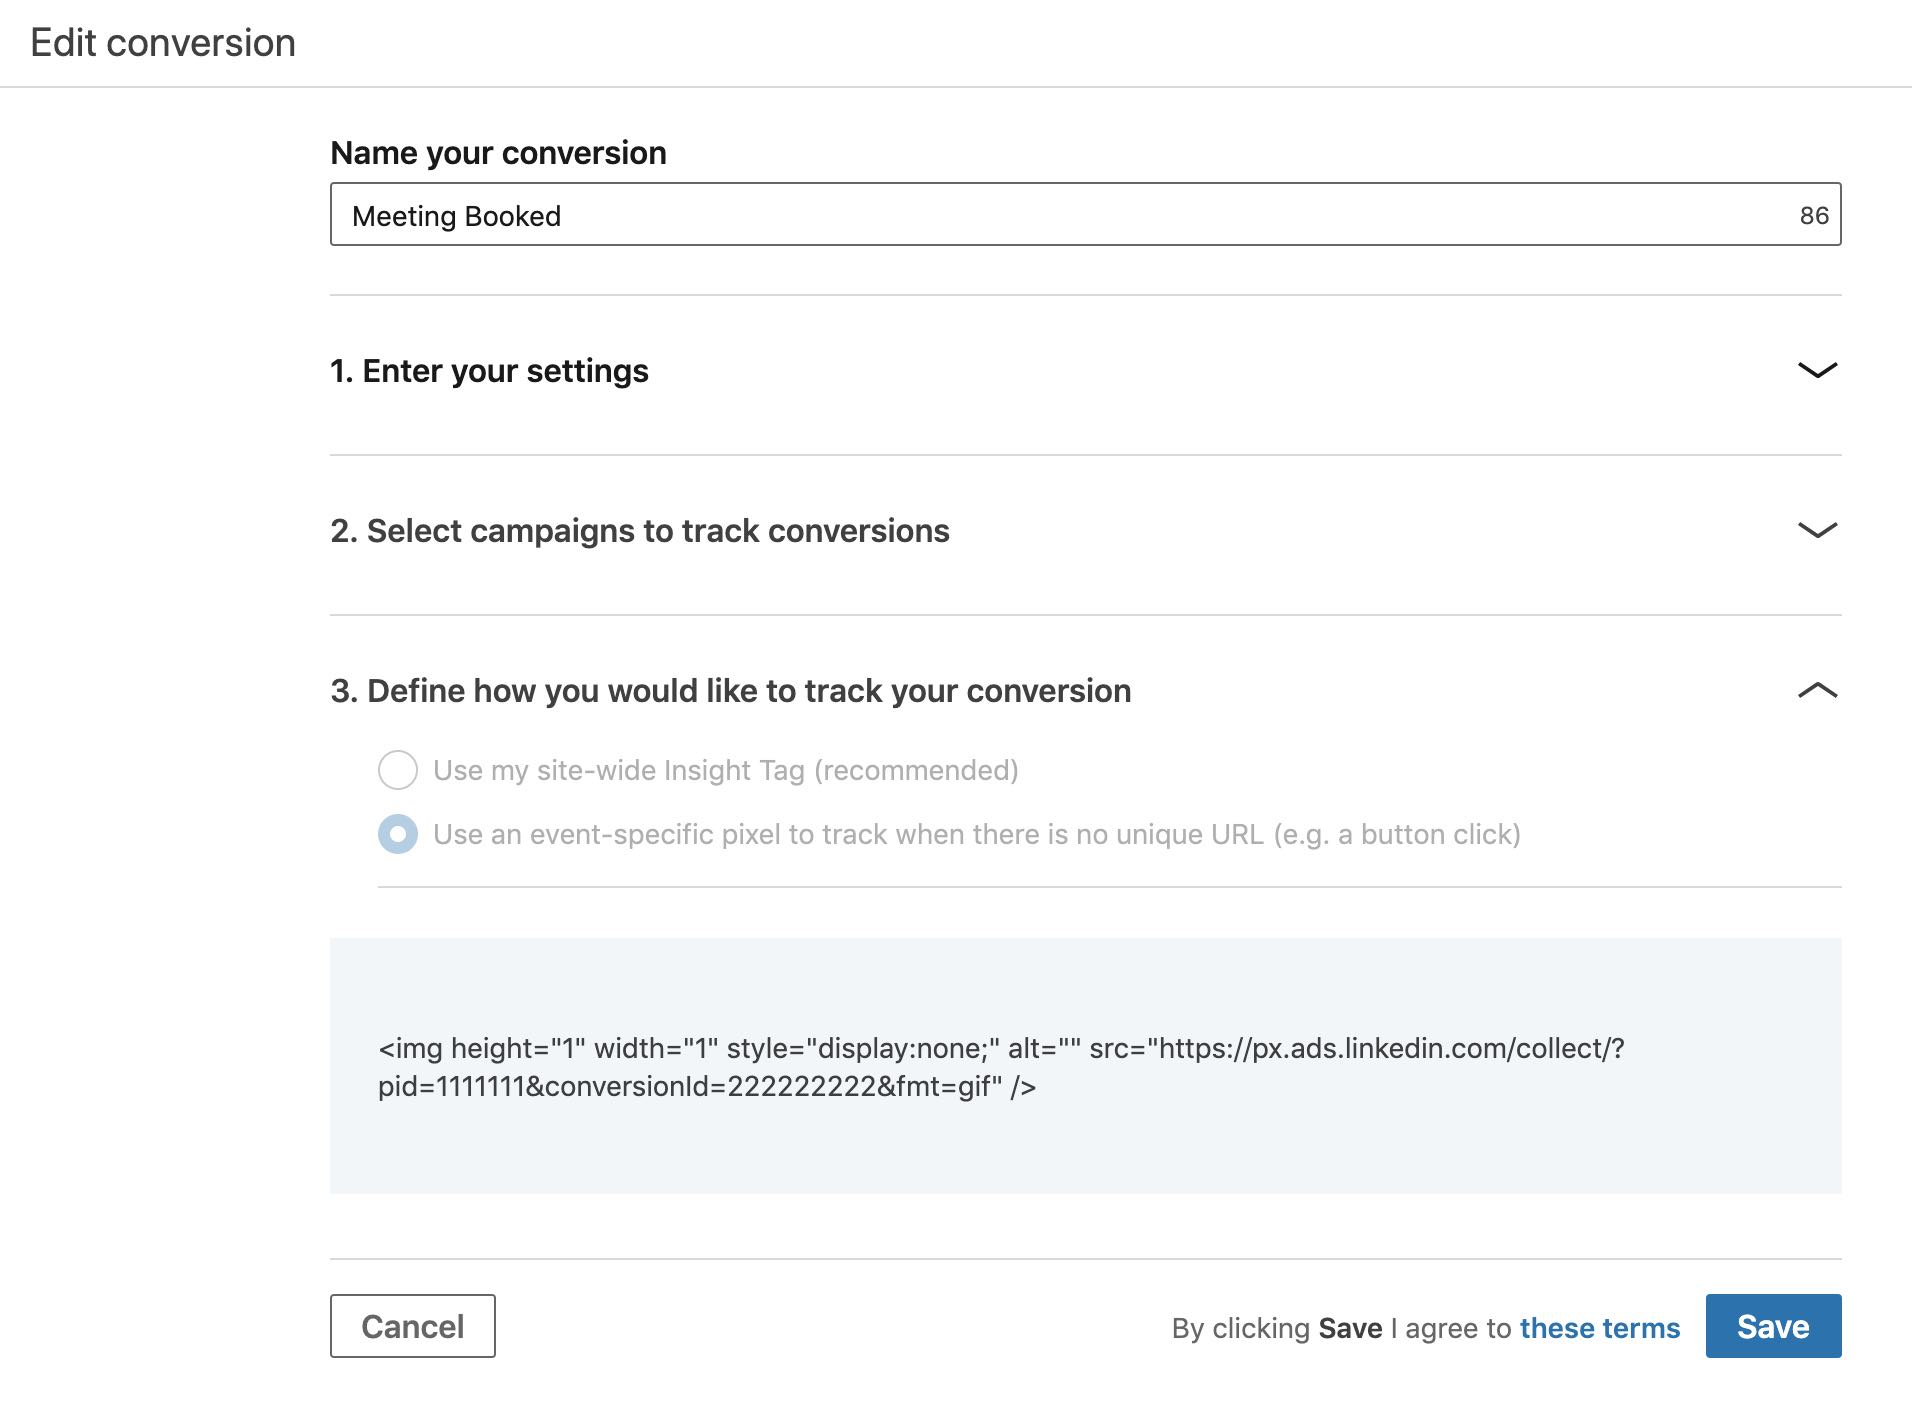
img tags… what is this, 1999?
Then back in Google Tag Manager, create a new tag, type: Custom HTML (because GTM doesn’t have a native option for LinkedIn conversions).
Input the LinkedIn code in the HTML section, and set the trigger to your Custom Event: HubSpot Event – hubspot-meeting-booked.
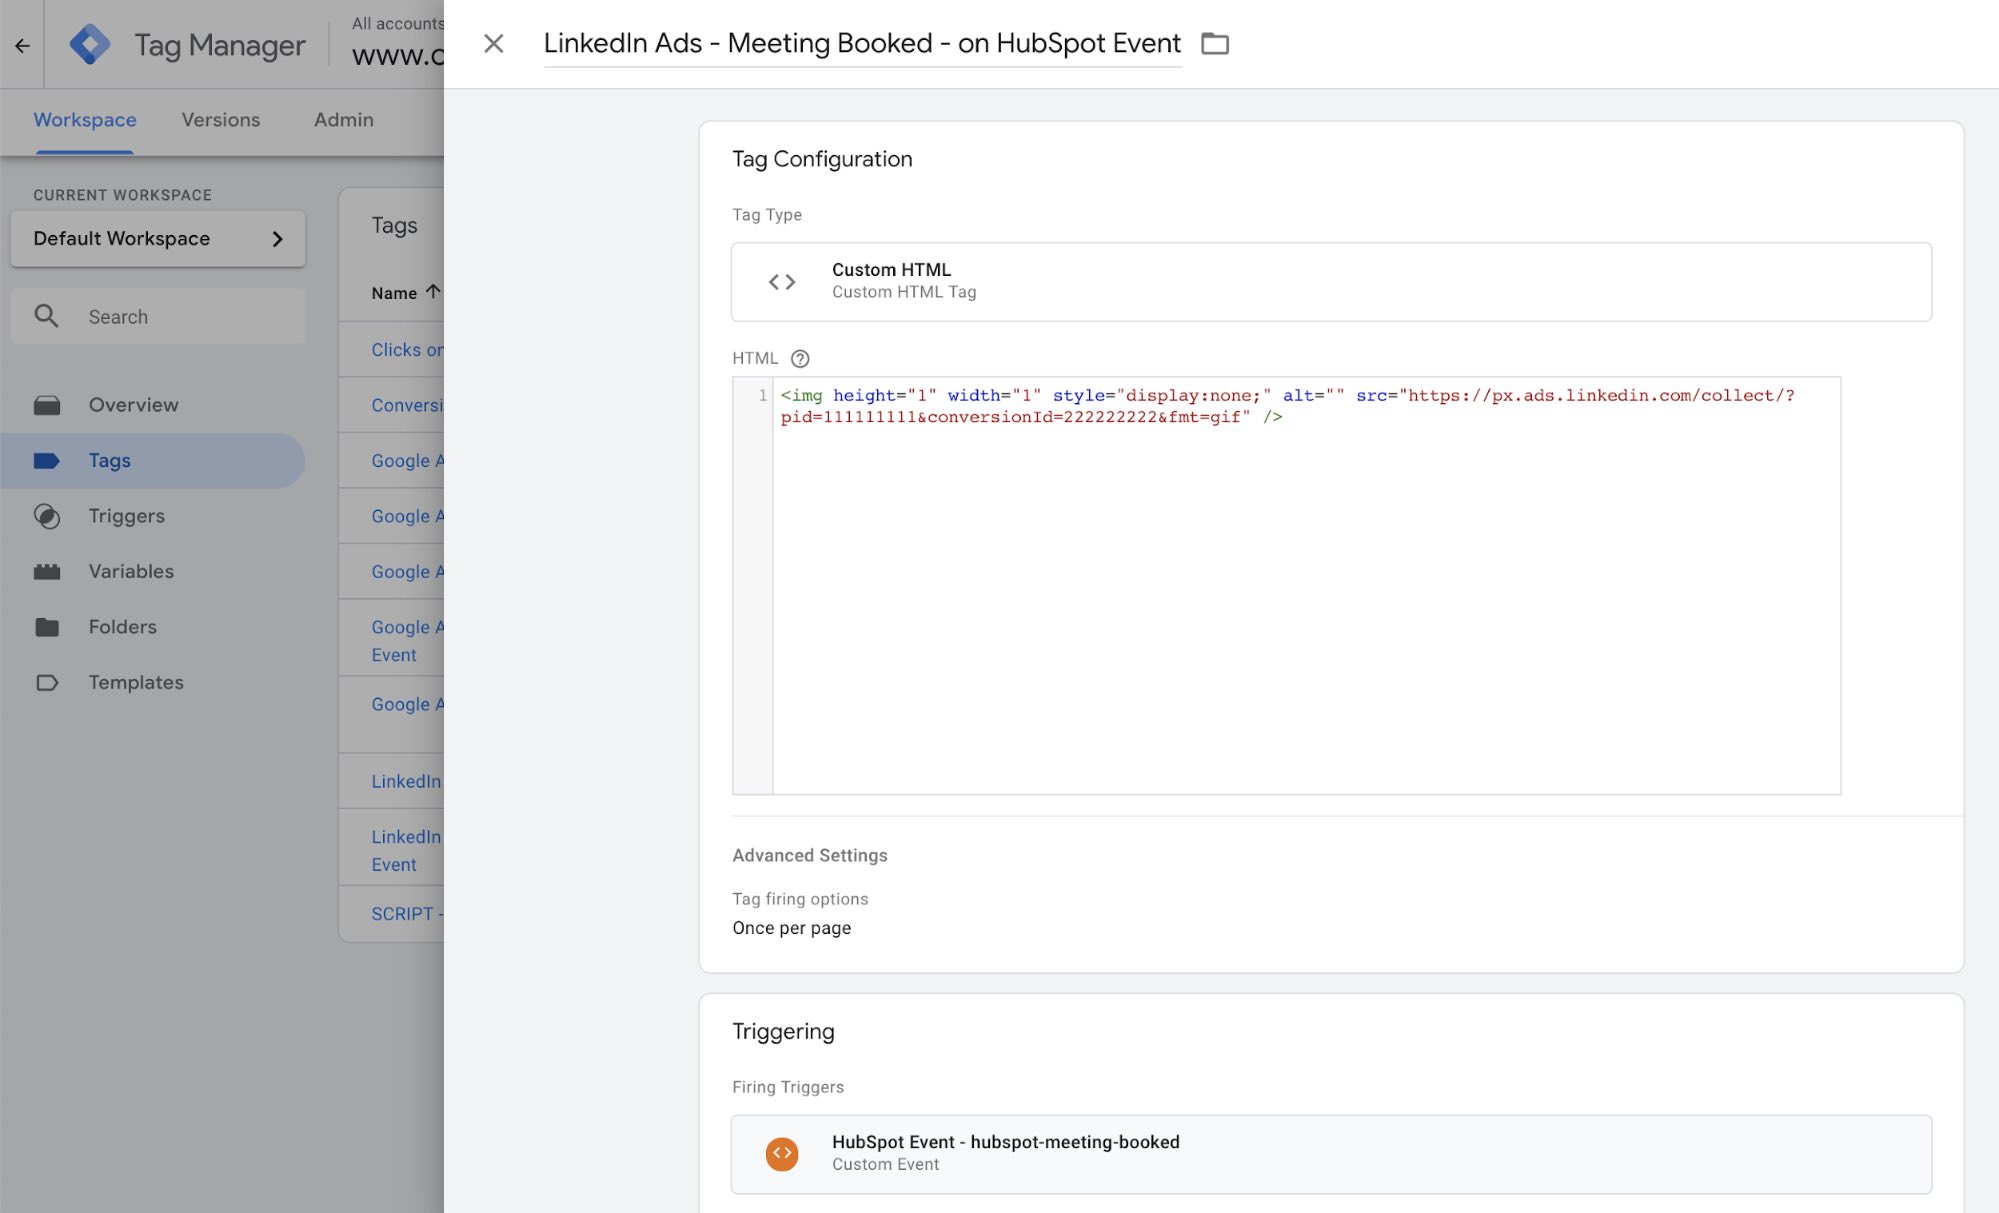
1×1 image = literally a pixel
Facebook Pixel Events
The Facebook Pixel has several Standard Events that you can track. When a meeting is booked, we typically log that as a Lead.
You may also want to use Schedule, Contact, or Complete Registration. If so, just swap “Lead” for the appropriate code in the snippet.
The HTML snippet is simple (once you already have the Pixel Base code on your page)
To track Facebook Events like this, you MUST first have the Facebook Pixel Base Code added to the page.
Note that for both LinkedIn and Facebook, we recommend having auto-tracking enabled in HubSpot… so that your LinkedIn Insight Tag and Facebook Pixel Base Code are automatically added sitewide.
“Auto” is music to my ears
If not, manually add your Insight Tag and FB Pixel Base Code as a GTM tag to All Pages.
5. Test!
GTM has a very, very handy Preview feature as well that helps you test and debug your configuration.
Use this to verify your tags and triggers are firing.

Whoever came up with this deserves a medal
Then navigate to your web page that has the HubSpot Meetings widget. You should see the Tag Manager preview pane open at the bottom of your browser. (You’re the only one that can see this pane – all other visitors won’t see it)
Your SCRIPT – HubSpot Meeting Booked Listener tag should fire when the page loads, as this means the code is now listening for the JavaScript event.
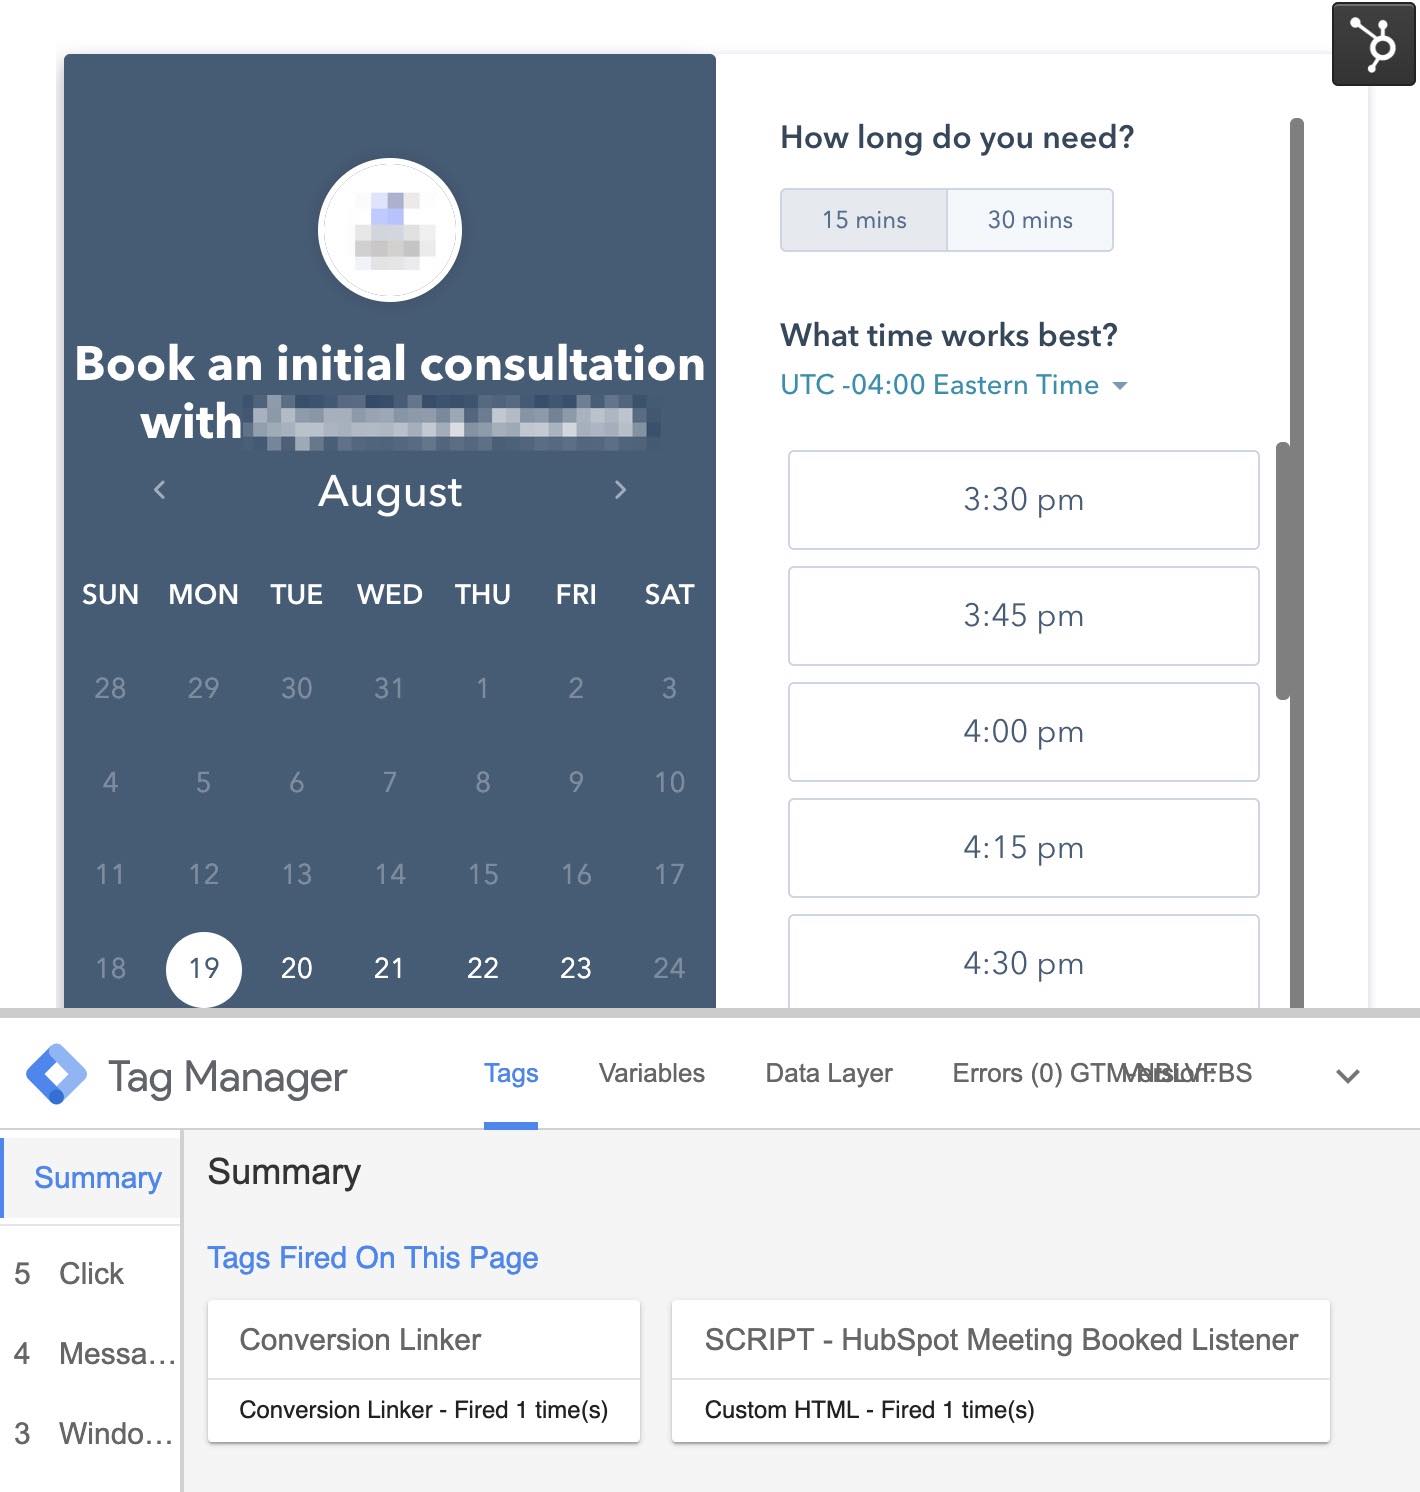
You’re beginning to see the matrix
Then test out booking a meeting in the widget. When you submit your information on the Confirm meeting page, you should see your conversion tags fire under “Tags Fired on This Page”.
If you’re using Google Ads, you should see your Google Ads Conversion Tracking appear in the Tag Assistant extension. (Note that only Google-related tags are shown here. LinkedIn, Facebook, or other tags will not appear here, even if they are firing properly)
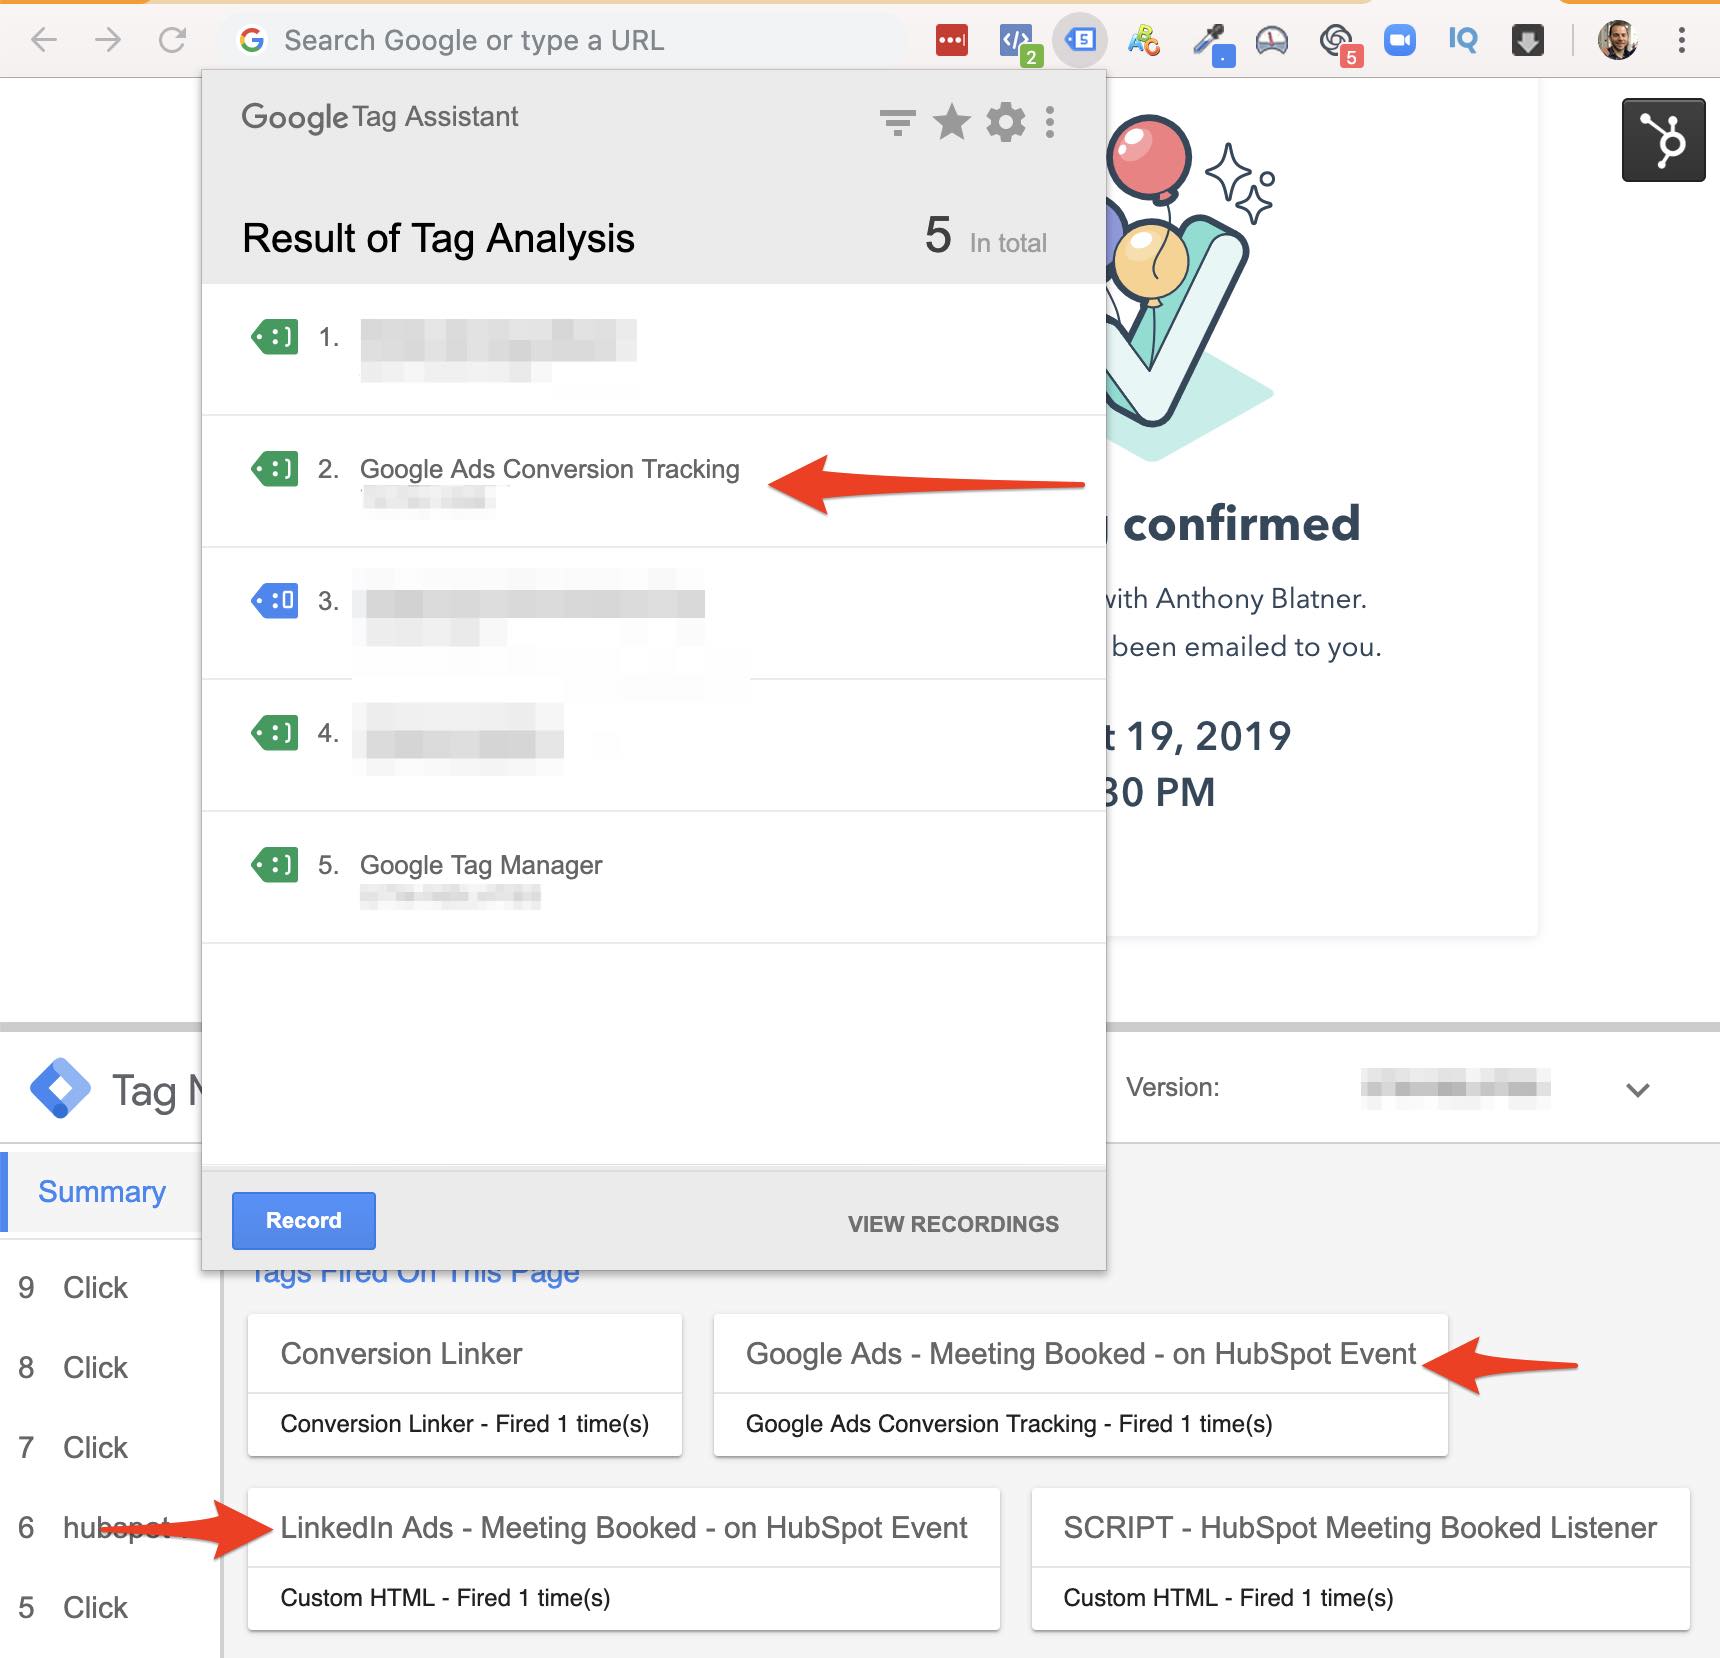
It works! It works! It really works!
If the right tags appear under Tags Fire on This Page, awesome – you’ve triggered a conversion. Head back to whichever ads platform you’re using and verify that the conversion has been received.
- Google Ads: you want to see Recording conversions
- LinkedIn Conversions: you want to see Conversion status: Active
- Google Analytics: you can scope out the Realtime > Events and Realtime > Conversions.
- Facebook Business Manager has a super handy Events Manager > Test Events feature that will show you the events you trigger with your account.
For all of these, make sure the targeted conversion that you expect to be firing from your GTM is also being received and recognized by the platform – to ensure your conversions are being counted.
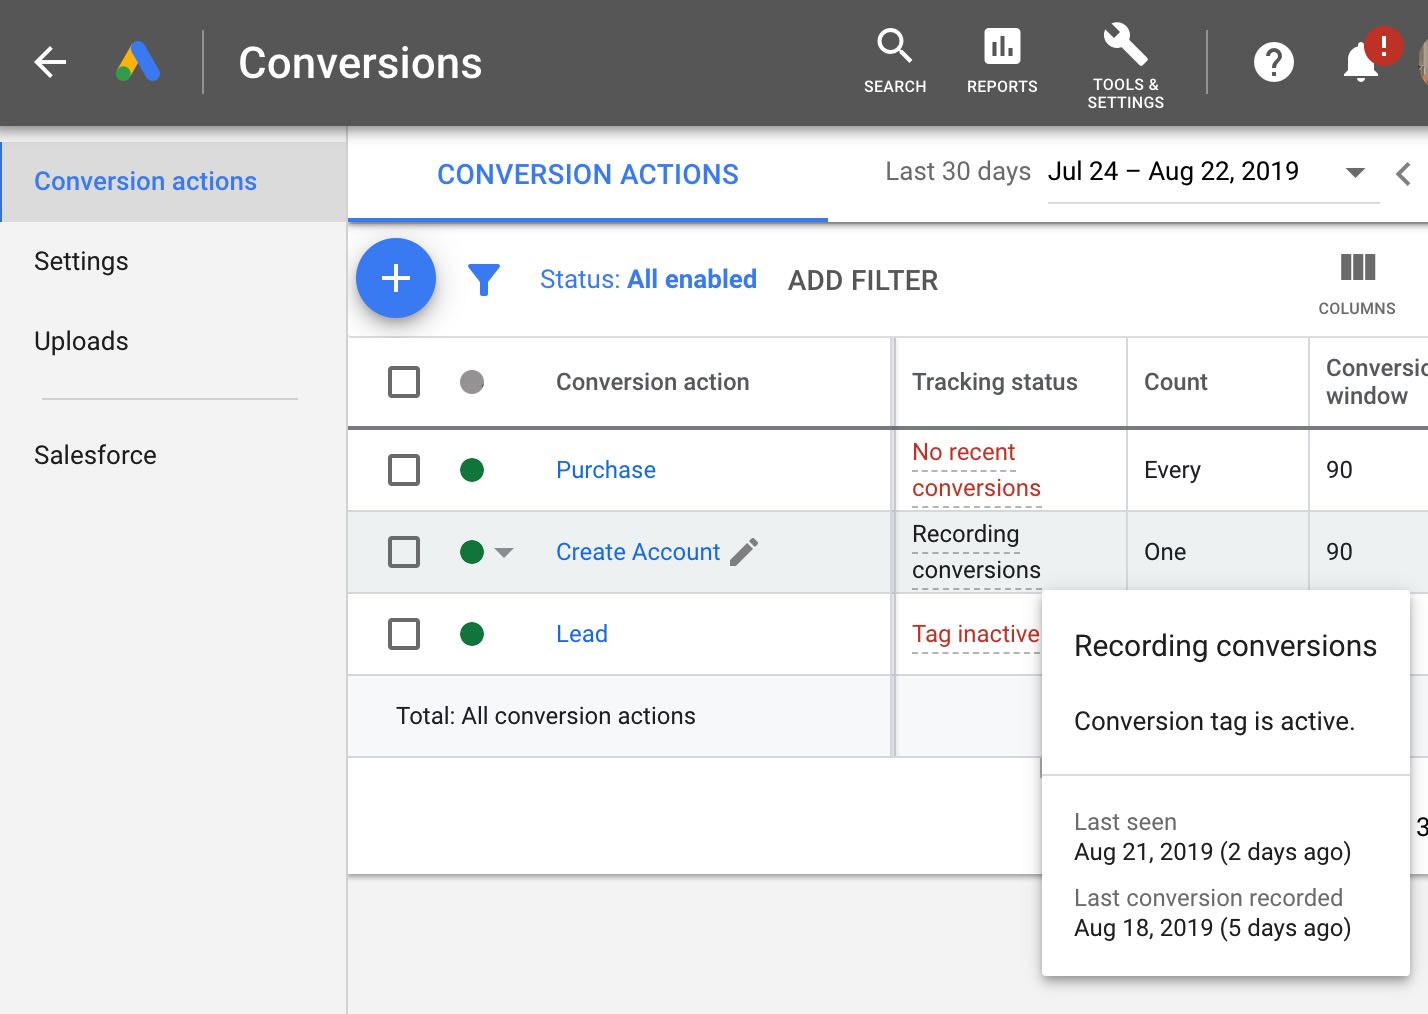
Yus!
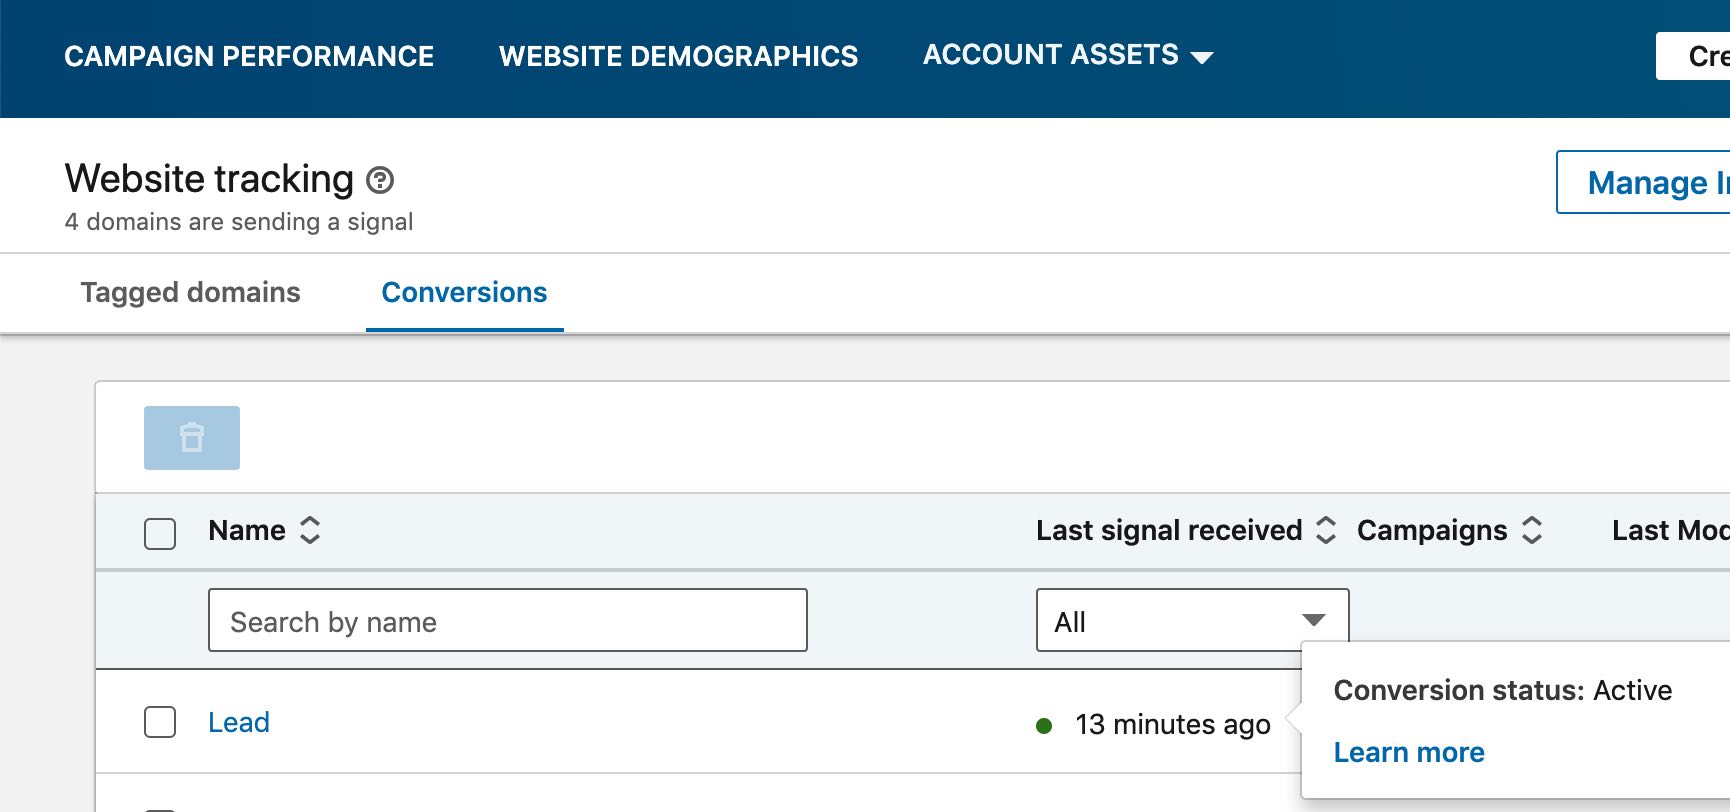
Last signal received… from Mars?
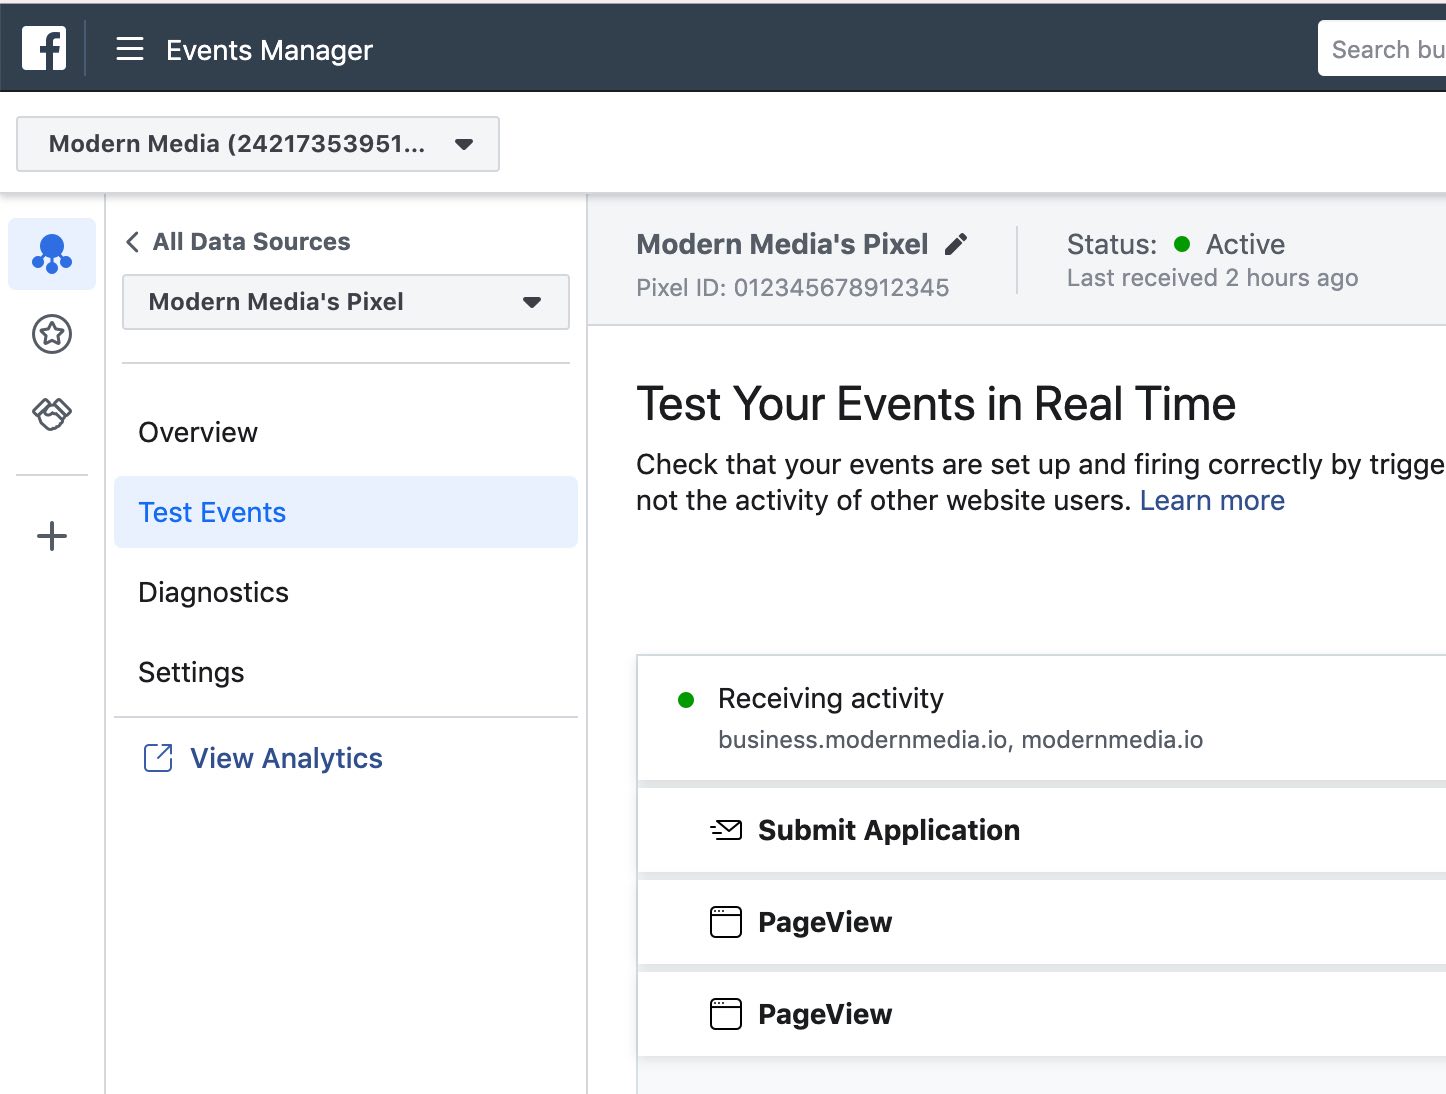
Whoever created this deserves a medal AND a high-five!
All done and working? Awesome! ✅
Still having problems? Head back to GTM and verify that your events are firing. If they are, make sure your conversion codes and IDs that you’re sending from GTM match what the ads platform is expecting to receive.
When you’re done… be sure to head back to Google Tag Manager and hit the Submit button to publish all of the tags, triggers, and code in your container. And then you can also hit Leave Preview Mode.
