Want to track conversions for your LinkedIn ads? Follow this tutorial to make sure your conversion tracking is set up and working!
We’re going to walk through setting up conversion tracking for LinkedIn event-specific conversion events.
About LinkedIn Ads Conversion Tracking
Why do we need new JavaScript events? Well, since Apple killed the ‘cookie’ a year ago, there have been a lot of changes to tracking online.
Previously, many conversions were configured with image pixels – when the undetectable image pixel loaded, a conversion was logged. Nowadays, that image pixel may not work in many cases, as shown below by LinkedIn.
![]()
Fear not, 1st party cookies and JavaScript events do work – whew! Read on.
Now there are a couple of ways to track conversions on LinkedIn:
- Page load– when the user makes it to a certain page and a ‘goal’ URL loads, that can be counted as a conversion. Say you have a thank you page after your request demo form, you can count people who make it to that page as a conversion.
- Event-specific – If your form does not have a thank you page (it submits and you stay on the same page), or if you want to track a different event, such as an Add to Cart button, then you would use this option.
In this tutorial, we’ll walk through setting up a conversion event for a Request Quote form using Google Tag Manager.
Video Tutorial
Step by step instructions
1. Create your conversion event in LinkedIn Ads
In your LinkedIn Ads account, navigate to Analyze > Conversion tracking.
Click Create Conversion > Online Conversion:
Create an Online Conversion
2. Enter a name, behavior, and choose your conversion tracking settings. Then click Next:
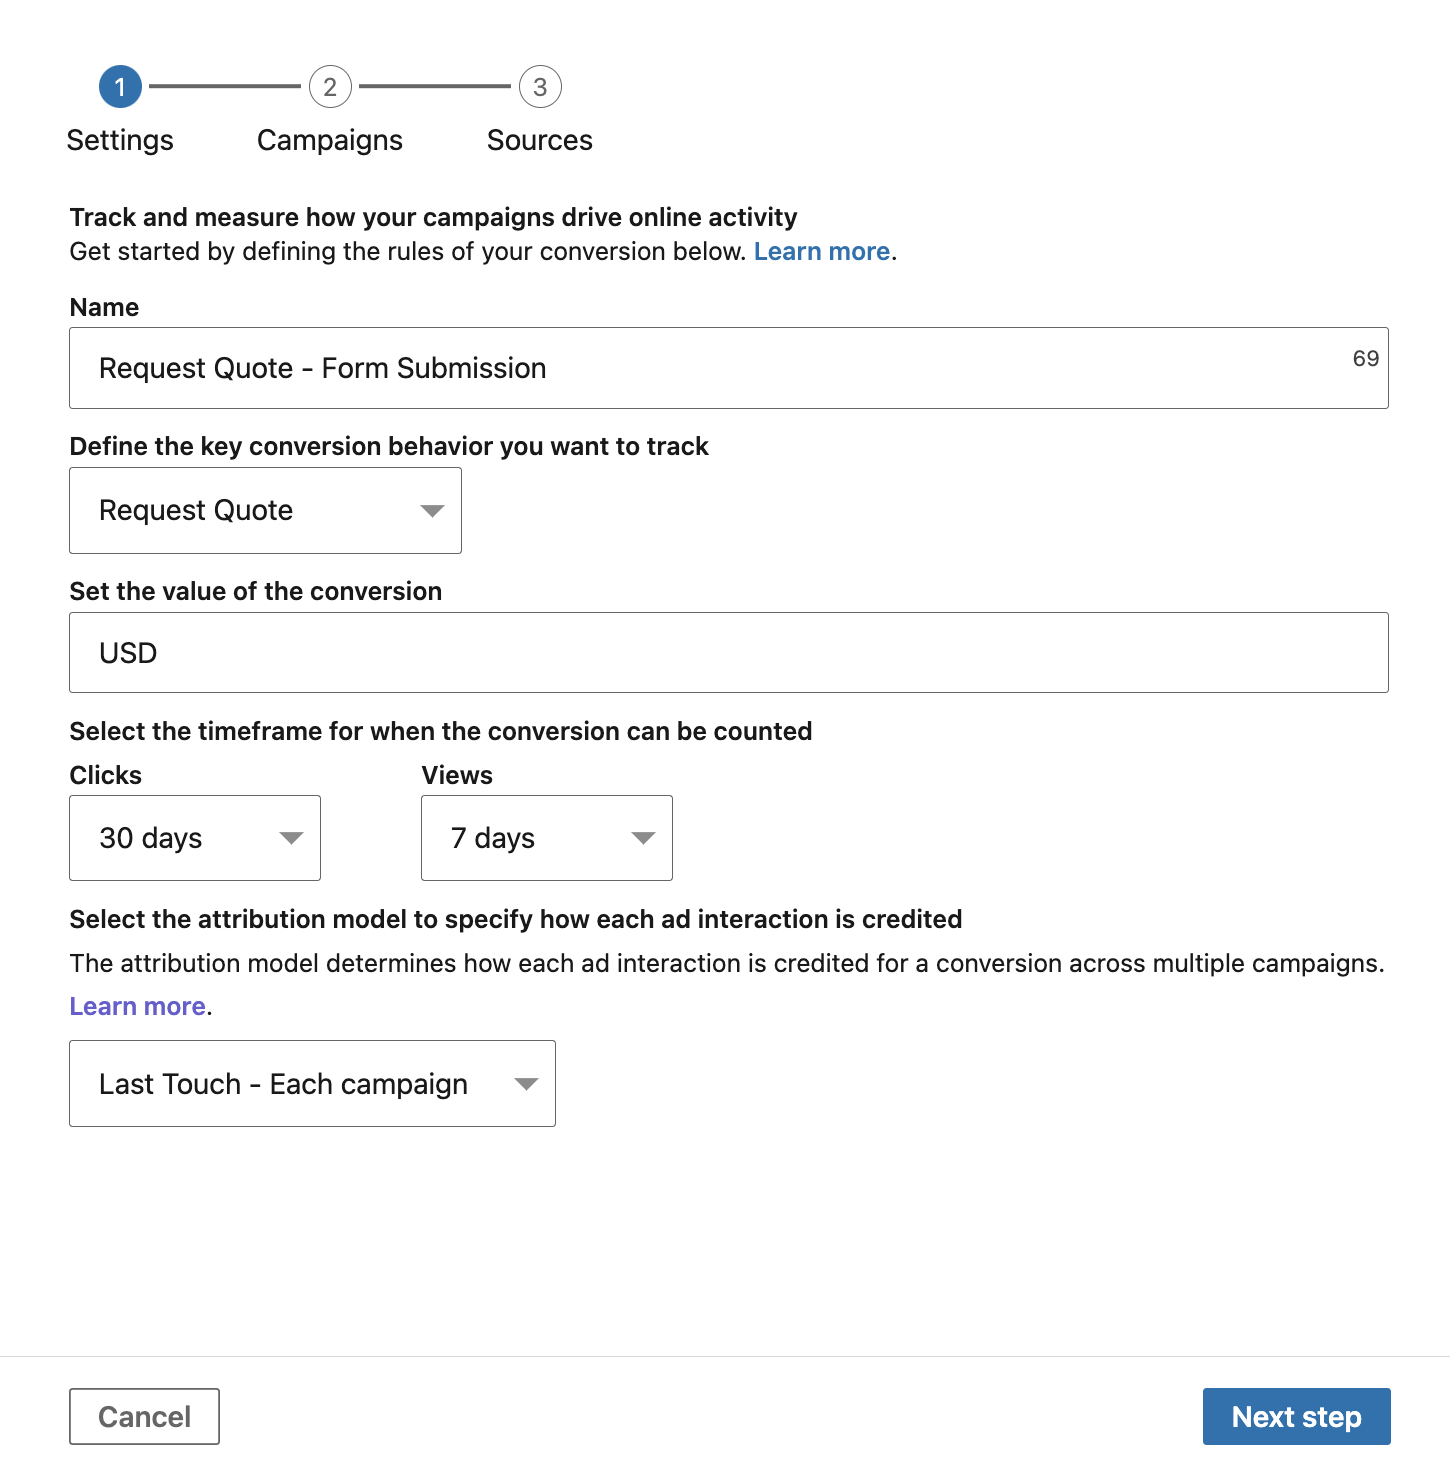
Enter conversion settings
3. Choose the campaigns you want to track > Click Next
4. Select Event-specific > Copy code
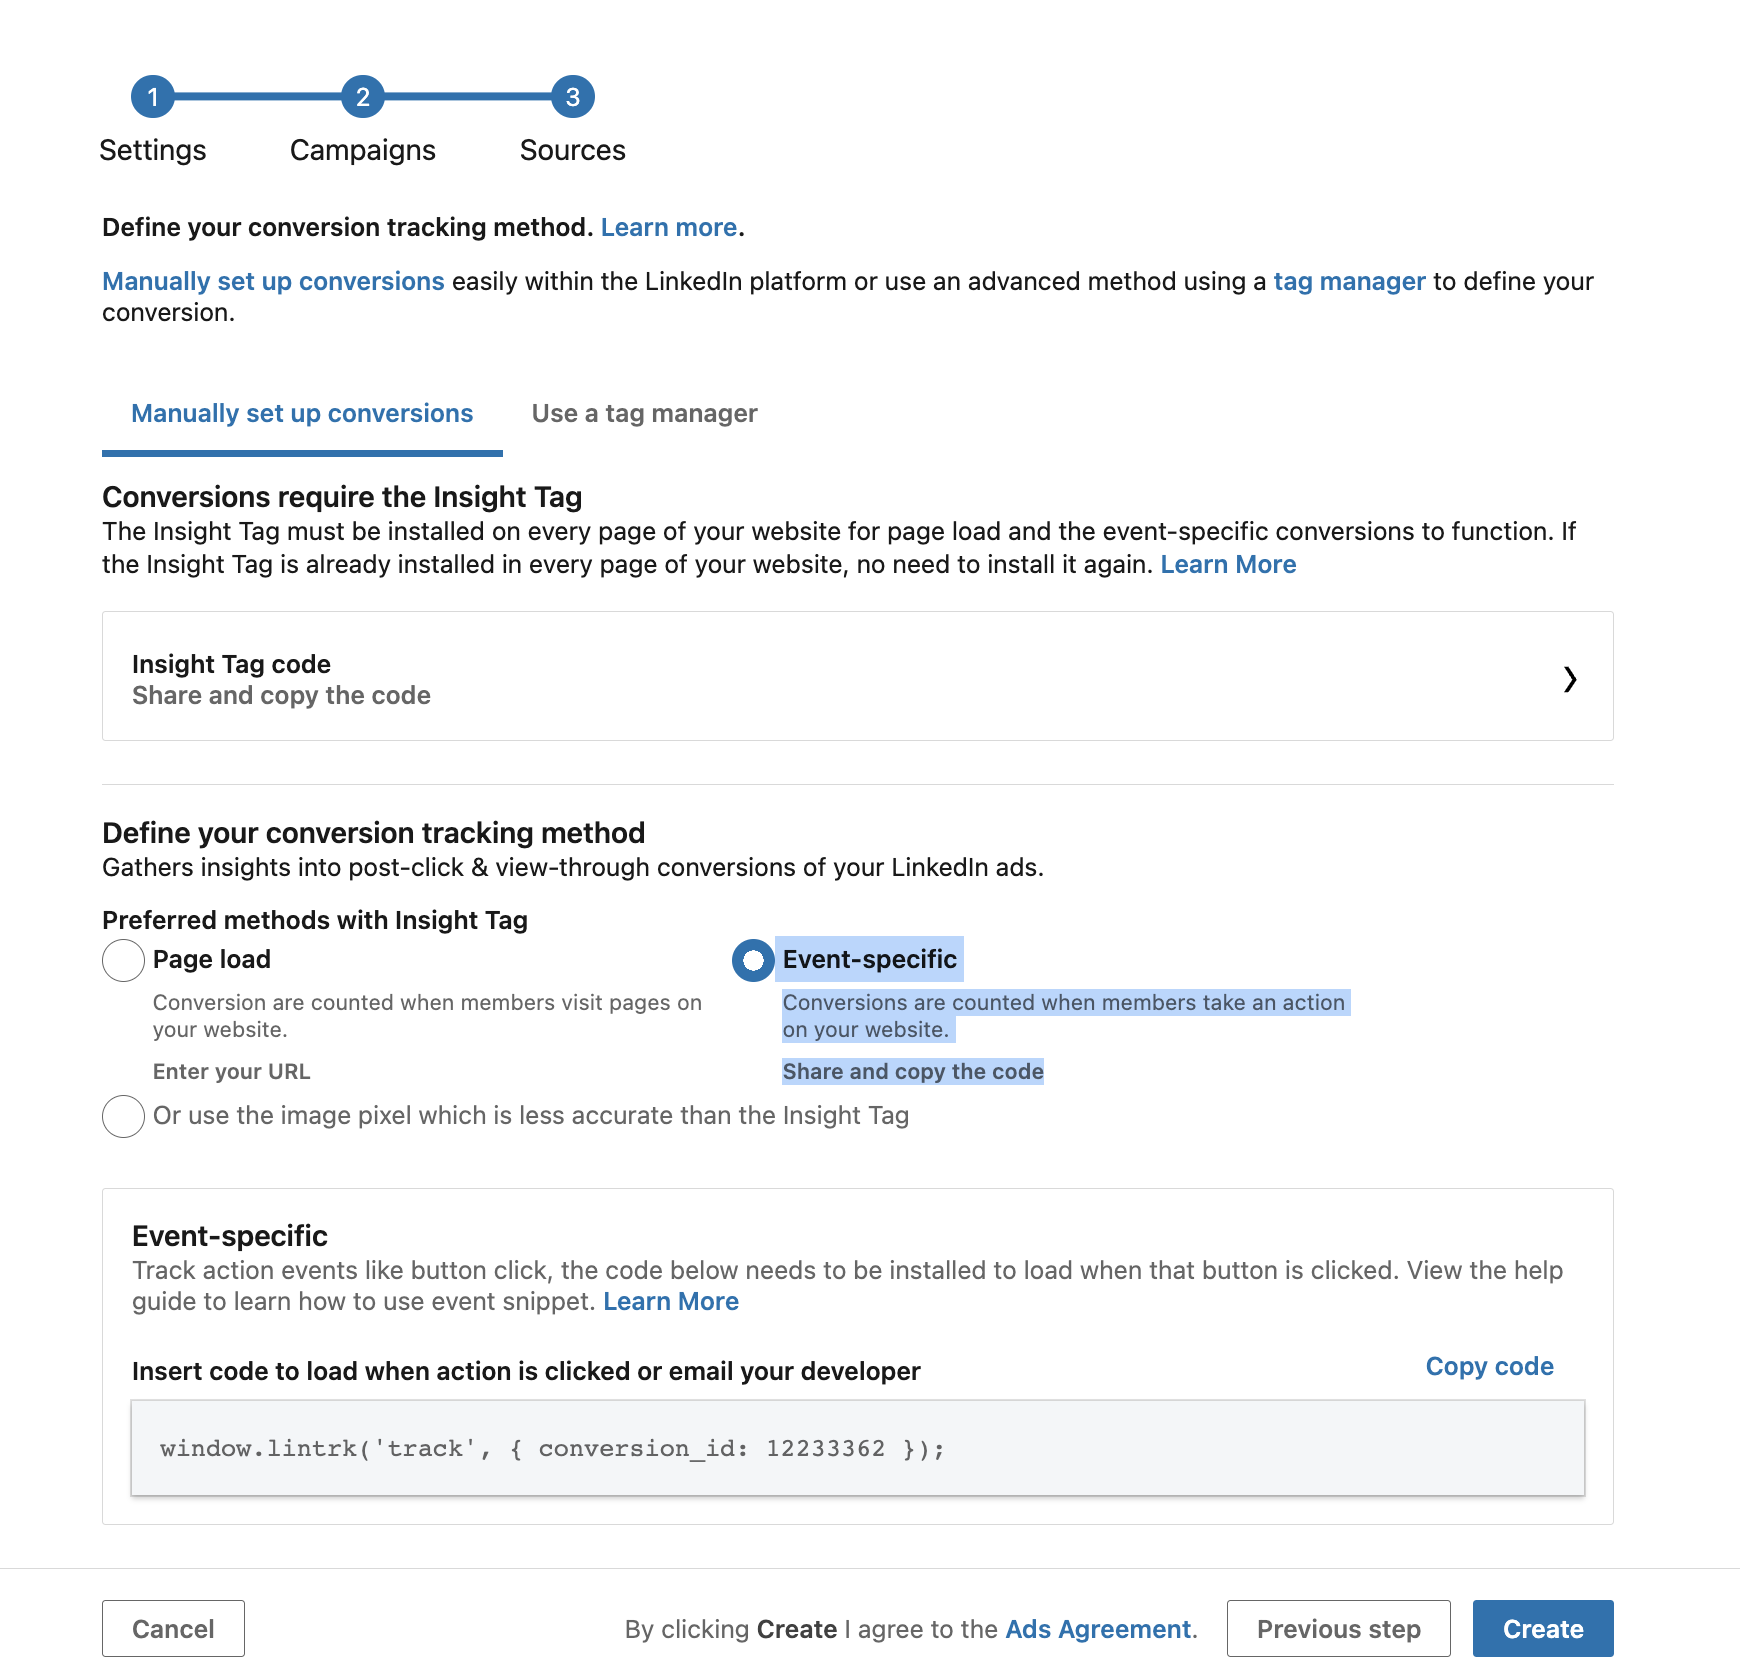
Select Event-specific

Copy the JavaScript code
Be sure to click the Create button now!
5. Use Google Tag Manager to Setup Website Events
We’ll use Google Tag Manager in this example to trigger the code when the form is submitted.
You don’t have to use GTM, there are lots of other options. Some forms and platforms have inputs where you can input the code right into the form. But otherwise, GTM is a great tool!
6. Create a new Tag > Custom HTML > Insert the event conversion tracking code from LinkedIn

Select Tags > New

Select Custom HTML
Be sure to wrap <script> … </script> tags around your code! If those tags are missing, your code will not execute properly.
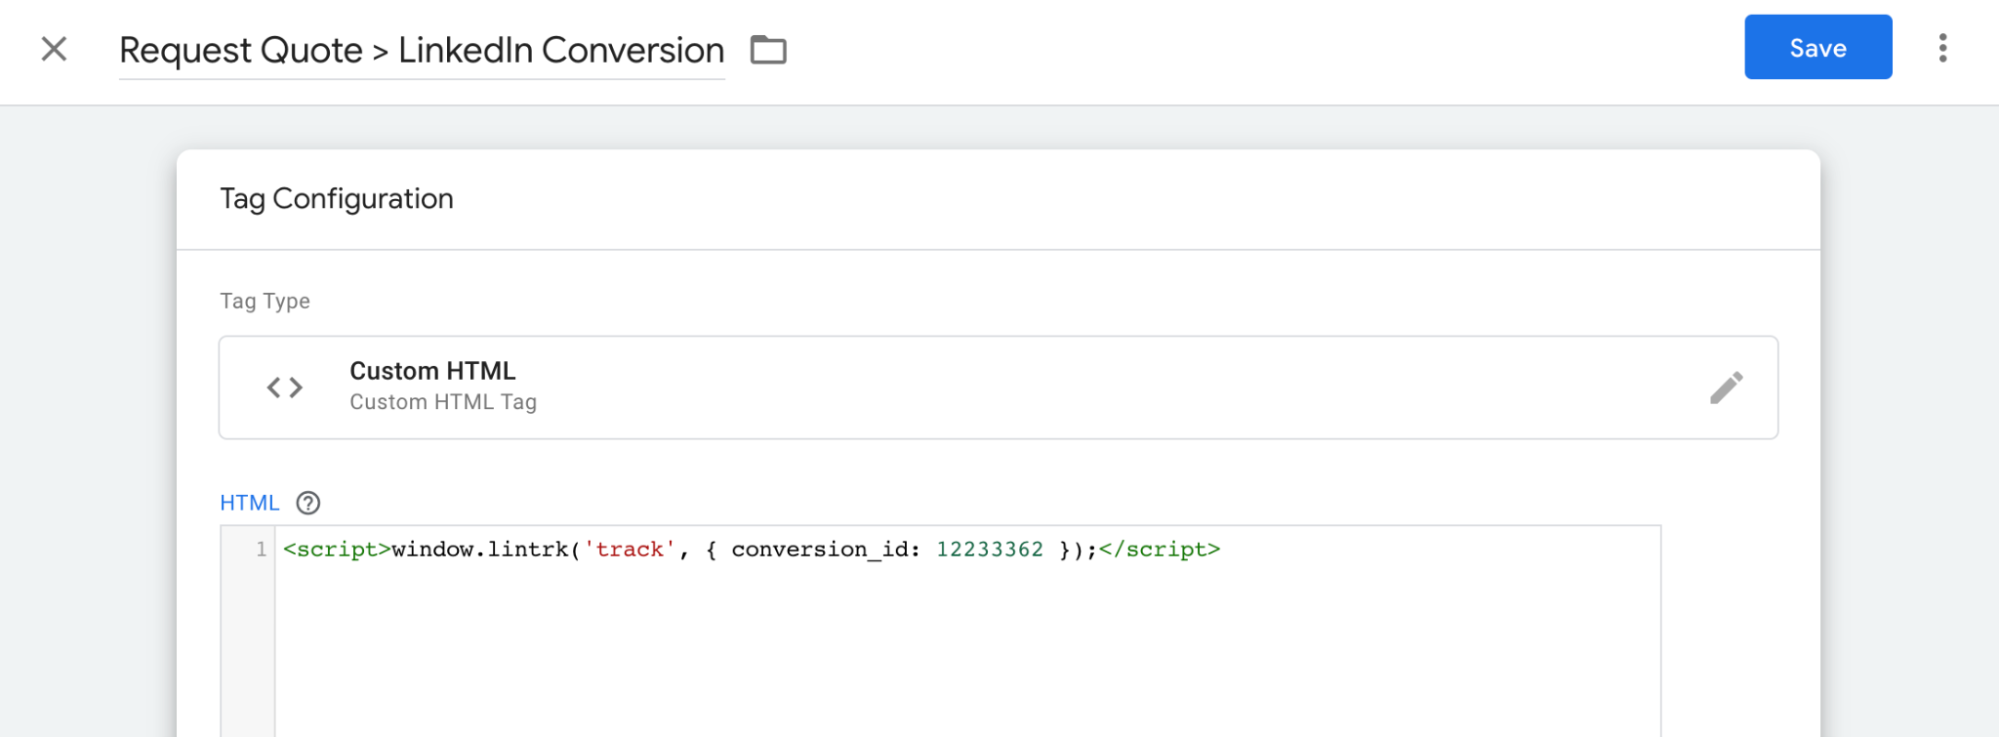
Input your JavaScript code, addtags around it
Then select the trigger event – in this example, we are triggering based on form submission, so select that.

Select Form Submission trigger
GTM will give you the option to start this trigger on all form submissions, or only forms on specific pages.
In this example, we are only going to trigger our Request Quote conversion on a /request-quote page, because we may have other forms on other pages that we want to track differently.
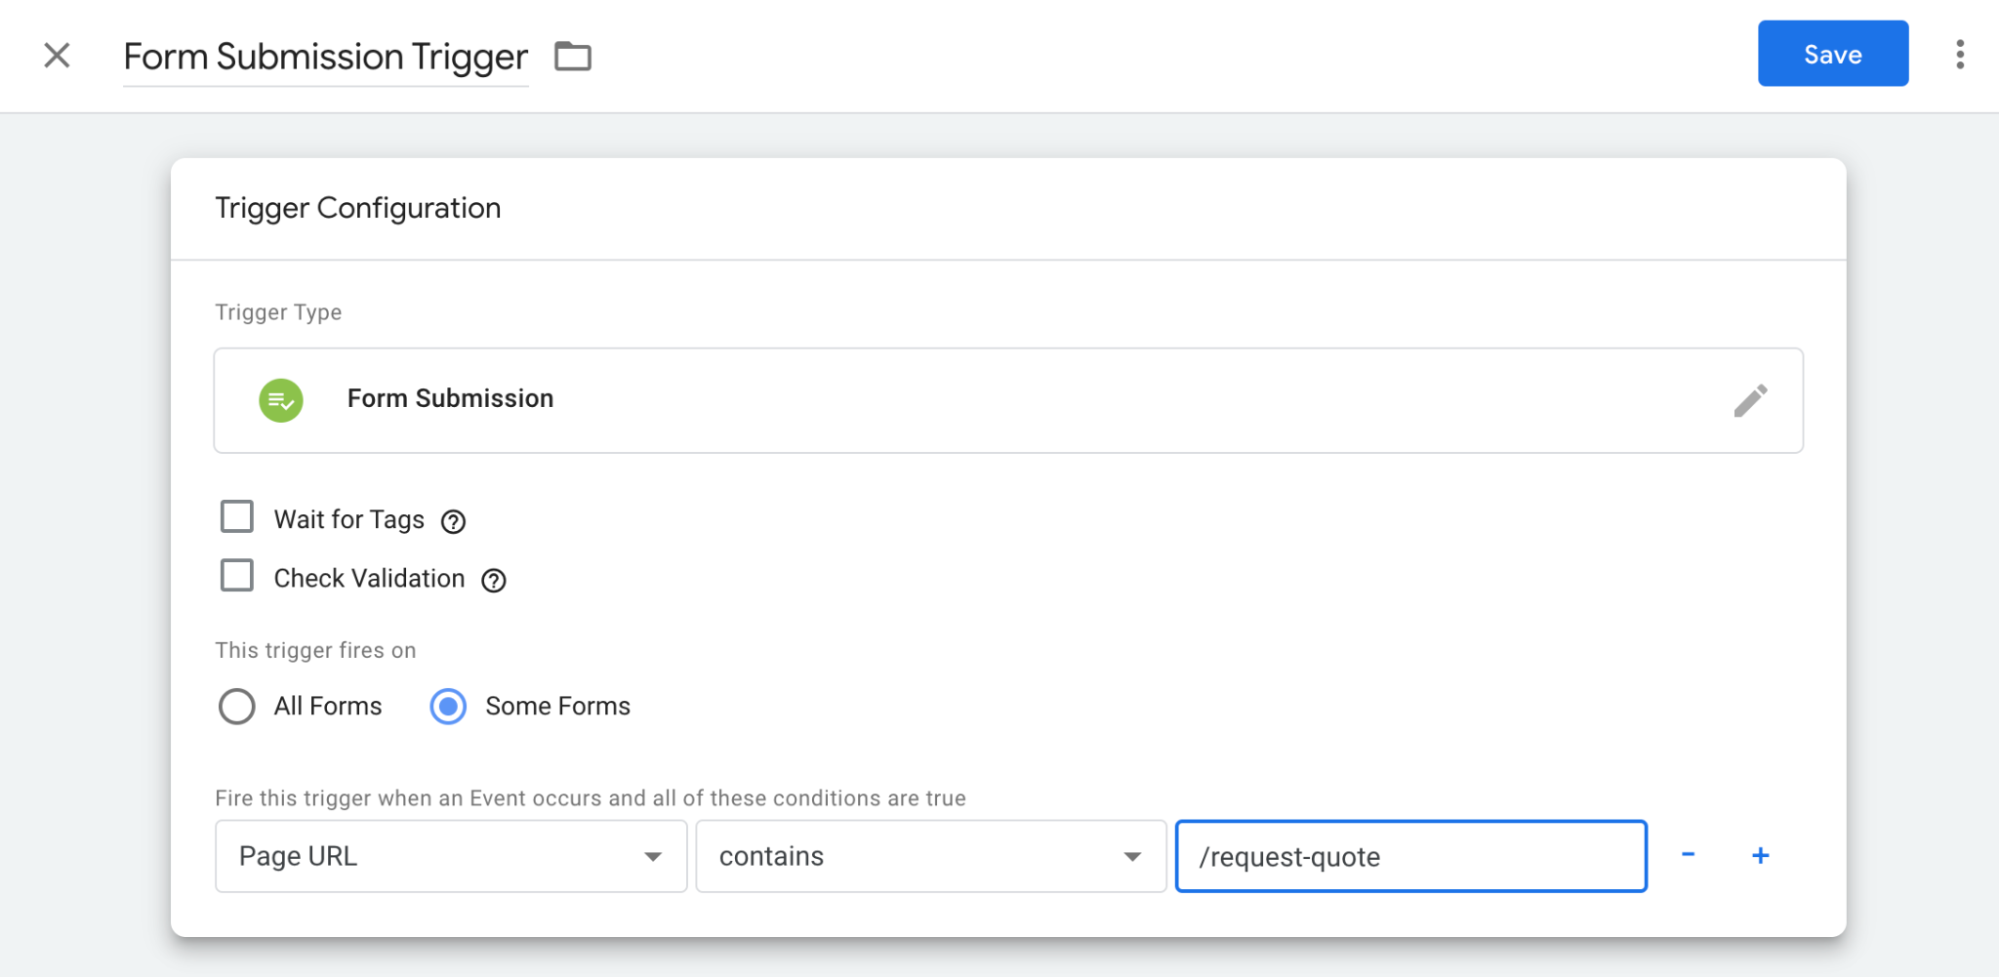
Use filters to define which pages and forms should trigger this event
7. Test in Google Tag Manager
GTM has a great preview feature to test out your new trigger and tag.

Select Preview
Use it to open the target page you want to track.
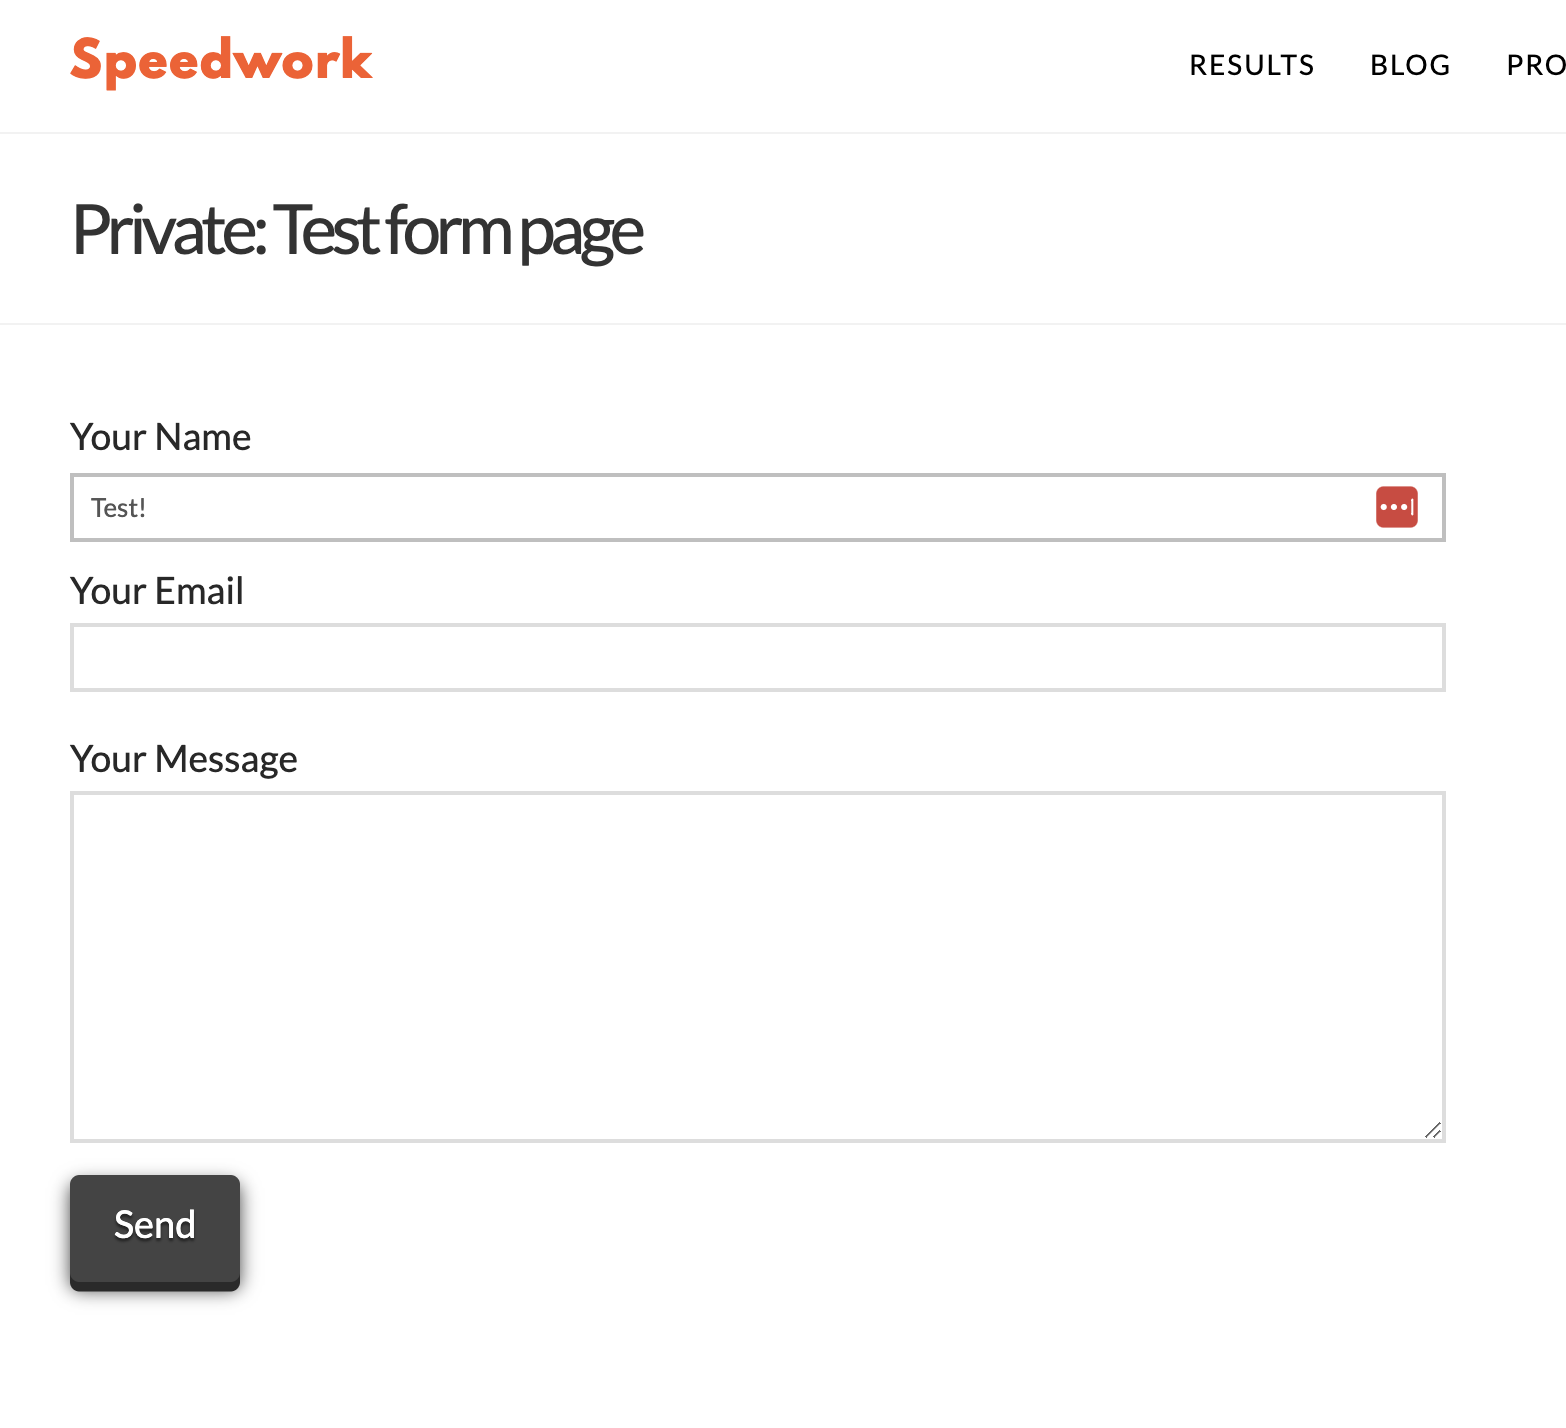
This is an example test form
After you submit your form submission – check the Tag Assistant page to verify that a Form Submit event was detected and that your new tag fired.
If it did, great!
If not, review and retrace your steps.
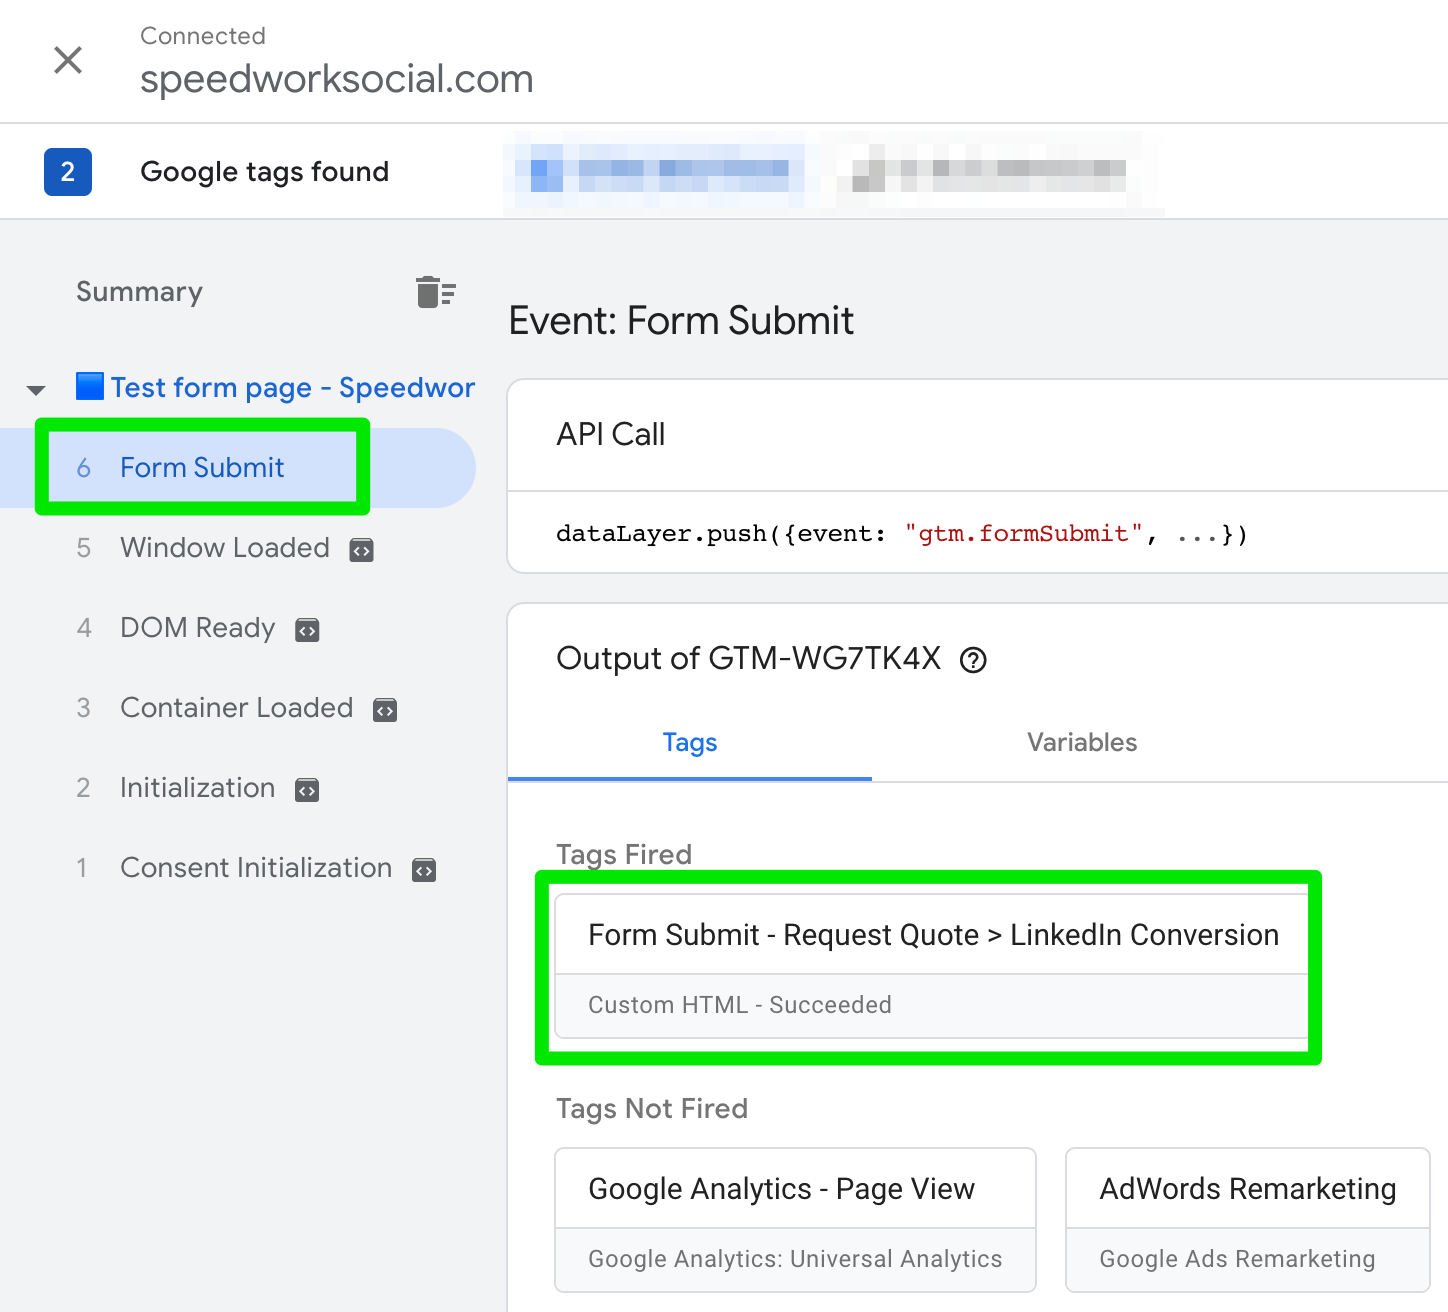
Verify that you see the Form Submit trigger and your tag fired
Not working? Ask yourself:
- Did you add the Google Tag Manager container to your website? This is a prerequisite to completing this tutorial.
- Is your LinkedIn Insight Tag on your website or page? This must be on the page when the conversion event code is triggered.
- Are you using a form that uses the <form> tags?
- Was the Form Submit trigger detected in Tag Assistant? If not, your form submission was not detected.
Note: GTM’s Form Submission trigger will only detect ‘form’ events.
Some forms on the internet use other technologies. If your form does not have a <form> tag, then you will need to look up documentation for the widget or tool you are using to figure out how you can use GTM to trigger an event on ‘submission’, and then use that to trigger your tag with the conversion event.
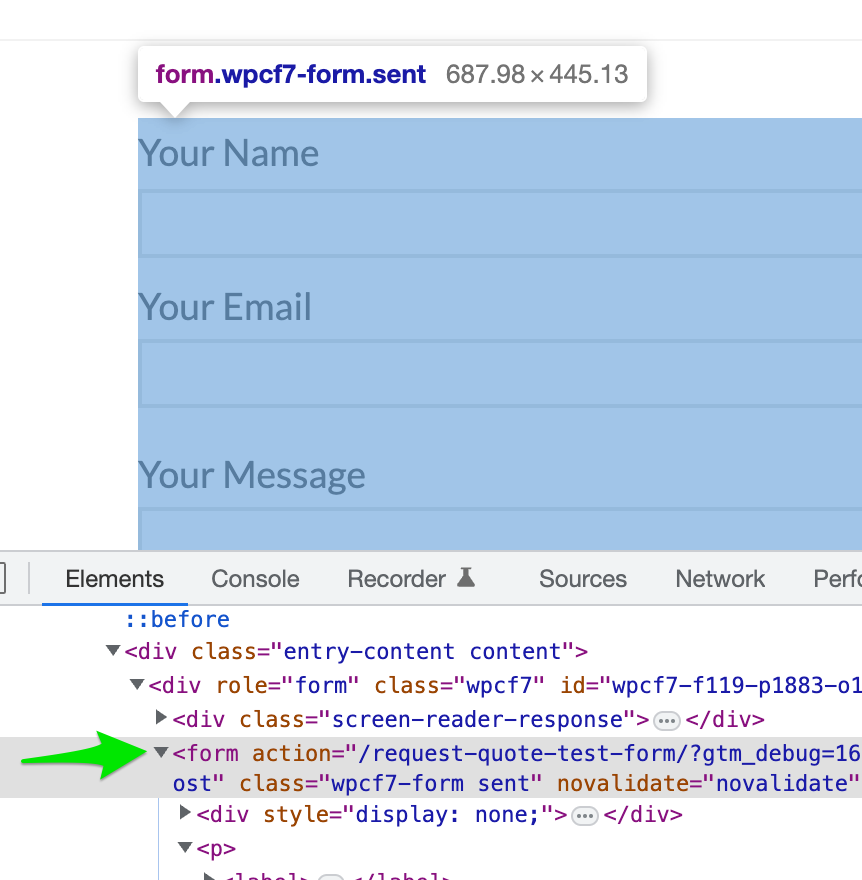 The form submission trigger will only work on forms using the
8. Check that LinkedIn received a signal
Once you see that your Tag has been fired in Google Tag Manager.
Jump back over to your LinkedIn Ads Conversion tracking page.
It can take anywhere from 5 minutes to an hour for this page to report the signal has been received. Check back on this page and refresh every so often.
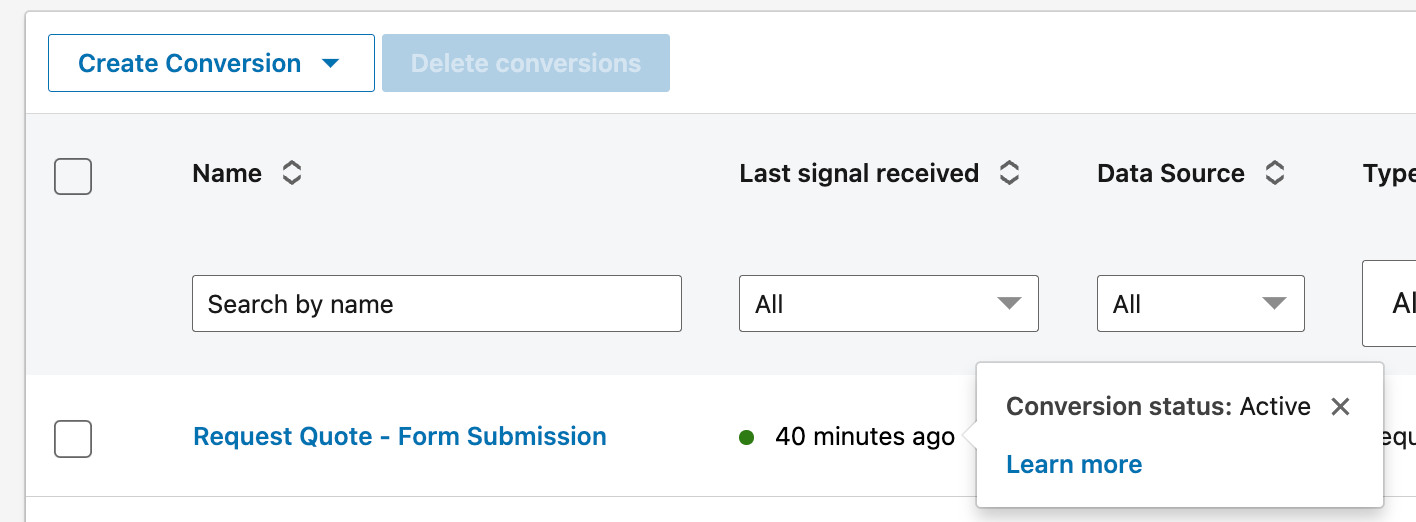
Verify your conversion event receives a signal
9. Publish your Google Tag Manager tags

Publish your Google Tag Manager updates when done
When you’re done, don’t forget to click Submit > Publish so that these changes appear on your live website. We were working from the test preview earlier.
And that’s it! You’re all done.